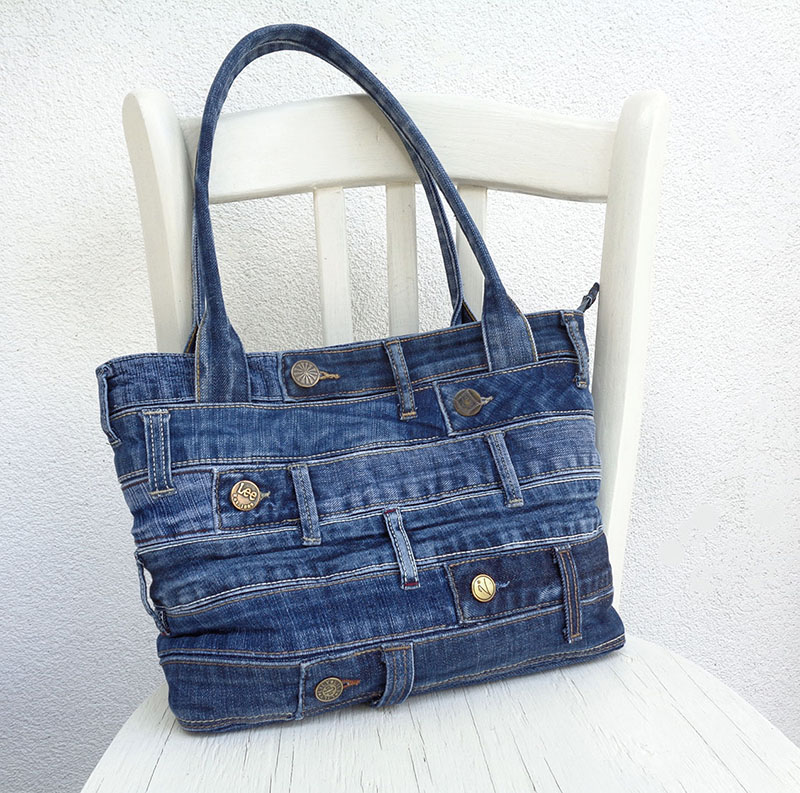
Fun and simple ideas to make shoulder straps and handles for bags

As for me it’s always been the hardest (and most boring) bit – to make shoulder straps and handles for my denim bags. For sure anyone of us knows how and is able to sew some simple straps, but we all are looking for easier and better looking options.
I would like to share some of my experience of how to make some fun and simple straps for your handbag project. This photo tutorial contains easy instructions and clever tips too.
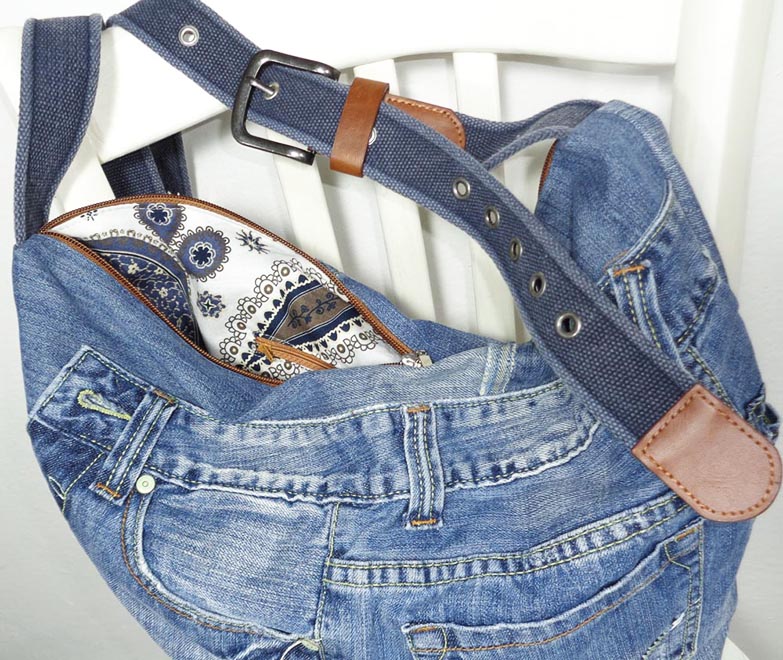
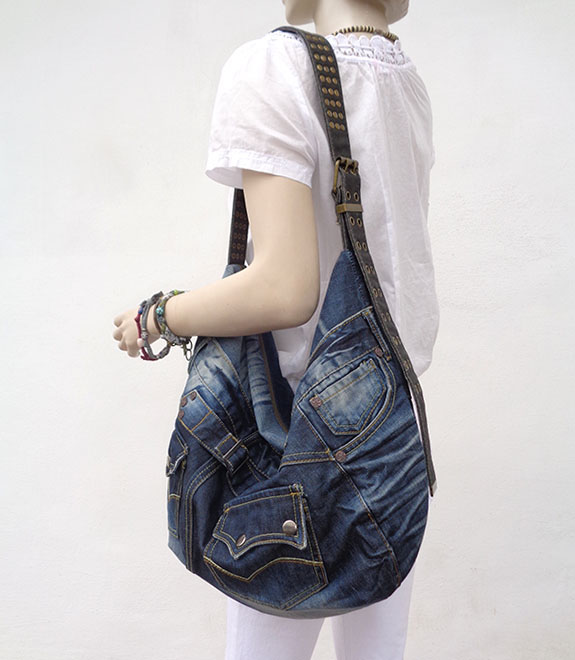
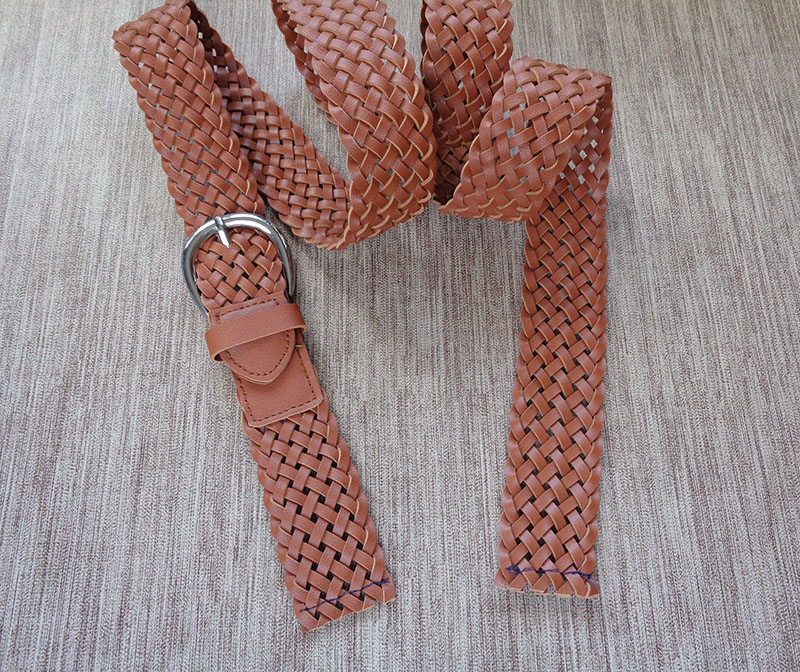
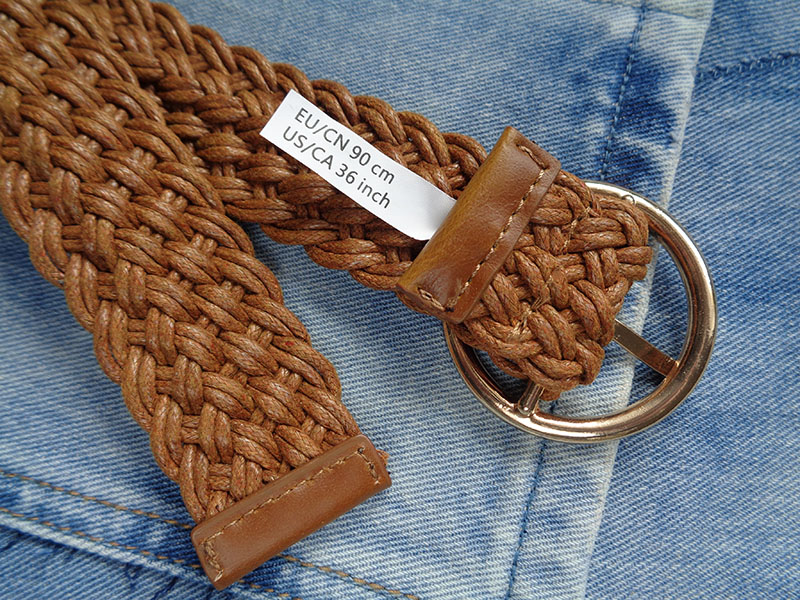
1. Use a belt!
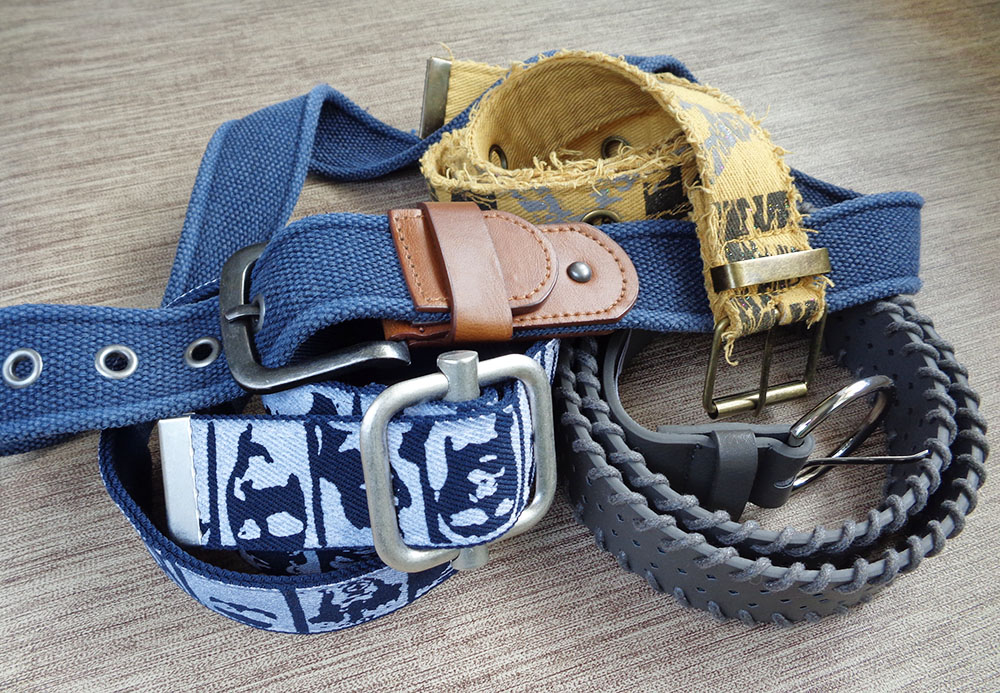
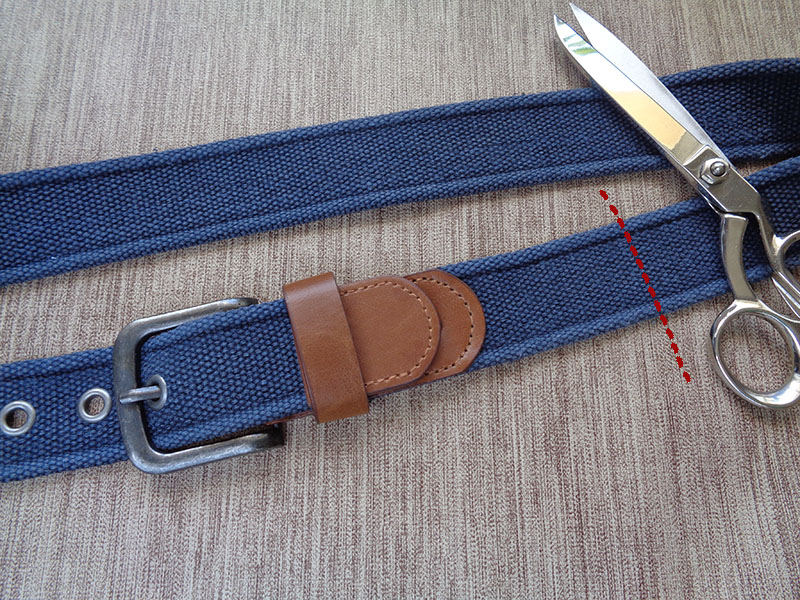
Yeah, how simple and fast that is! Fasten the belt and cut giving enough length for the buckle to be not too far away from the bag and not too close to it either. Cut exactly like on the picture below to get it right!

Another great thing about this strap is that it is adjustable!
But do choose a belt that is rather soft, so that it is comfortable on your shoulder.
If the belt you have chosen for your handle is made of strands braided together, don’t hurry to cut it! The strands will fall apart and make it very hard work to insert into the bag! There is a simple trick – sew across the belt in two places (where you will cut after) to hold it together and then cut between the stitches! (Another option is to use a sticky tape, see further down)


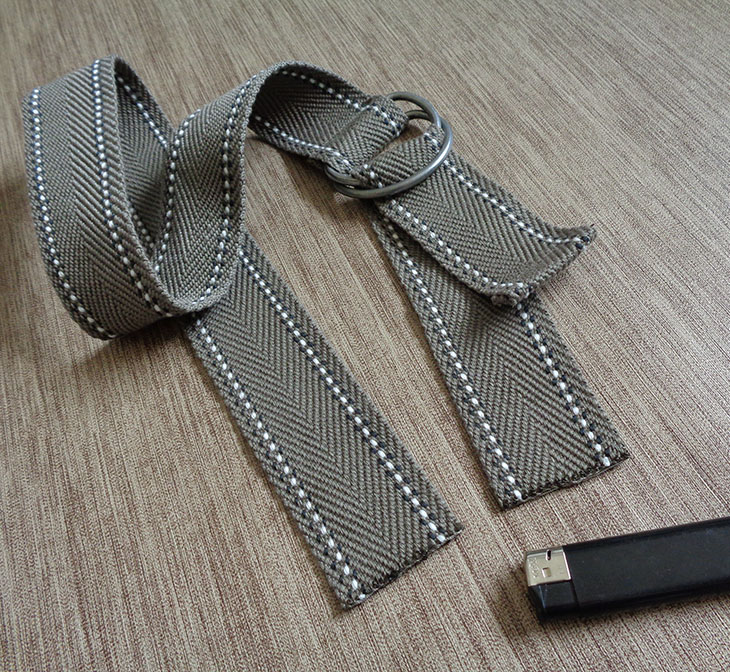
How about the belts with d-rings?
Where to cut if the belt has no buckle but two rings instead? We can still make an adjustable belt with it, but it requires a bit more thinking.
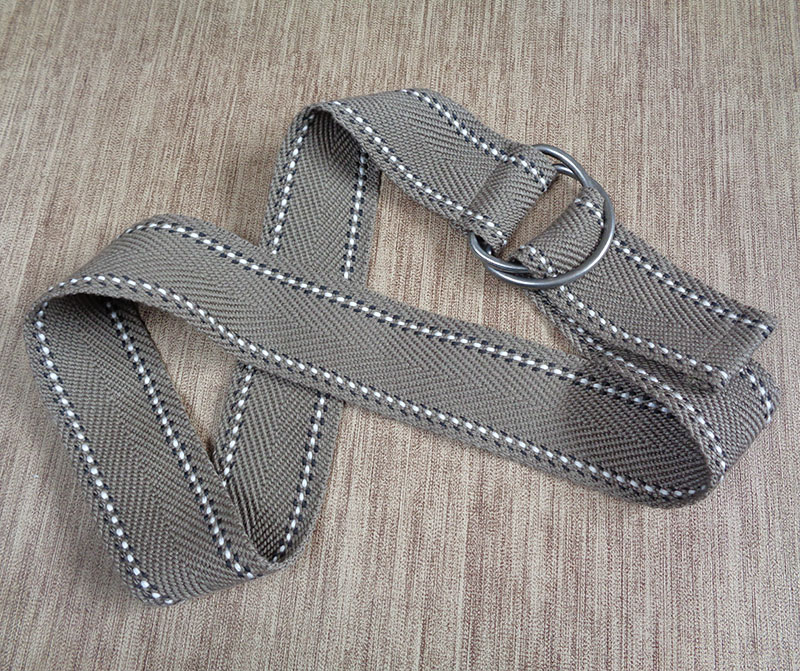
On the picture below take a note where the rings are and which direction the loose end is pointing (adjusting):
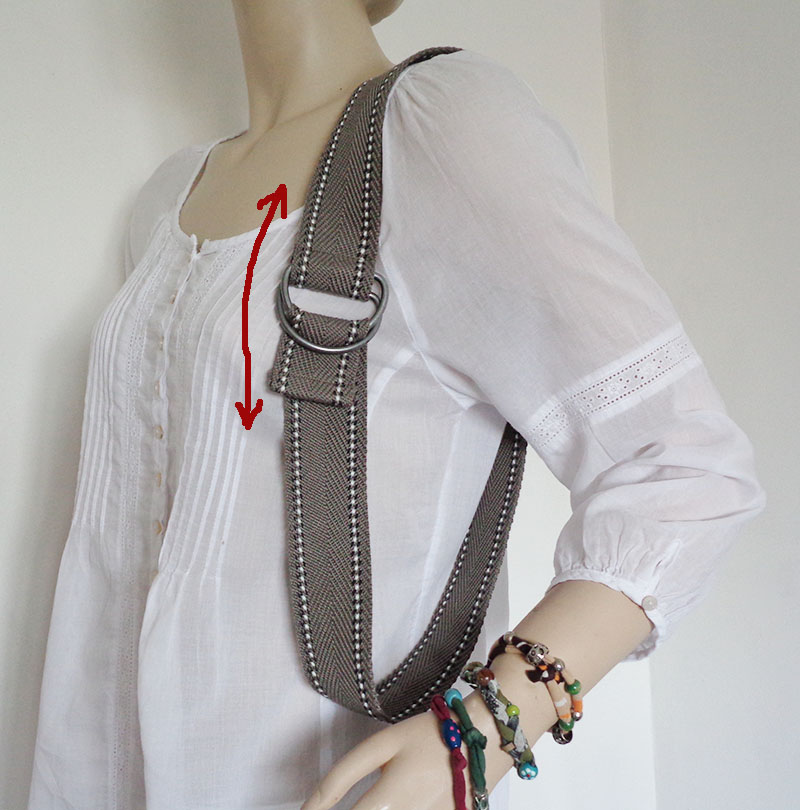
Fasten the belt to its biggest size. Place the belt on your shoulder in such way so that the rings are not right on top of your shoulder (it will not be comfy to wear after). Now your cutting point is at the very bottom, and the freedom of movement of the loose end – is your adjustment possibility.

When choosing a belt for your strap, make sure it is long enough. Of course if it’s a shoulder bag – any belt length will do, if it’s too long it can be cut shorter. But if you are aiming for a cross-body bag, the strap must be long enough. It all depends, but for those slouchy that I make, the belt must be minimum of 100cm/40″ (for a smaller person).
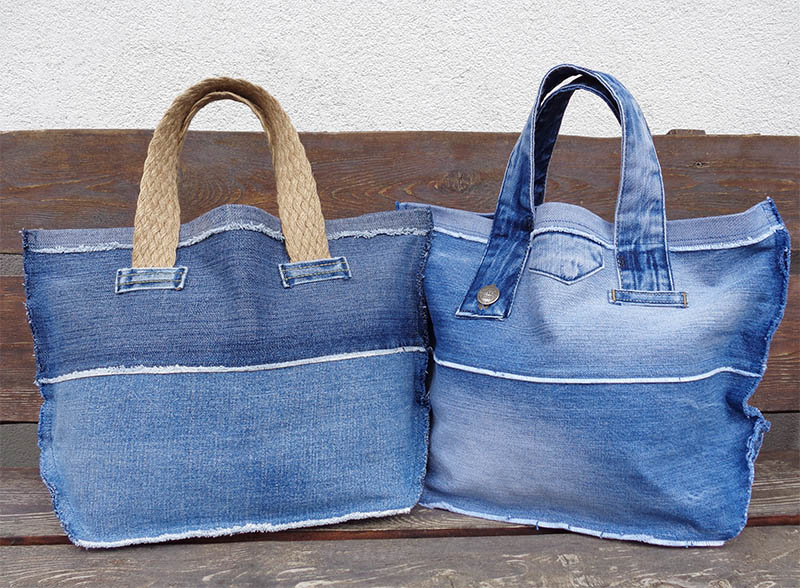
2. Make the strap out of jeans leg

This is most common way. If you have enough denim, this is a great approach to match the strap to the bag exactly.
Cut two long pieces out of jeans leg. Keep parallel with the grain on the denim (texture lines). The length depends on your needs and denim availability. For the bag above I had 55-60cm for the length. For the width of the strap – keep in mind that you will have to turn it right side out after it’s sewn, so the wider it is – the easier it will be to turn out. I find it good enough 4-5 cm wide strap, meaning 6-7cm wide pieces including seam allowances.

When sewing along the long side – sew only in the same direction. Having more experience with sewing you’d notice that the sewing machine always stretches slightly the upper layer of fabric. So sewing in the same direction on both sides of the handle will prevent the diagonal creases or lumps.

Now turn inside out using your fingers. Yeah, it takes a while 🙂
Trying another way
Another way might help to turn the handle right side out: sewing a string to one end before sewing up the whole thing. I have tried that too and I would say that both ways are a bit tricky with the heavier denim and both ways are good enough.


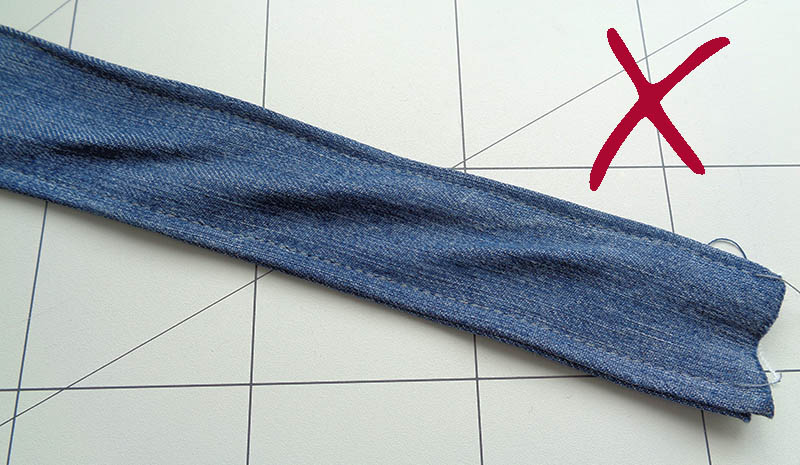
Now push the seams out (wet fingers work best), press flat and top stitch the long sides. I always stitch twice at each side, I like the way it looks on denim! Don’t forget, again, all the top-stitching should be done in the same direction! You can use a contrasting thread for a wow effect!


Top-stitching along the sides of the strap in the same direction is quite important especially with thin and stretchy fabrics. Look at the picture below – we don’t want our bag strap to look like this 🙂
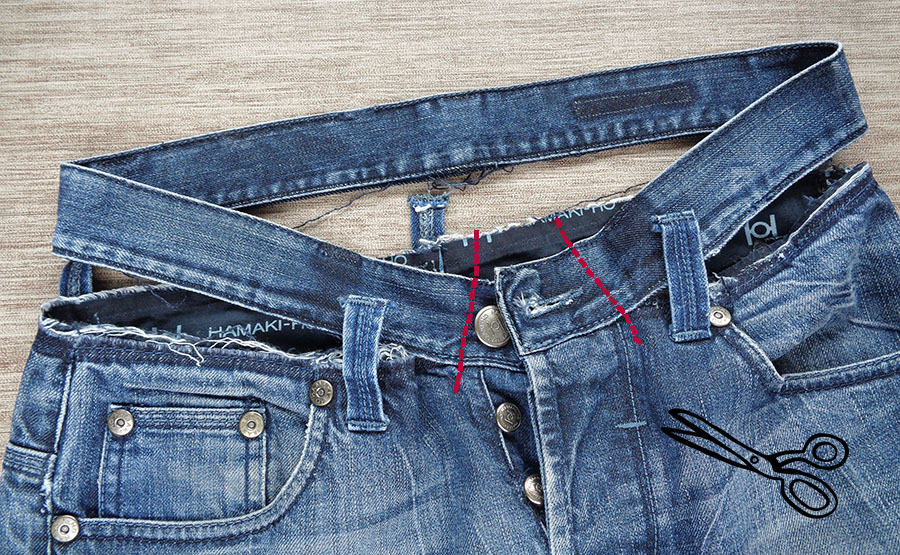
3. Use the jeans waist band

This strap is easy and great looking with all the washed effect, but not every waist band makes a good strap!
First of all – the waist shape! For the straight strap it has to be a straight waist. Those usually come in men’s jeans. Curved waists will make a curved handle and we don’t want that!

Second problem that might appear – the inner labels and embroidery. Some are ok, some can be removed, but rather avoid the bold stitching and weird colours, it will not look good.
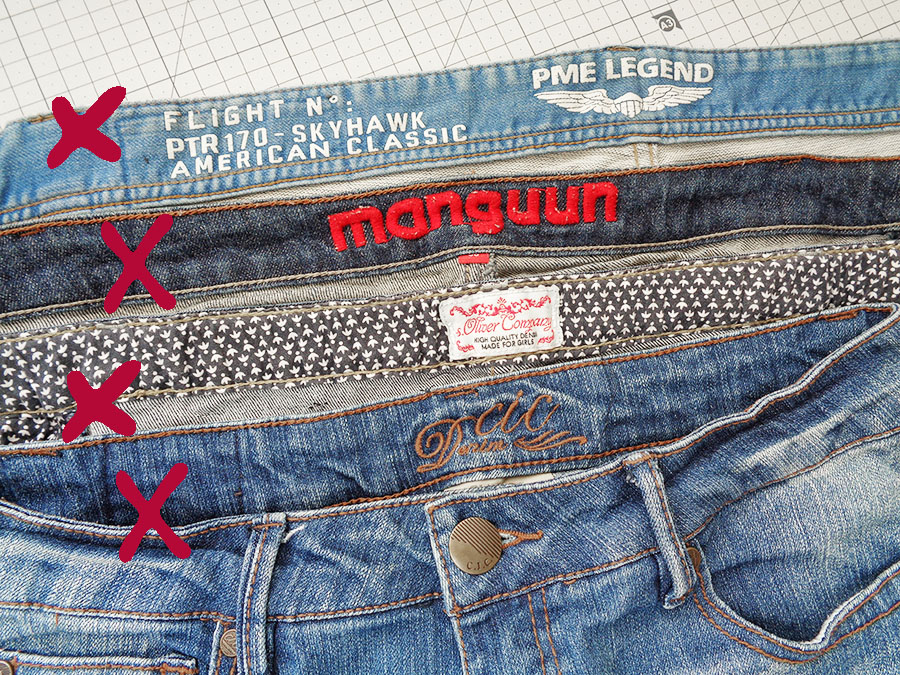
Once you have a straight, clear and wide enough waist, let’s get on with it.
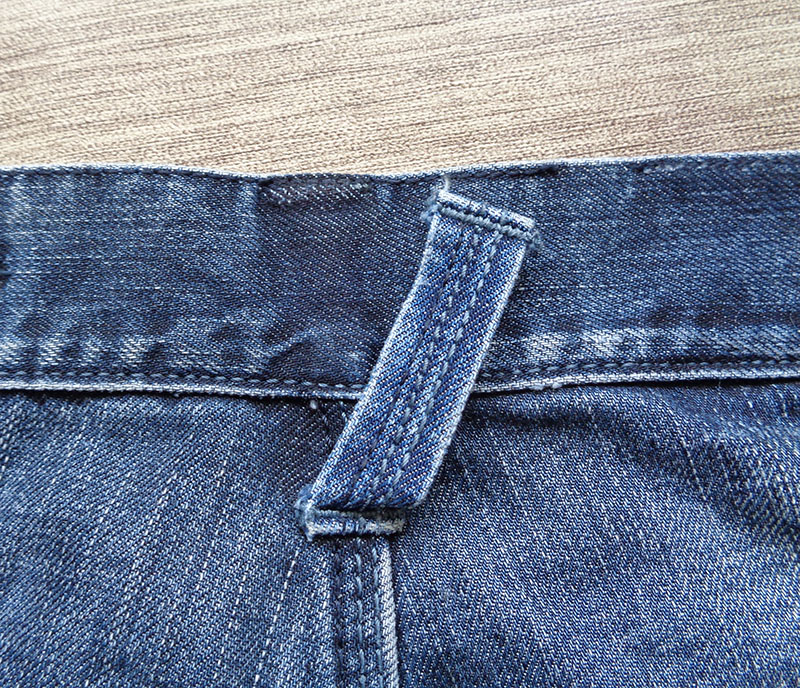
First, remove the loops from the top of the waist band, don’t bother with the other end of the loops, save your energy 🙂 Be very careful here not to cut through the waist band.
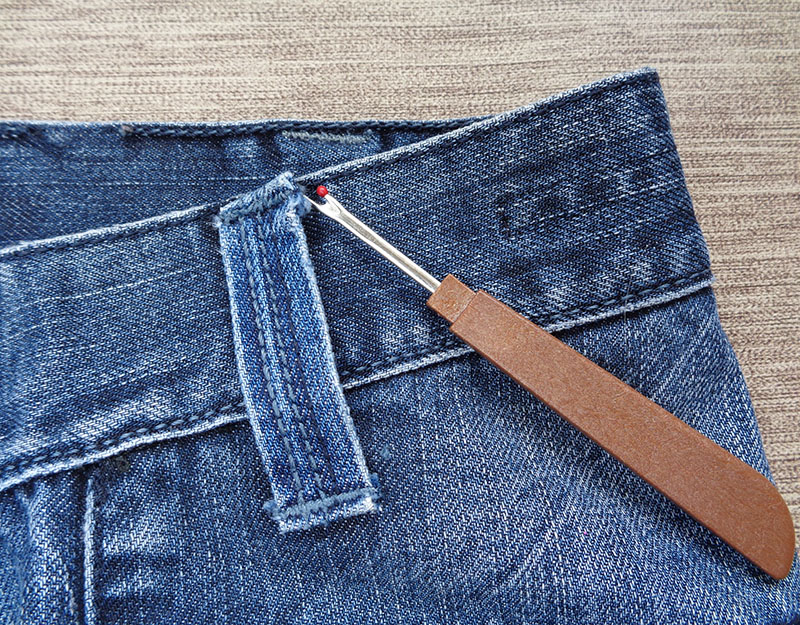
Now remove the stitches which hold the waist to the rest of jeans. I have found out that there is magic happens sometimes. Pork the seam-ripper through few stitches and pull the inner thread. You will be amazed if it will work on your jeans! Just pull and all the thread comes off!


Check out this video lesson I have made for this magical way of removing the waist band:
Remember, you are not useless if this will not work – some jeans stitches are made a bit different. So if it doesn’t work, just do it the harder way – rip the thread up with the seam-ripper all the way.
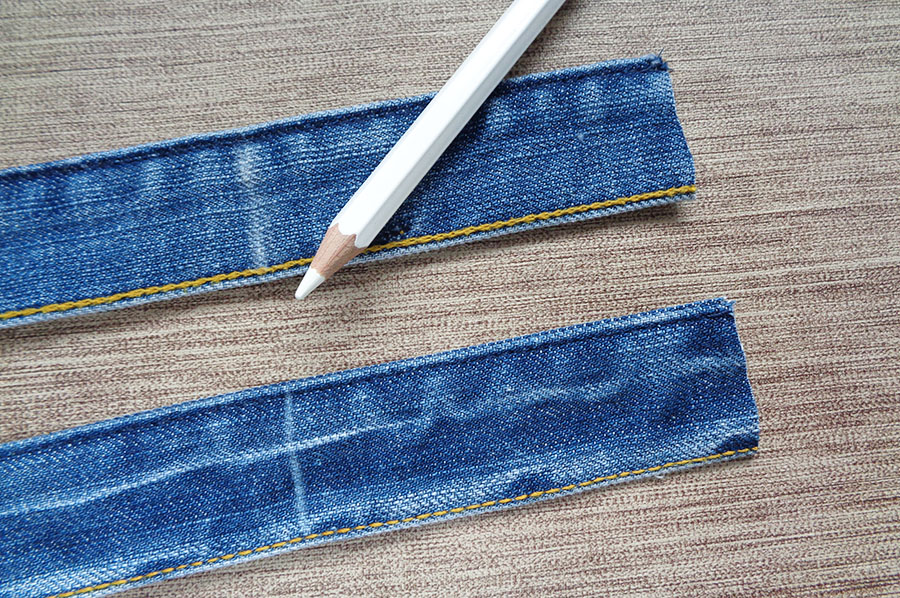
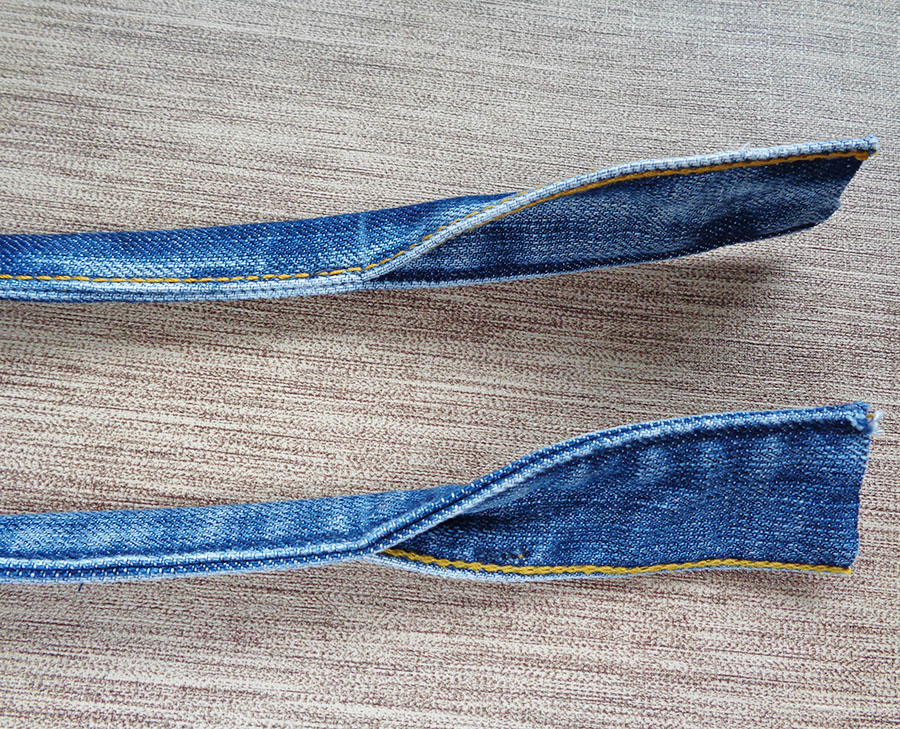
Voila! All what’s left to do is to iron the strap and sew up the open side.


4. Two handles from jeans waist band

These handles look awesome and easy to make. You just need to be lucky with the jeans and a very strong sewing machine.
For the handles like this you will need one very very large size waist band or two smaller ones but very very matching in colour and width.
Remove the waist band, iron and stitch at a side as for the strap above (idea N3), but make two identical straps. Cut to the required length. Then measure and mark where you will have the unfold of the handle at each end (this depends on how deep you are planning to insert the handles into the bag). Fold along in half and secure leaving the unfolded ends loose.

Sew along starting and finishing at the markings. Secure the thread at the unfold point by going back and forth a few times.

And this is it! Beautiful looking denim handles with naturally washed effect. Ready to be inserted into your beautiful handbag.
5. Handbag handles from plain denim
When you don’t have enough of the waist band to make two handles as described in #4, let’s make plain handles.
You will need four pieces of denim 5-6 x 55-60 cm.

Iron each strap folded in the middle.

Place one on top of another, hold in place by clips and stitch along at both sides. You can even go twice at each side leaving a 3-5 mm gap between the stitching lines, so that you will have 4 lines in total). If you use a contrasting and thick thread you can make it looking even better! But if you are a beginner and not so familiar with top-stitching, keep it safe and use a matching colour thread.

Here we go – some durable plain denim handles for your tote bag are finished.

You can see that the ends are left raw. This is because the handles are inserted into a bag in such way that the ends are hidden between the layers of the bag’s body, usually at the top.
What about the ends?
If you need the handles to be sewn ON (not IN), you can try making it this way – iron the ends inwards before top-stitching. However, denim is quite tough fabric and having so many folds might make it impossible to sew through. So think about it early – while designing and planning your denim bag or try the stoppers from the next idea (N6).
6. Woven handles with belt loop stoppers
Sometimes we need the handle to be sewn not within the top of the bag but onto the body. There are very pretty woven strapping available but you will notice that it frays badly. Don’t let it to stop you! Yes, it is nearly impossible to fold under, but jeans loops make a great “fray stopper” and a “raw edge hider”. It also works great with handles made from jeans waist band.

Here is the trick – wrap some sticky tape around the end to stop it falling to pieces. Place the tape slightly higher than the strap’s end to be able to stitch belt loops later and remove the tape.
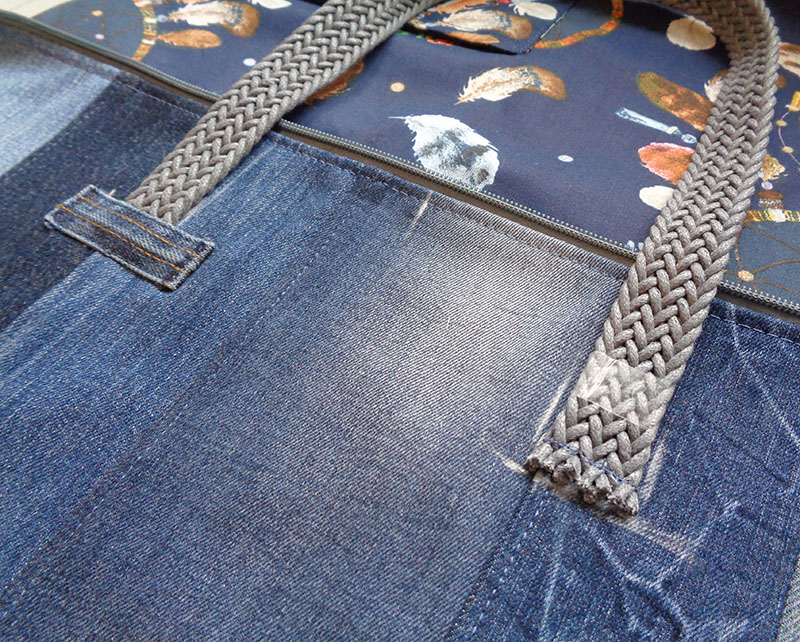
Pin everything in place and stitch. First tack in place the strap itself, then add the beltloops. The stitching here will be tough, so go slow, rotate the machine wheel by hand.
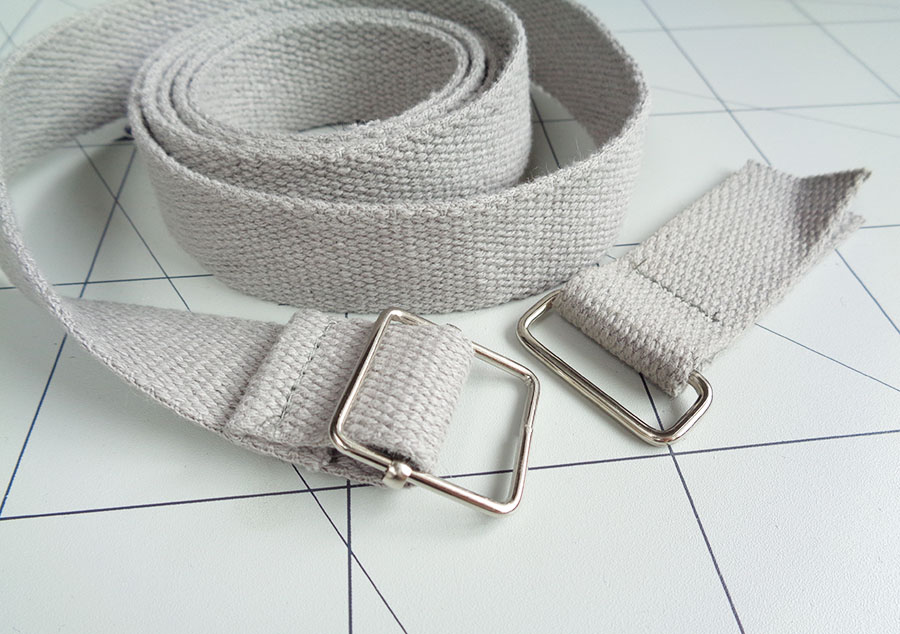
Adjustable strap
If you wish to use webbing to make an adjustable strap, here is a quick guide. It’s really is easy. You will need 1.5meters (1.64yards) of webbing, a slider/adjuster and an oval or rectangular ring.

Cut off 10-15cm (4-6″) from one end, fold and stitch the ring in it. Take the long piece of webbing and feed one end through the slider, loop to the inner bar and stitch too.
Feed the free end of the long webbing piece through the ring of the short piece and then through the slider just like on the picture below. Pay attention on the right and wrong sides of it.

This is it! Now you know how to make an adjustable strap.
I will be happy to hear from you if you’ve tried any of the handles above or if you have more ideas to make easy shoulder straps and handles for bags. I hope I was helpful 🙂 Check out more lessons about using old jeans >>> here >>>
And take a tour through some project ideas of what you can >>> make >>>
On my lastest denim bag I used entire waistband,loops & all. Its my favorite strap so far.
That’s great!!! Enjoy your bag 🙂
Such a good variety of straps with great instructions…thank you!!
Thank you for the comment! I am glad you find it useful!!
Olá querida . Estou começando a costura criativa para bolsas . E suas aulas me alegram muito . Quero está sempre grata por suas tão úteis dicas .Um grande beijo fraterno. Olinda – Pernambuco- Brasil . 👋👋😘😘😘😘
Thank you so much for the comment!! I am super excited for your new start! Happy sewing!
Thanks so much for sharing your beautiful work.
I loved your ideas.
I am so happy to hear that!!! Thank you!
Love your tutorials & ideas! Very helpful to me because I’m a beginner. Thank you!
Thank you for the comment! I am so happy that it is helpful!
Awesome information. I’ve been making denim bags for a while, but your ideas (and clear directions) is very helpful. Thanks for sharing!!!!
Thank you! I am happy that it is useful!
grazie, bellissime idee 😍
Happy sewing!
amei suas dicas!
I love this idea! I’m going to use this on my origami purses! I made dog leashes out of the waistband but could not think of how I could use it otherwise.
Excellent! I am glad you found it useful 🙂
Great ideas !!! Handles for the bags I make have been a challenge. These ideas will spruce up the artistic realm of what I’m trying to portray in my work !!
Excellent! I am so happy to hear that!!! Happy sewing!
Love your page! Very informative and simple to understand. So glad I found it.
Thank you, Melissa! I am happy that you like it!
Awesome tips and guides. So clear and followable. Thank you!
Thank you! I am so happy that you liked my tutorials!
Thank you so much for all these great ideas. I will be able to recycle a lot of belts I have that I no longer use. Used to have a 22” waist long ago, but . . . motherhood changed that for me! Wouldn’t change that for the world! Thank you for showing details on how to cut and sew them! I am so glad I came across your site! I’m excited to get started!❤️
Hi, Zen! Thank you for your comment! I am so happy it came useful! Have fun!