DIY recycled denim doorstop or a textile decoration piece for your home. Or how about making it and giving somebody as a gift? Totally green and eco-friendly gift idea! Please enjoy this DIY denim owl doorstop free sewing tutorial.

This is not just another owl doorstop – this one has a zipper! So that you can remove the outer and wash it easily!

This tutorail is free, just download the pattern here and follow the photo instructions below.
Prepairing the pattern
Print the pattern on two A4 pieces of paper. Make sure the settings are on “Actual size”.

Join the two pieces of paper with some sticky tape. Do not overlap, instead join up the gaps in the lines with a pencil (different printers have different non-printing areas). Cut out.
Surely you can make this owl with any other fabric, but jeans are the greenest option. Plus denim is a very durable fabric, which will last you years!
You will need two different colours for back and front of the DIY denim owl doorstop. By placing the pattern to the uncut jeans, find the right spot. Usually this owl pattern fits nearer the bum pockets where jeans are wide. Size Medium jeans is usually good for this project.
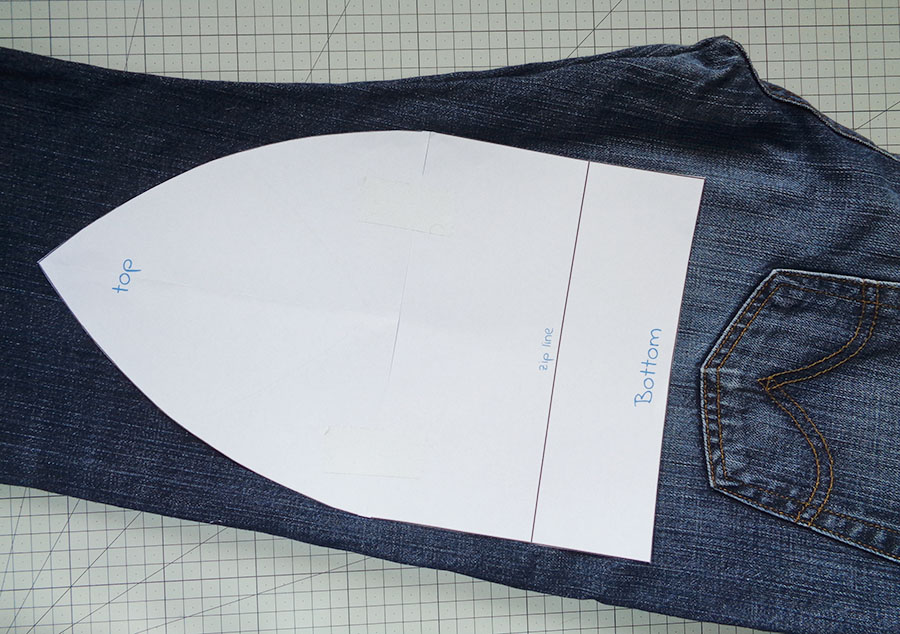
Once you know which part of the jeans you are using, cut the jeans to eneble you to iron and work easily on the chosen area.
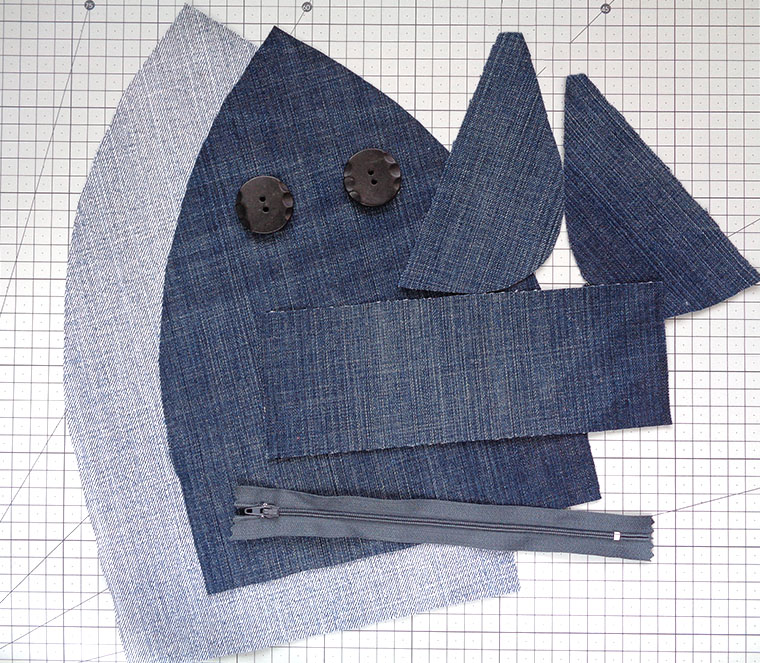
Cutting the parts
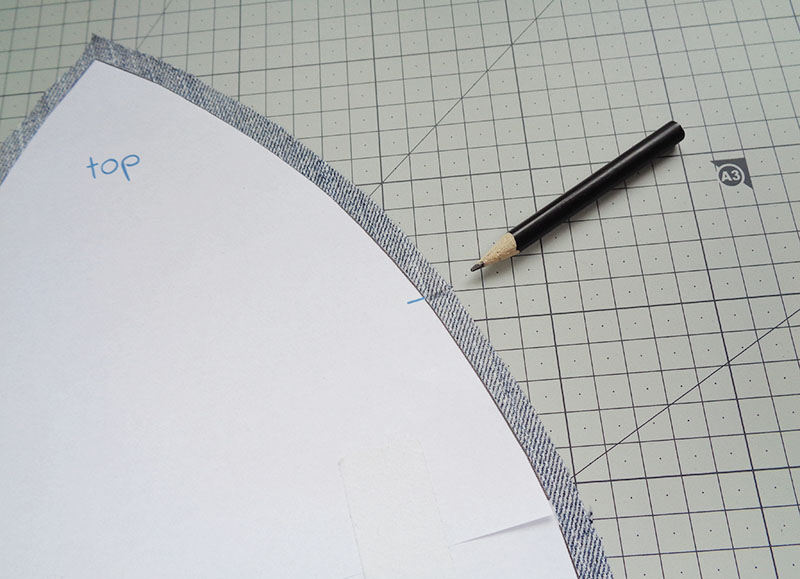
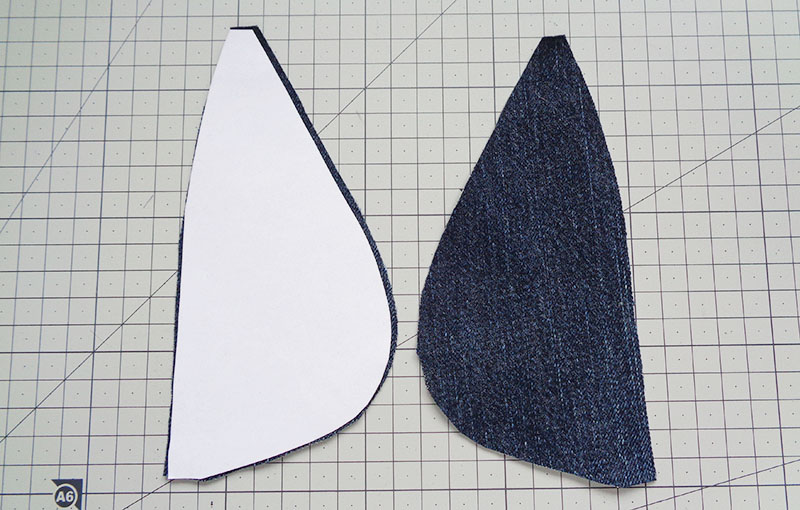
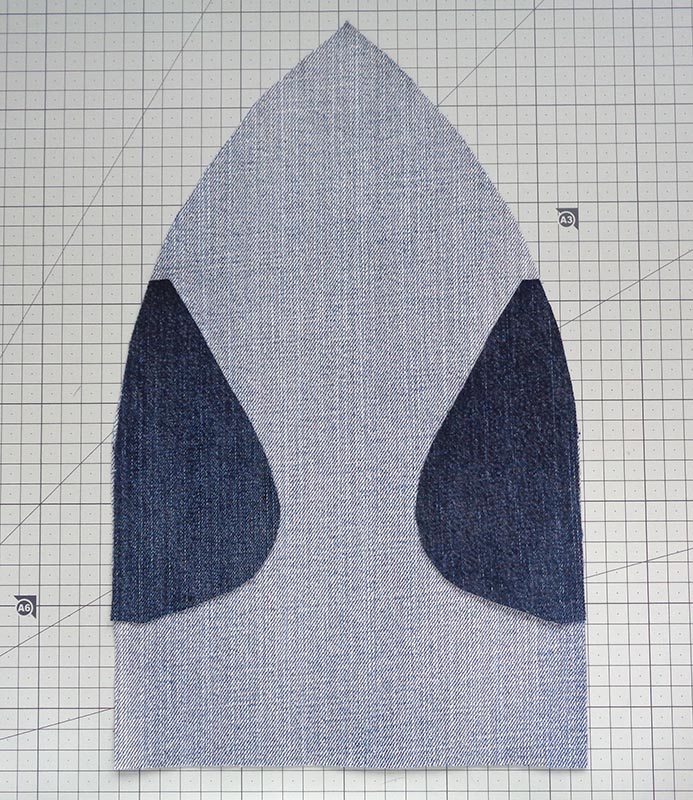
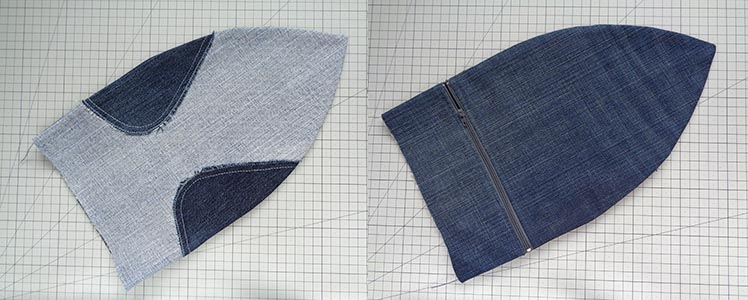
Use the light piece first! This will be the front of the owl. Place the pattern onto the fabric, pin and cut around adding seam allowance (1cm is good for denim).
Always remember to align your patterns with the texture lines (grain) of the fabric! This is especially important when sewing denim. On denim the texture is very clear and it gives the item that special look!
Now cut the paper pattern along the “zip line” and place those pieces onto the dark denim. Cut around with the same seam allowance.
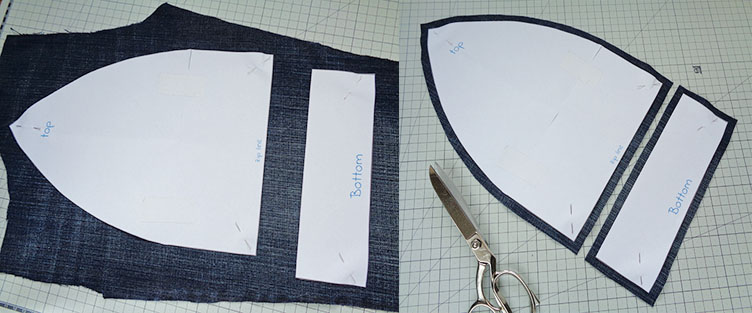
When planning out the dark denim, keep in mind that you will need some wings too. On another note, wings can be a different color 😉
Cut out the wings without seam alowance! And a mirror image!
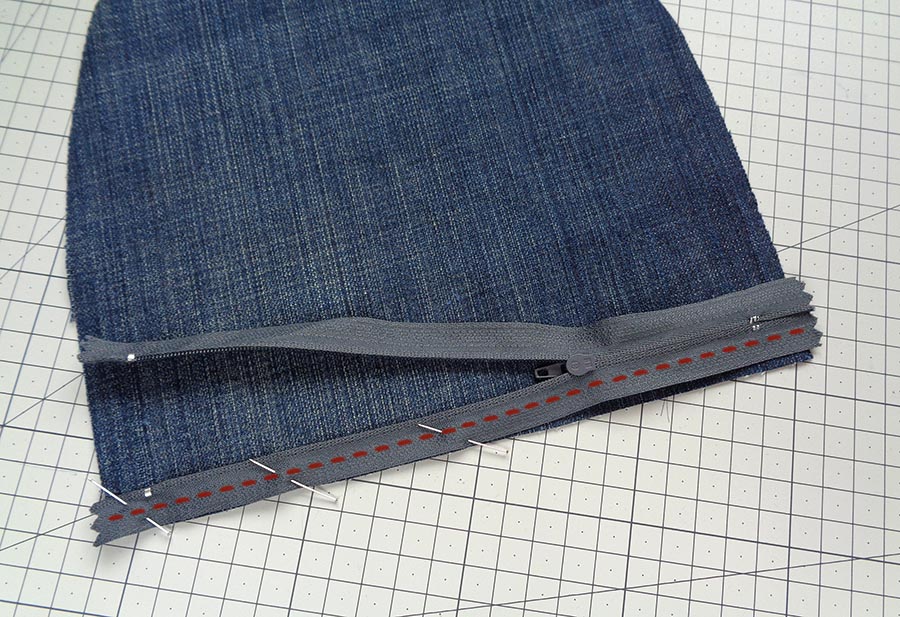
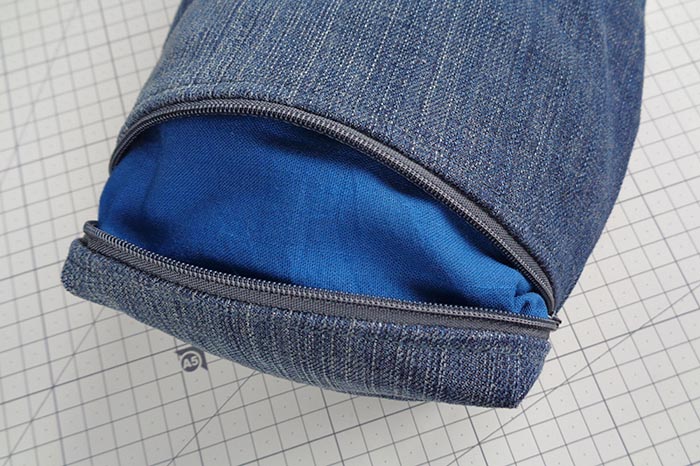
Adding the zipper to our DIY denim owl doorstop
The zipper should be long enough to reach from side to side of the body (or longer). My zipper is the minimum and it was 23cm (9″) total.
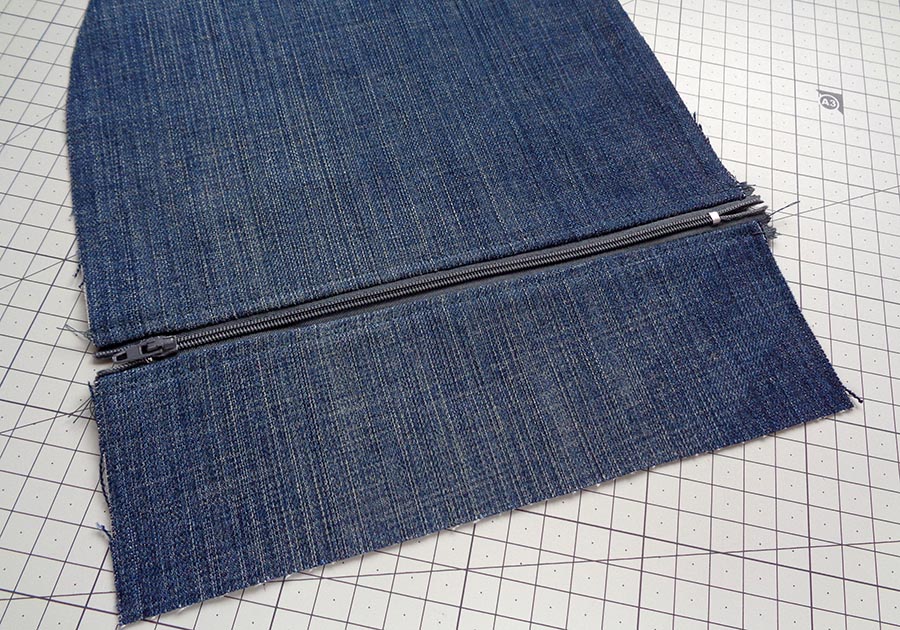
Place the zipper onto to the bottom of the dark body, facing together, pin, stitch along.
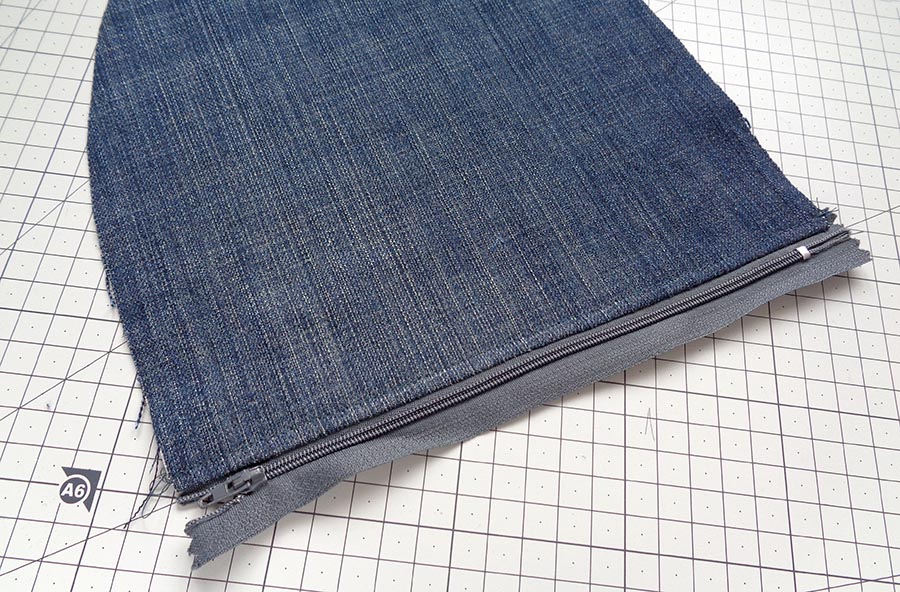
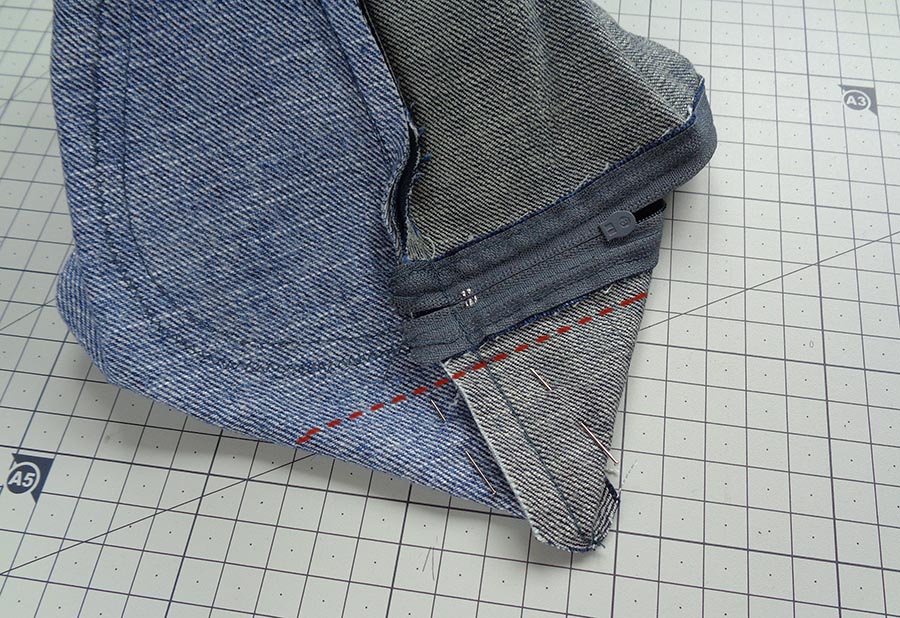
Refold the zipper to the right side, press flat (pull it out slightly) to get a nice straight look and top-stitch at some distance.
Then place the bottom bit over the zipper, align the sides and stitch in the same manner.
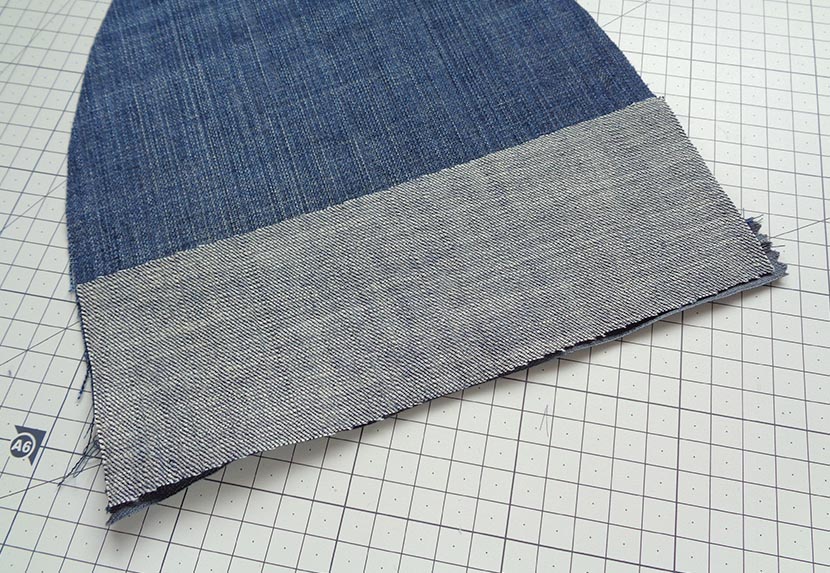
Top-stitch this side too and you should have a result like this:
Sewing wings on
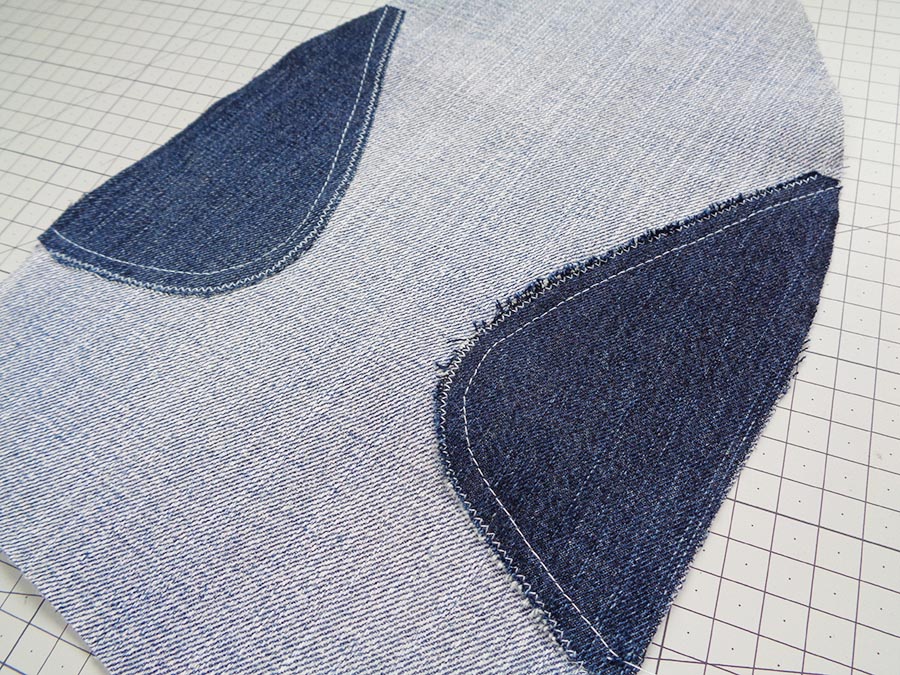
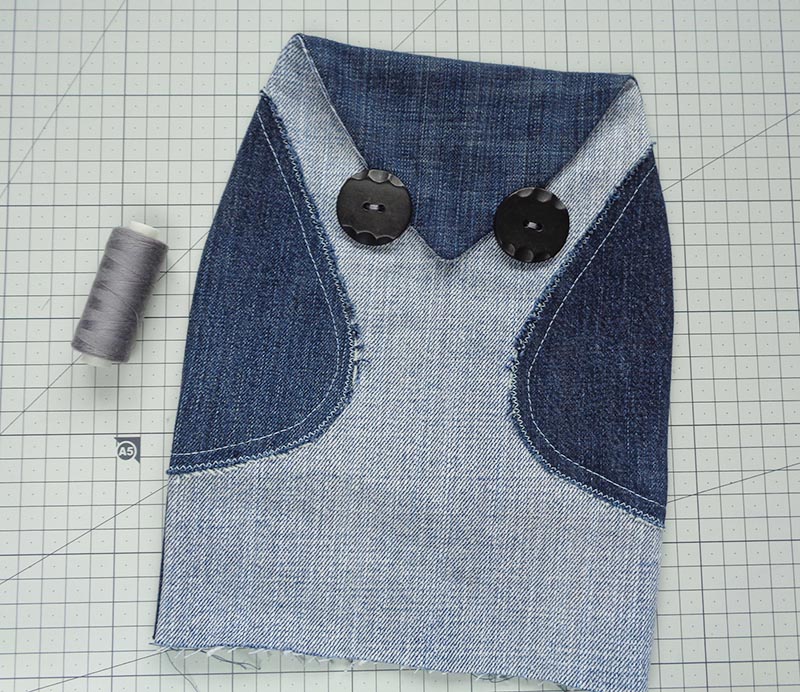
Place the wings onto the light body piece. Align the tops with the mark, which I have mentioned earlier. Align sides. Pin.
Stitch the inner sides of the wings. I like the ruffed up look on those wings, so I first go with a straight stitch at 1cm from edge, and then with a narrow zigzag at the very edge. Then I rough it up a bit with my nails.
Sewing the body
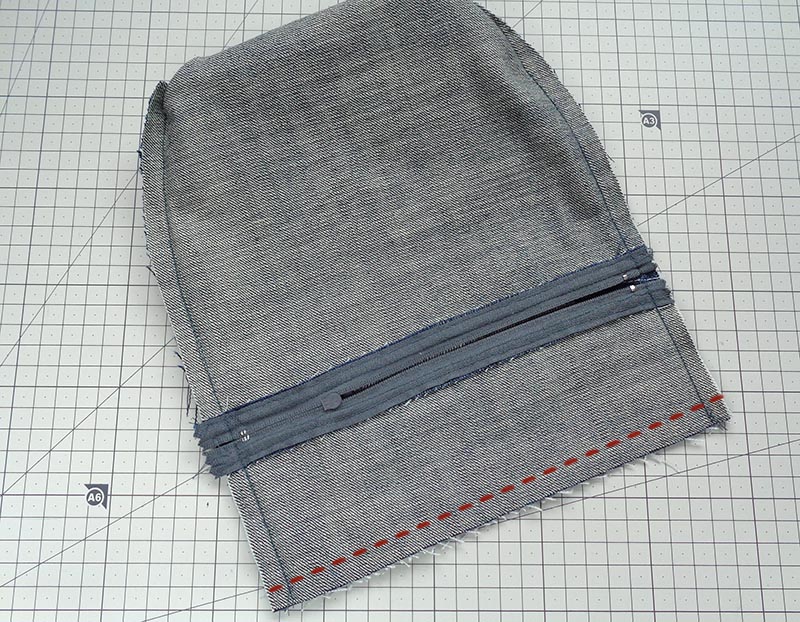
Place the two body parts faces together. You might have some extra fabric at the bottom of one of the parts. This happens because we have sewn the zipper in place and it gave that extra length. It is not possible to calculate in advance because we don’t know the zipper width or how much space the zipper will take while sewing. Just trim it to match the second part.

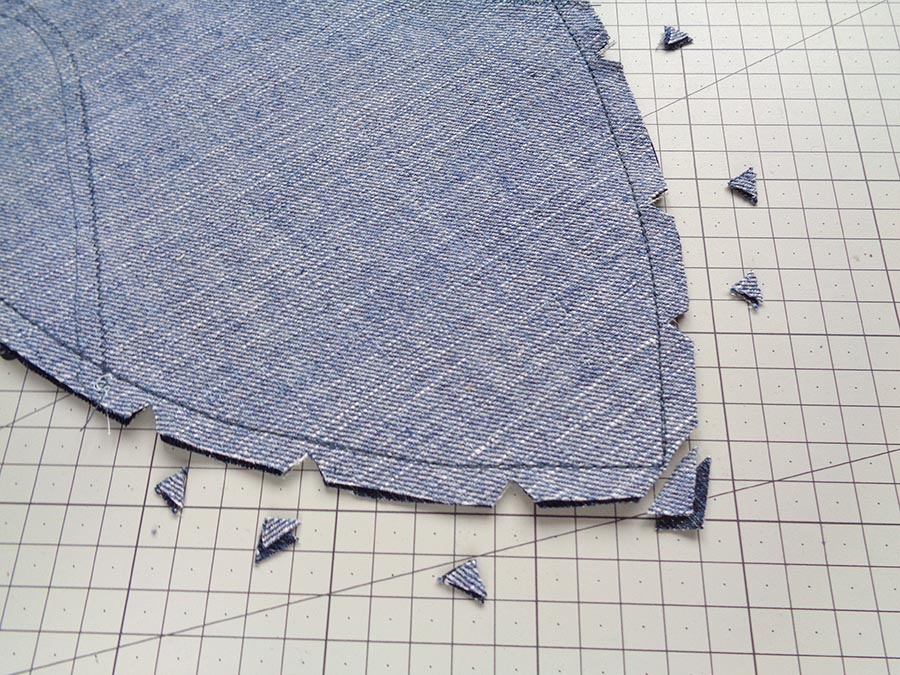
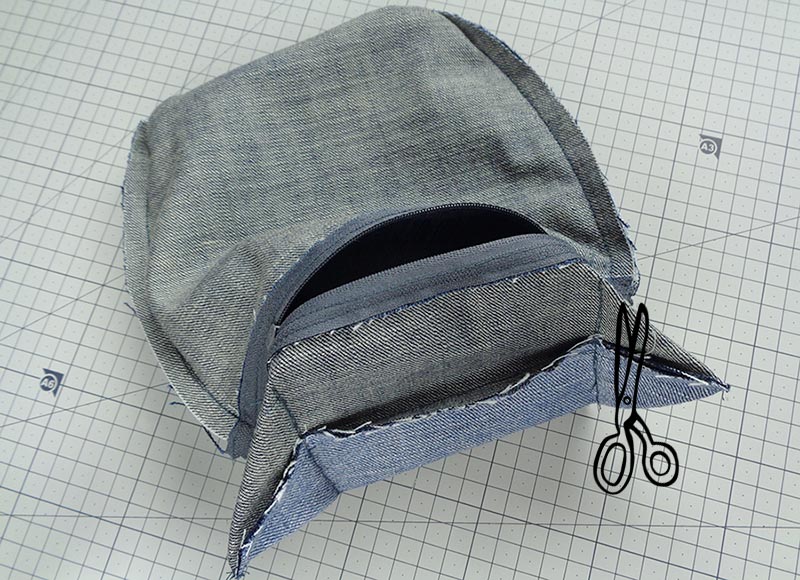
Sew at sides and leave the bottom untouched. I’d advise to stitch there twice as the doorstep is meant to be strong and hold some heavy stuffing. Then carefully cut some small V’s at the curves to avoid bulk.
Turn the DIY denim owl doorstop to the right side. Poke out the top corner with a screwdriver or something similar. Poke out the sides too, press flat with iron.
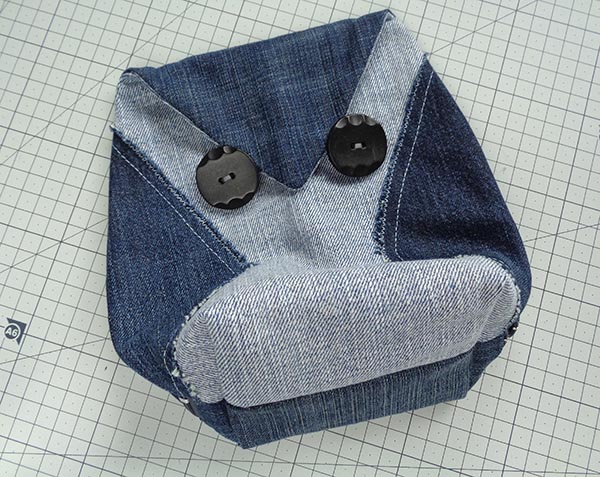
Fold the top over to the front and secure with a thread by hand into the place where you’d like it to be. Sew on the light denim only without coming through to the dark top layer.

Decide where you would like the eyes to be and sew the buttons in place by reaching to it through the open bottom.
Sewing the bottom
We will make the bottom the easiest way as in tote bags.
Turn inside out again, flatten and pin the bottom side. Unzip the zipper!
Stitch the bottom twice. Then cut the corners off. Then mark two marks at 5cm from the seams – those will be our guidance for sewing corners.
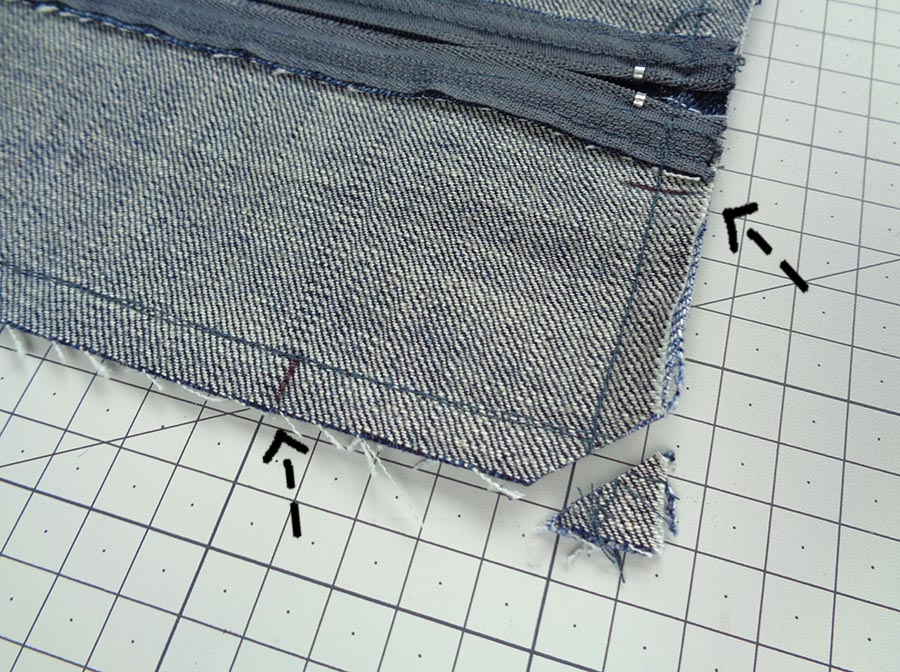
Refold one corner to join the seams exactly in the middle. Pin and stitch across twice.
Do the same with the other corner and cut the excess off.
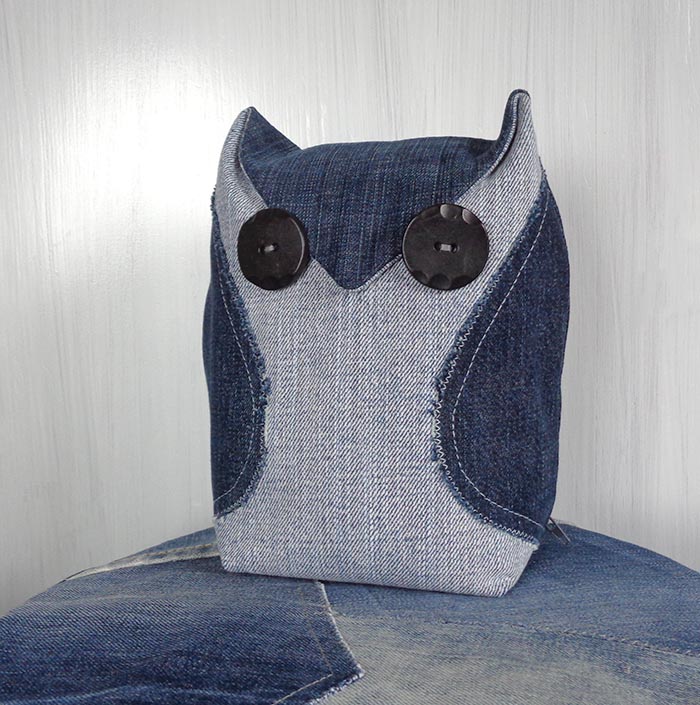
Turn to the right side and the owl is ready!
Making the removable stuffing
Usually doorstops are filled with sand, pebbles or even rice. But one day you will want to wash the doorstop. To be able to remove the stuffing and put it back easily, we can simply make a bag to hold the stuffing.
However, I suggest making two bags. One will hold the heavy substance and will be placed at the bottom of the DIY denim owl doorstop. And the other – some soft polyester or even more eco-friendly option – textile cut-offs and old rags. This will be at the top of the doorstop and will keep the shape at the head.
As the bag of heavy filling will be at the bottom of the doorstop, we should make it the same size and shape as the denim body.
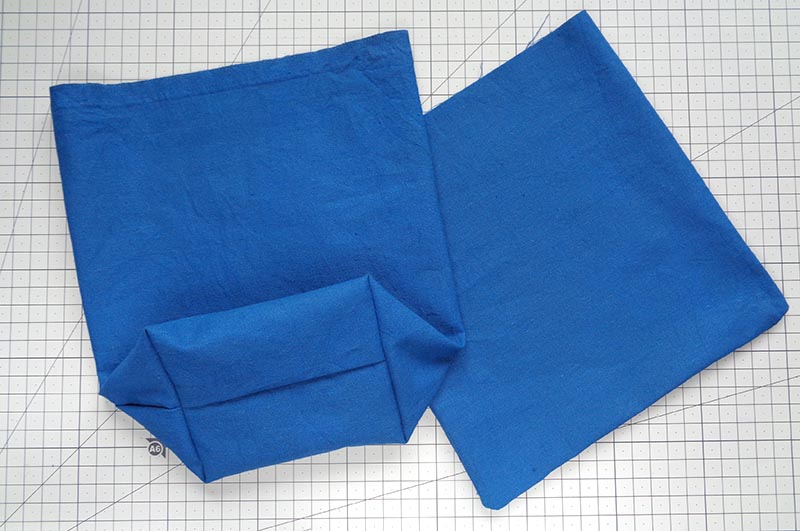
Larger bag is 21x30cm (add seam allowance). Make the bottom corners just as you did for the denim outer.
Smaller bag is 20x20cm, but this doesn’t have to be exact. It will be filled with something soft and squashed into the upper half of the owl.
Fill the bags with whatever you have prepared for it. You will know yourself how much filling you will use for each bag. Tie them up.
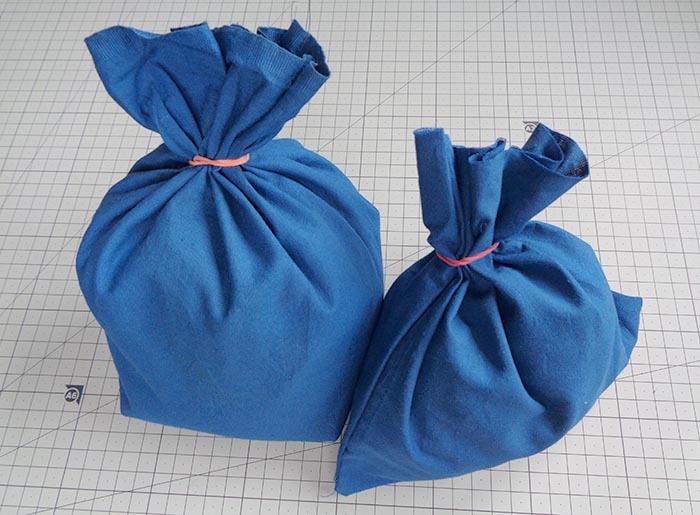
Put the soft light bag into the head first, spread it around nicely. Then place the heavy bag in, trying to match the bottom corners.
Your DIY denim owl doorstop is done!
The pattern to download and print is here:
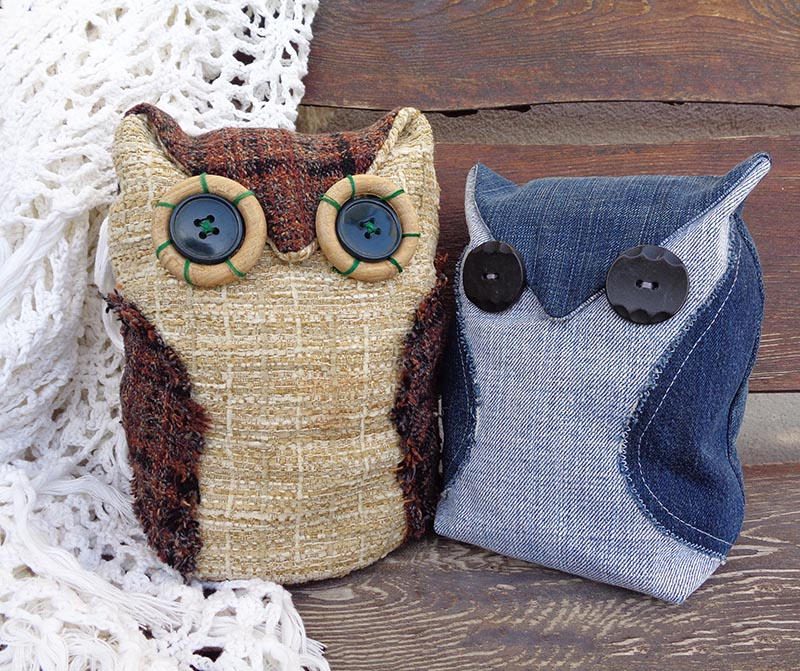
This doorstop makes a great gift. Try it in different colours and fabrics. For more authentic eco-friendly gifts, fast and inexpensive to make, check out my little collection >>>

Hope you had fun making this cute owl! For more tutorials go here>>>
Love how you make it look easy.
Thank you! Glad to be useful! 🙂
I love the little owl! I would love to make it but finding so many of the instruction illustrations “protected” and blank is a little off-putting to me. Do you sell this pattern somewhere? If that is the reason you are not sharing the pictures, a notation would be nice. If not, why go to all the bother of working up this post which is very detailed and very nice and leaving off some of the more technical instruction? Thanks for what you did share.
Hi! You can download the pattern and print it. The download link is situated on this page right above “Preparing the pattern” chapter, it says Download. Let me know how you get on. Kat
Love the owl.
Thank you and fingers crossed if you try it!
Great pattern and easy to follow tutorial, thanks for sharing.
Thank you for the feedback! I am glad it was useful :))