Denim apron with free pattern
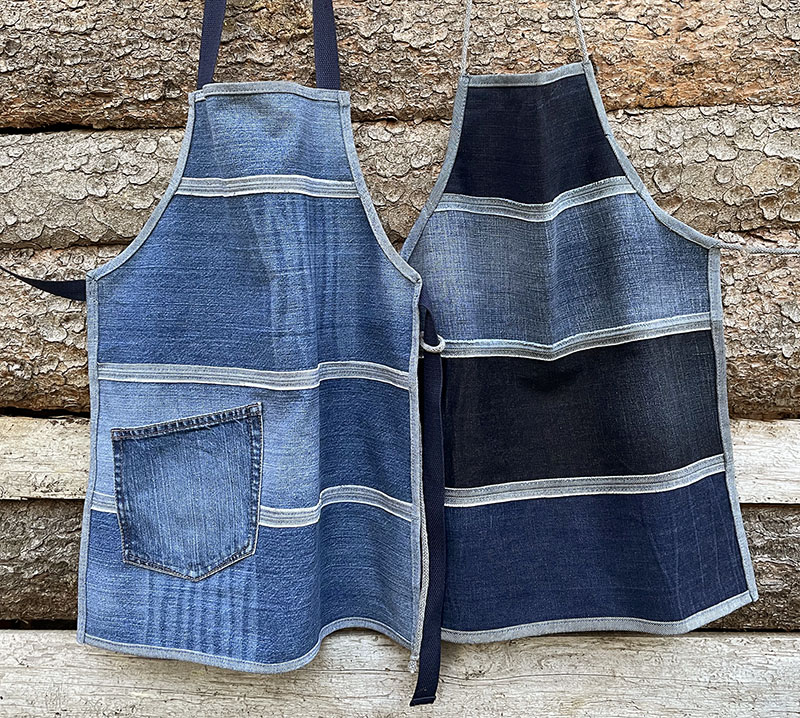
This denim apron is easy to sew and can be a great handmade gift. I like this apron because there is only one layer of denim and it is not stiff nor heavy. The free sewing pattern I provide here for printing at home is for a size small apron, but as you can see on the photos it doesn’t need to be large as it covers the areas that needs to be covered and it looks super cute! You can however remake the pattern to a larger size by adding at the top and the bottom and at the middle fold if you need to.

One pair of jeans is enough to make this apron, but you can also make it from different pairs for the contrast in shade. You can also add pockets 😉 There is no lining but no raw seams at the back, so it’s easy and fun!
The finished size of the apron is 46x57cm (18″x22,5″).
Download the pattern here:
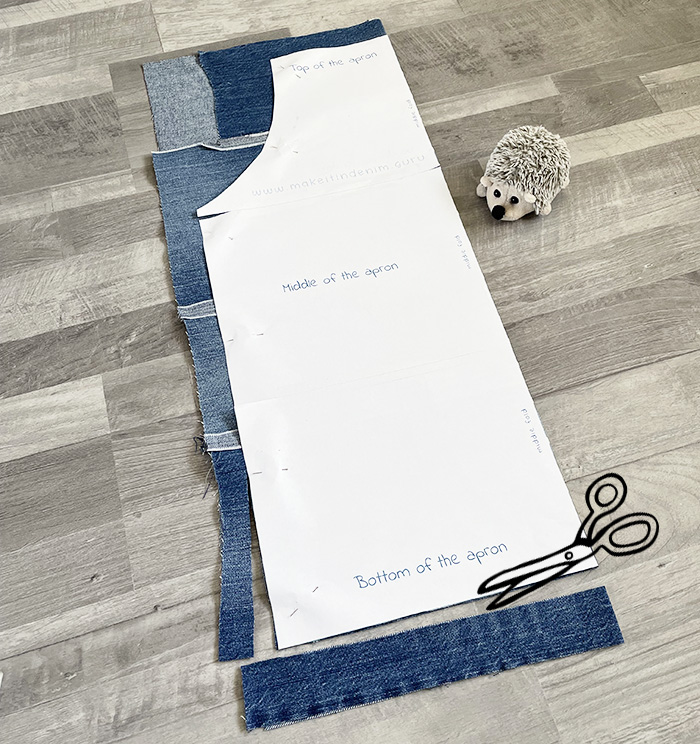
Cut out the three parts of the paper pattern and stick together with a sticky tape. There will be areas at the edges of the pages where the printer could of missed, just join the lines, do not overlap the paper parts. Check if the heights of the full apron pattern is 24 1/4″ (61,5cm).

Choose the right jeans
Choose rather medium weight jeans for this sewing project, because heavy thick fabric will cause difficulties sewing at the rolled up edge and if the jeans are too thin, stretchy and flimsy – the apron will look the same. Especially stay away from the stretchy jeans for this upcycling project – the rolled up edges may stretch drastically and the apron will look very ill 😉
If you are planning to make these aprons for gifting or selling, consider washing the old jeans before even cutting. A great way to clean stains and smell is king soda. Read about it here >>>
You can learn much more about choosing and preparing second-hand jeans for upcycling in my essential e-book >>>
Cutting jeans
To make this apron of the size provided, gather 4 pieces of jeans of minimum 21″ (54cm) long. One piece for the top of the denim apron can be shorter. The width of the pieces may vary (as jeans legs vary too). So we’ll master the width of the pieces as we go.
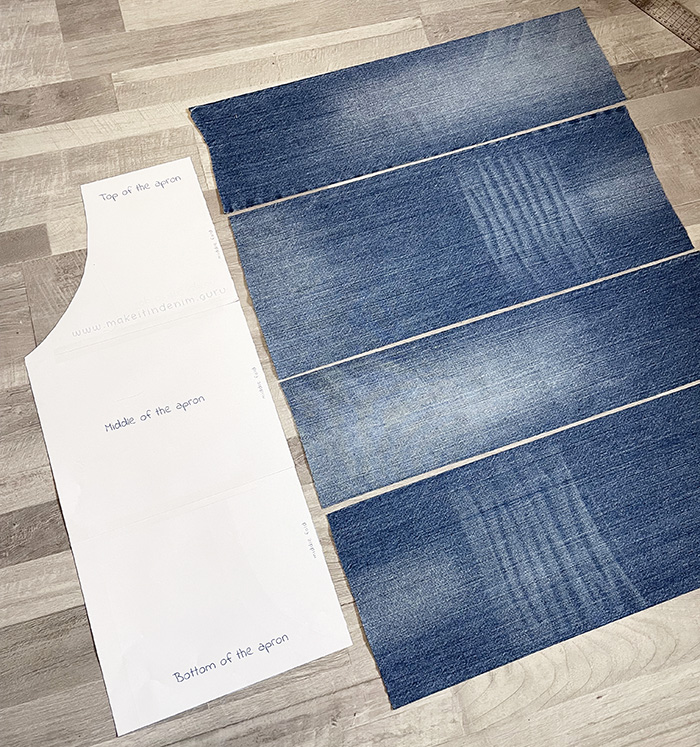
Using the pattern as guide, make sure you have enough height to build the large body piece. The outer seam allowances (for edge folds) are included, but you still need to consider the seam allowances between the denim strips.
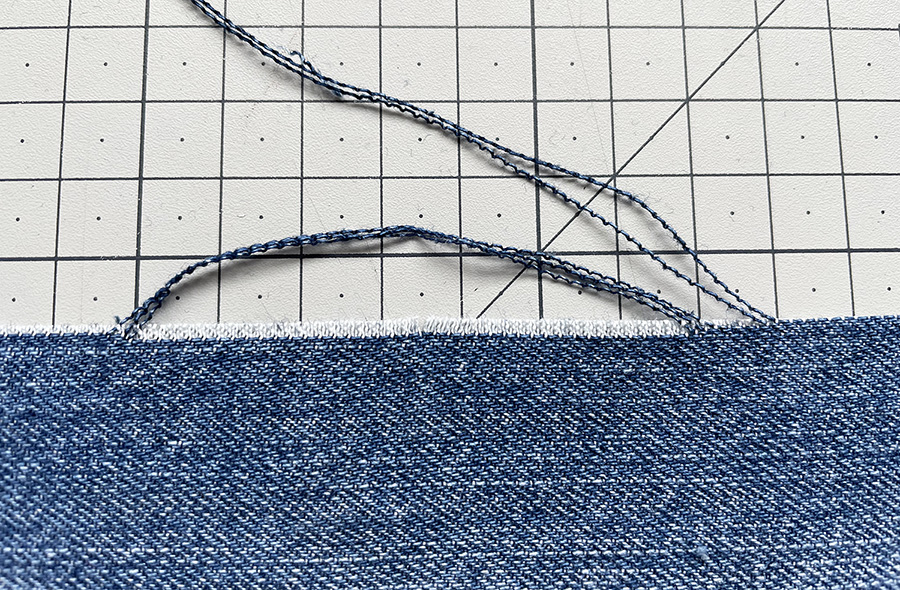
Work first at each longer side of each piece – cut along straight, following the grain lines. This is very important because these edges are going to be shown at the front. We will fray them slightly afterwards.
Sewing the body
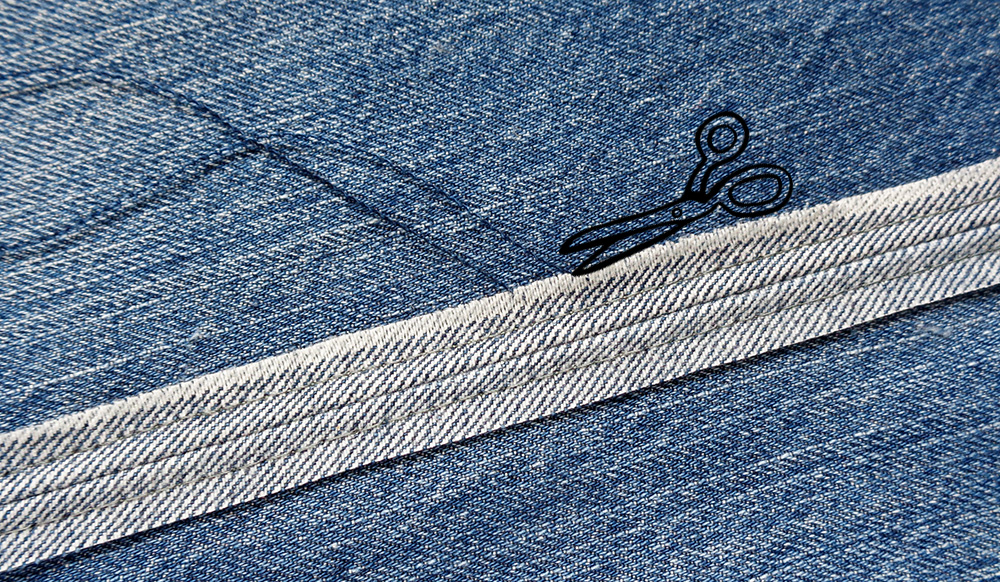
Sew all the pieces together lengthwise with wrong sides facing, so that the seam allowances stay at the right side. I usually sew here twice – for strength. I use 1cm (3/8″) seam allowances.
Fold out flat open these seam allowances, iron and topstitch to hold in place and prevent too many threads from falling out. The topstitching can also be done using a narrow zigzag.

Now at each of the exposed seam allowances pull off some threads to make it look better and also to prevent further threads from falling off later. As you do so you may notice that the edges was not cut exactly parallel with the grain of denim. In this case, pull and then stop and cut the loose threads off before they get too close to the topstitching.
Cutting out the shape
Iron the whole thing and fold it in half vertically. Lay and pin the paper pattern to it aligning with the middle fold. Cut out the apron shape without adding any seam allowances.
Make sure the corners for a waist strap are not on the seams!
Sewing up the sides
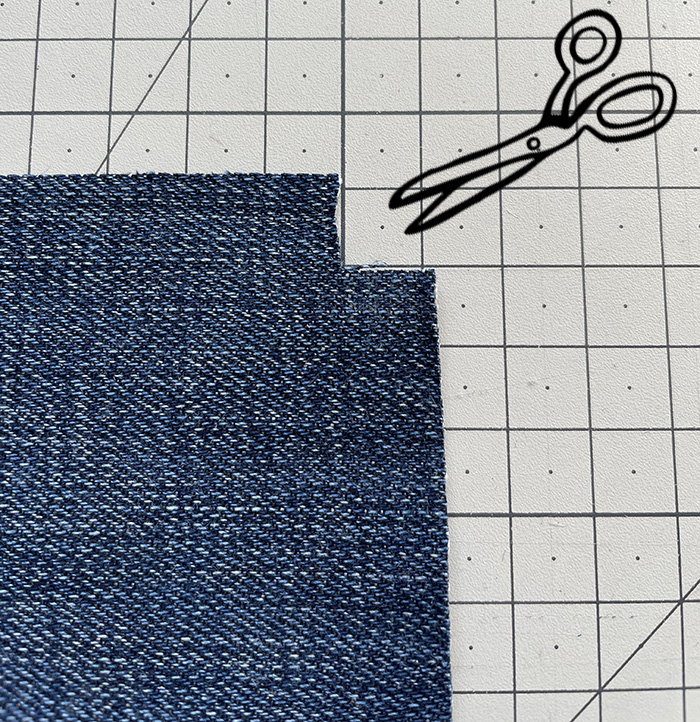
At the top and bottom corners – cut out a small square. It should be really small – no more than 1cm (3/8″). This will slightly reduce bulk when we roll up the edges. Do the same for the two corners at the waist.
Start with the top and bottom edges of the apron. Fold 1cm (3/8″) towards right side once and then again. Secure by paper clips or sewing clips if you have. Pins are possible but harder to pin.
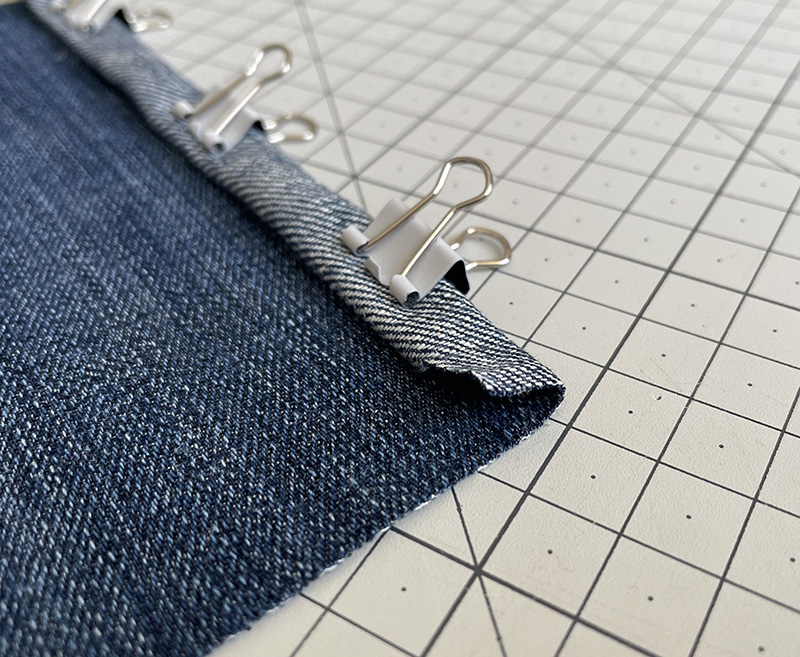
Stitch along, removing clips as you go.
Now proceed to the apron’s sides. Start rolling and pinning from the ends, then pin the exposed frayed seams. And then pin in-between. This helps to keep the side neat for sewing.
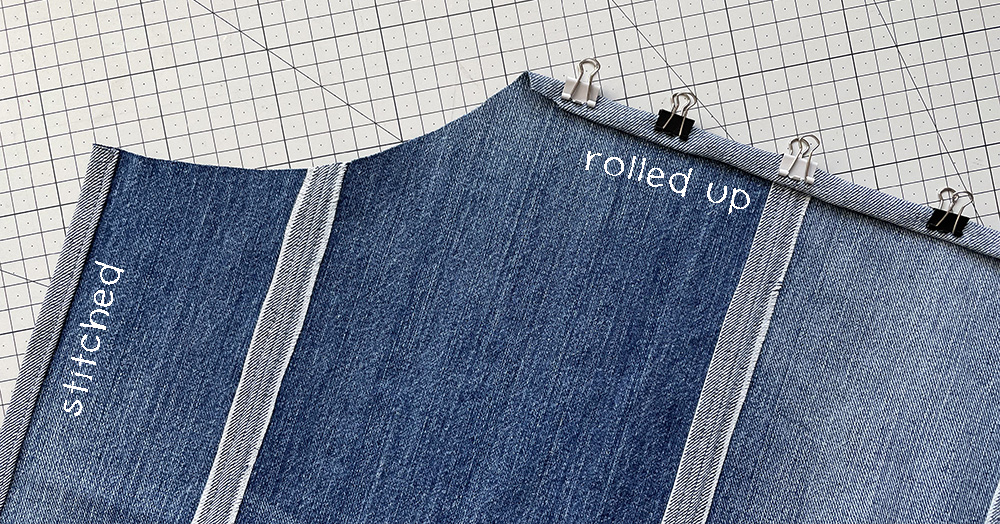
When sewing the sides try your best not to stretch the fabric, especially that a sewing machine stretches it slightly anyway. When I see fabric bobbles approaching next clip, I push the top layer towards the foot, it looks like it will be wrinkled but it straightens itself while passing through the foot.
Some places will be tough to sew, especially at the corners. Rotate the machine wheel by hand. Don’t forget to secure all start and finish points by going back and forth.
To pin the curved edges – start in the middle. Fold the centre of the curve towards the middle of an imaginary waist line, not towards the reversed seam.

Then fold and pin the corners of waist straps to come. Don’t try to make the fold at these corners pointing towards the sides – it can be folded at a diagonal. Continue to fold and pin to make the curve flat. There is no need to cut any slits, even though logic asks you to 😉 Denim fabric, when diagonally cut, stretches a lot and gives us quite a neat fold in this case. So, as you are playing with this curved edge, just try to make the folds flat.
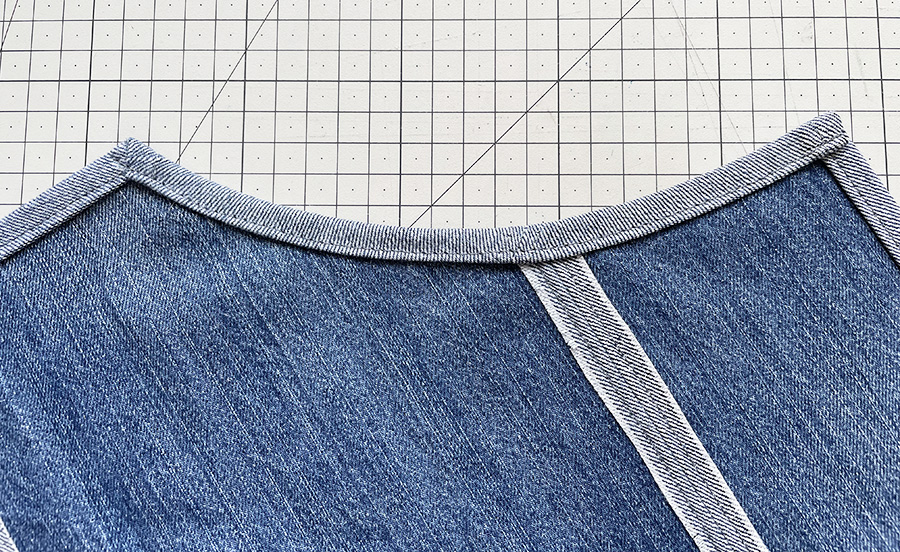
Stitch the two curves and voila! The apron from old jeans is nearly ready, just need to add straps and pockets.
Adding straps
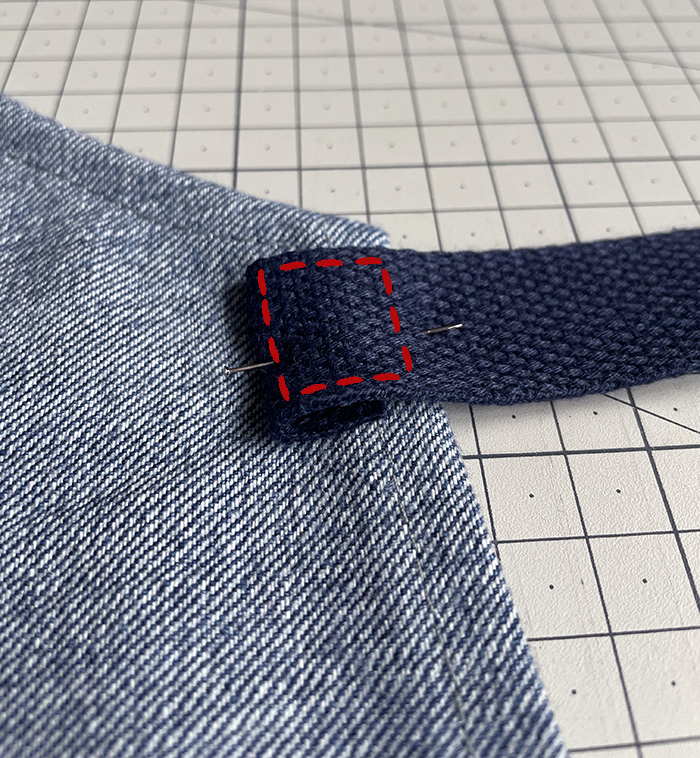
For the straps I am going to use thin cheap webbing because it is easy to attach. Mine here is 2,5cm (1″), but I think 2cm (3/4″) would be even better. Make 4 straps of minimum 50cm (20″), this is long enough for a small size person. For larger sizes go for 60-70cm (23″-27″) each strap.
For each strap fold the end under and lay onto a corner at the wrong side of the apron. Do not place at the very bulky corner area to enable yourself to stitch there. Sew the straps on. As you will most possibly sew with the strap at the top, choose a bobbin thread that is matching colour of the outer of your DIY denim apron.
At the loose ends of the straps fold over twice and stitch to stop them fraying.
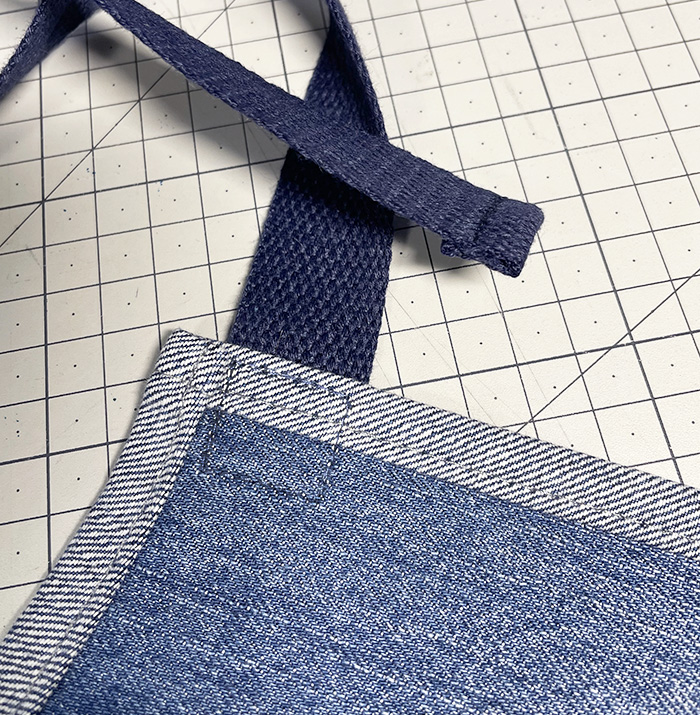
Here you go – your apron is ready!

Adding pockets
Adding a pocket is optional. I like a pocket in my apron to put a hankie or a phone or some small items that I find and don’t know where to put for now 😀 A denim pocket goes very well with a denim apron, so it can a be a cool looking addition.
Cut a pocket from old jeans. There are three ways you can do that. Check out my free instructions here >>>

For this apron project I use the simplest way – cutting around the pocket as close as possible and cutting the inner out too. Decide where to place it. Pin and stitch in place by following the original stitches. Again, choose a bobbin thread to match the colour of the apron’s back.

Now, that was an easy and quick sewing project! I am sure a lot of girls and women will appreciate this denim apron for a gift and don’t forget to make one for your precious self! 😉
Have you enjoyed this tutorial? Was it useful for you? If you are thinking how to thank me, you can buy me a coffee. This is how I keep this website adds-free!

Check out more gift ideas to make with free sewing tutorials >>>

Thank you so much for this delightful pattern. What a great idea to use old denim pieces. You’re directions are so excellent.
Hi, Li! Thank you for the comment! I am so happy you liked it! If you have made the apron and would like to share, I can add your pic into the Student’s Gallery – https://makeitindenim.guru/students/
Thanks so much for sharing, I’m going to make some for my husband and sons, the love to bbque. I’ll also embroider their bbq nicknames.
Hi! What a good idea to embroider the names! Feel free to email me pics 😉 I bet they will worth getting into the Student’s Gallery!