Removable seat cushion covers for any size
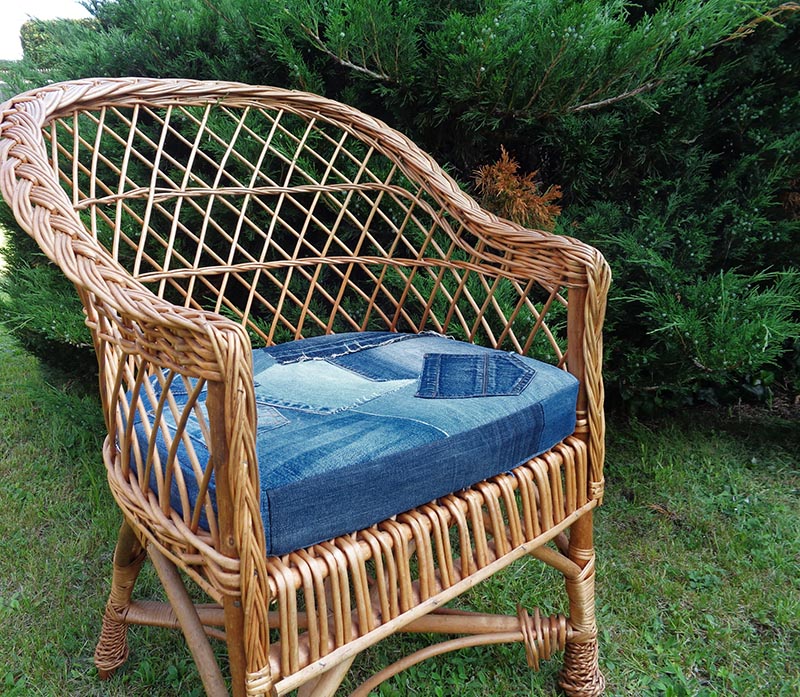
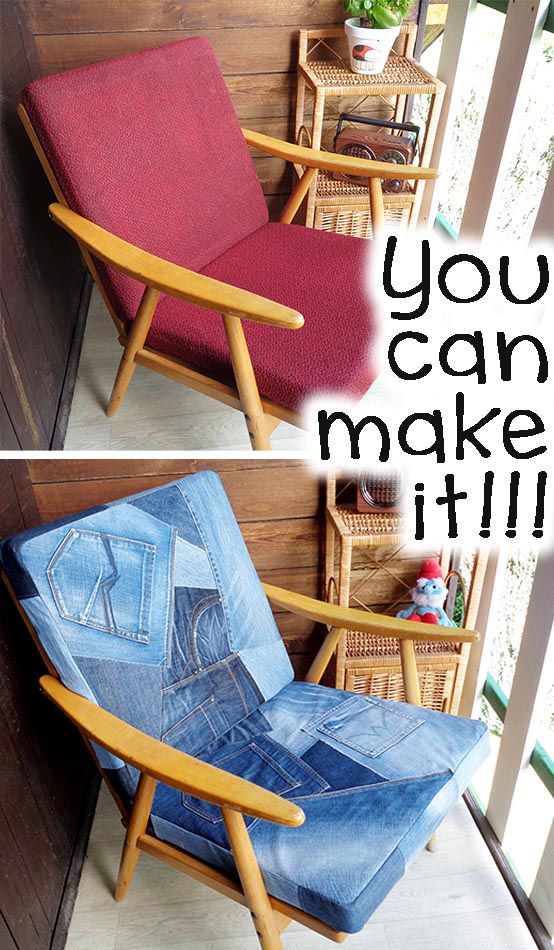
Let’s refurbish your garden chairs using denim leftover pieces. Upgrade your seat cushion covers to a funky jean style for a cost of peanuts.
I will show how to DIY denim seat cushion covers with a zipper so that they can be removed and washed. You can sew these using any strong fabric. But I will explain how to sew the covers using old jeans pieces with a very easy and cool looking denim patchwork technique.
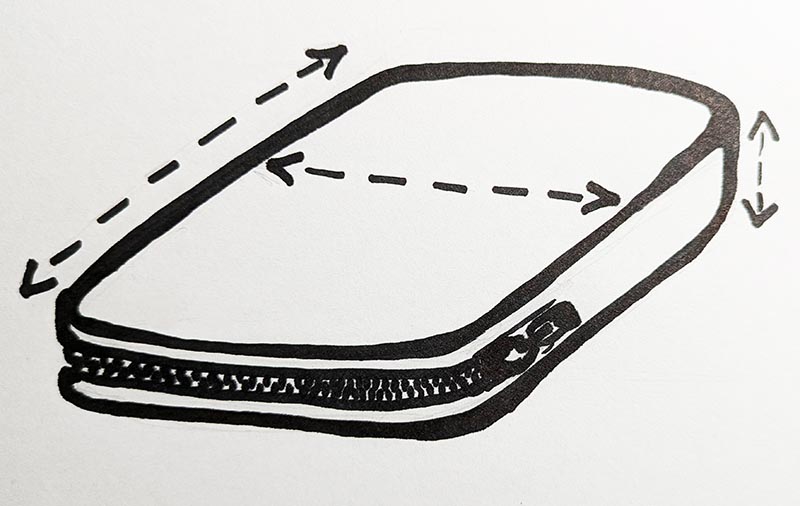
The type of the cushions we are working on here have to be three-dimensional, with vertical “side walls”. We will attach a zipper to this “side wall” somewhere at the back. The minimum height should be 5cm (2″), otherwise it will be very difficult to work with. However, if the cushion height is only 2-3cm (~1″), which is the same as width of a zipper, there is an option to skip adding to the zipper width and attach the rest of side panel direct to the zipper’s ends. You’ll see what I mean when you get to Zipper Panel in this free sewing tutorial.
To make seat cushion covers you will need
- Some unwanted fabric to make top and bottom panels for patchwork
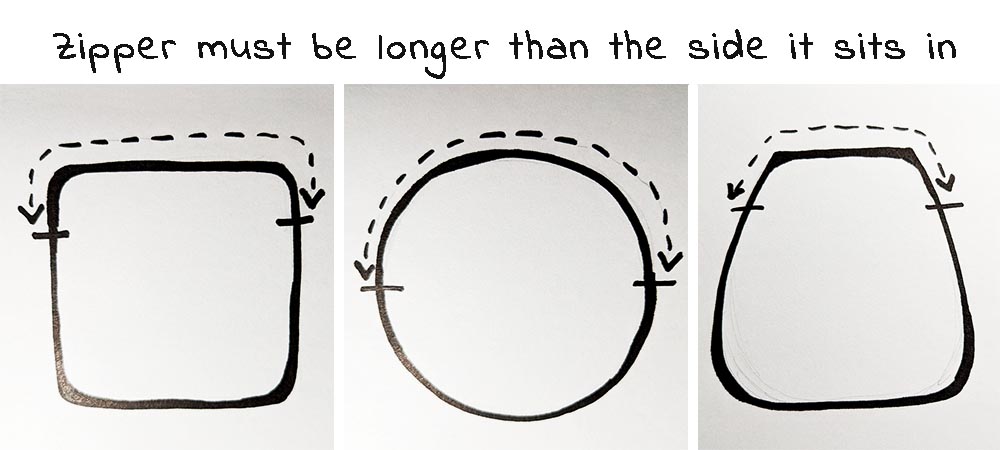
- A zipper longer than side of the cushion (see further)
- A strip of jeans leg same length as the zipper
- Lots of denim scraps
- If you need to make the cushion higher, you’d need some polyurethane foam to add to it
For the base fabric of the denim patchwork it can be anything thin but sturdy, not flimsy or stretchy. Old cotton sheets work very well for this crazy patchwork method. I also had an idea that some kind of waterproof fabric would be great as a base for the garden furniture seats. But I haven’t tried it nor tested in a rain, so I can’t be sure 🙂
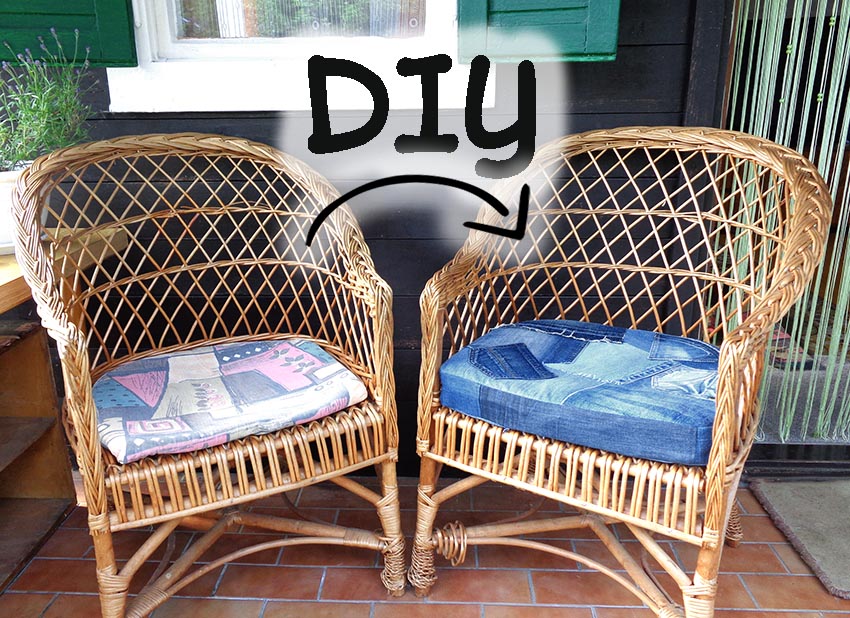
Let’s see how we can make denim patchwork seat cushion covers of any size.
Measuring to fit
Let’s measure the width, the depth and the height of the seat cushion. Seats are usually soft and it might be tricky to measure exact. Think that if you go on a smaller scale, the cover will sit tight, and on contrary, if you take the measurements “loose”, the whole thing will be slacker. I prefer to measure rather smaller, after all, fillings go flatter with time, so it’s better tight.
It is hard to decide if the cushions are super soft and the measurements that you decide will influence on the look of your finished item. So do think about it prior to cutting.
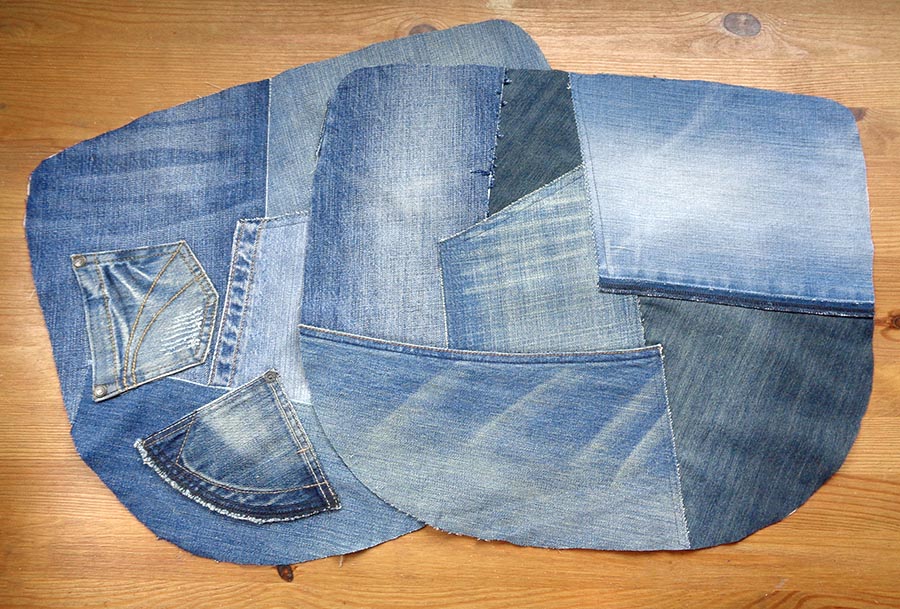
Preparing the base of the seat cushion covers
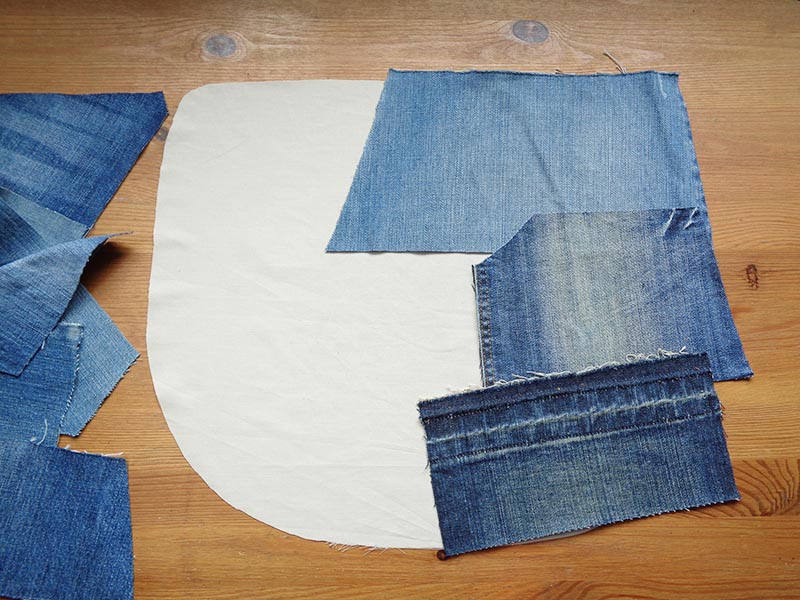
To make these denim seat cushion covers using old jeans scraps, first of all we need to prepare panels from any unwanted fabric for a base of patchwork. We need two panels of exact shape and size as the top and bottom of your cushion plus seam allowances. I usually use 1cm seam allowance, but you can do whatever you are used to.
If your chair cushions are square or rectangle, you can measure and cut out two panels (for each) form unwanted fabric for the top and bottom of the seat adding seam allowances.
If the seats are circular or odd shape, place the seat onto fabric and draw around adding seam allowances. It is a good idea to draw one half first, then fold in half and draw the second half so that the shape ends up symmetrical.
If you decide to not use denim scraps, but a full piece of fabric, simply cut out two panels (for each cushion) to fit the size. Don’t forget to add seam allowances. And skip all the patchwork explanation 🙂
In any case make the corners rounded, even slightly, it will look much better!
For the vertical sides of our seat cushion covers we will not need the base fabric and making them will be described later on.
Simple crazy patchwork
This crazy patchwork works so well with old jeans scraps! Using additional layer of fabric as a base makes is very strong and very fast to make. More detailed free tutorial about sewing denim patchwork is here, do check it out. Because in this sewing tutorial I will talk about it only briefly and concentrate more on the removable seat cover construction.
So, lay the pre-cut base panel in front of you and start laying denim scraps. The pieces should overlap. Cover the whole piece completely. Once you see that all pieces fit fine, take out and iron each piece, if you haven’t prior.
Trim whatever is too much overlapping or too much at the sides. Pin through all the layers.
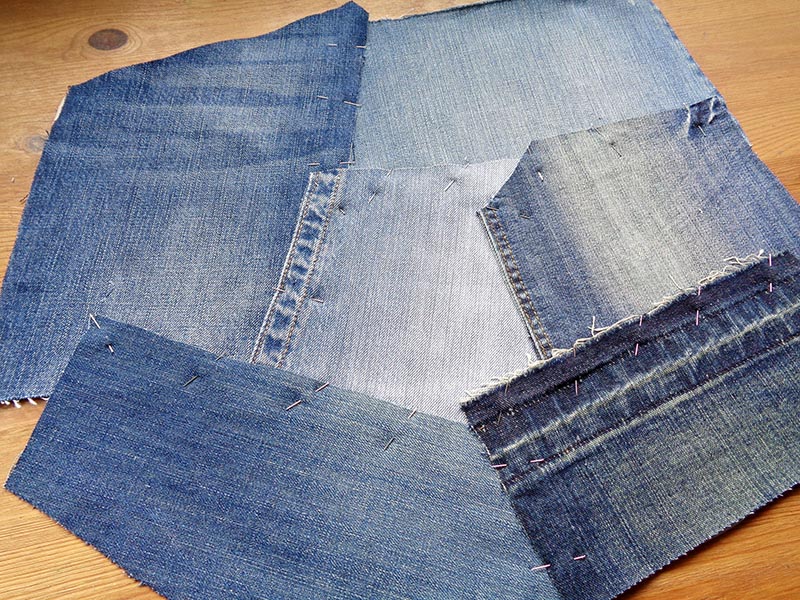
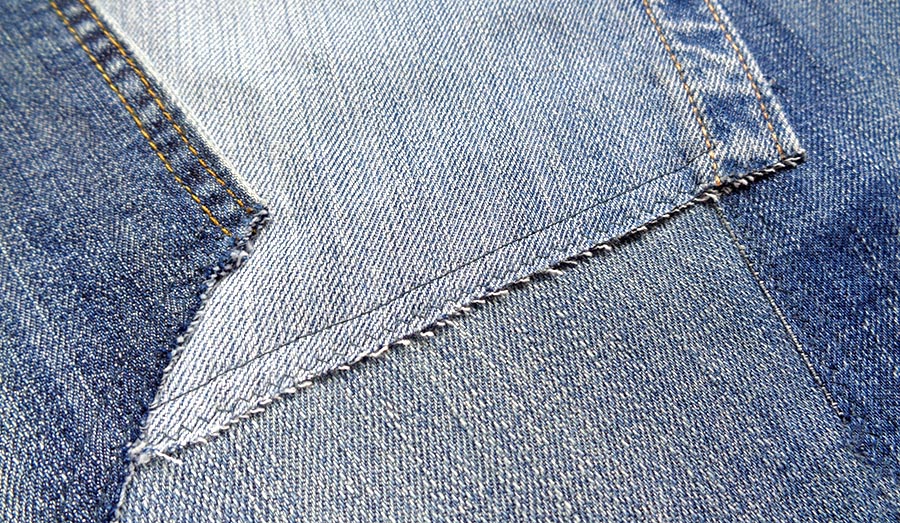
Sew through all the layers, removing pins as you go. I always stitch each edge twice: once with a straight stitch and once with a narrow zigzag. This is for strength and better fray at the edges. More about this raw edge patchwork technique is in this article >>>. If there is no raw edge, but an original jeans seam, you don’t need to use zigzag as your second seam, you can go straight. The original seams from jeans are really cool and add a lot of character, more about it here >>>.
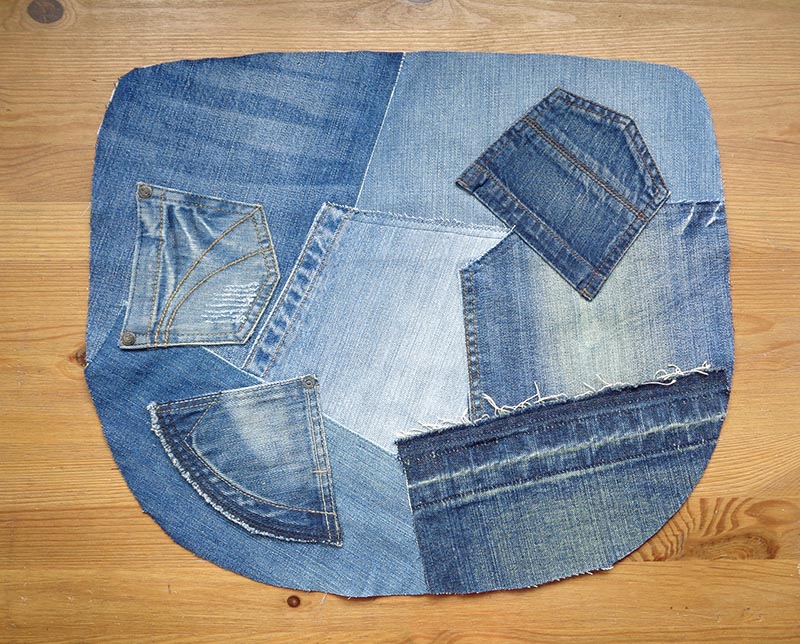
Once you have gone through all the edges of all the pieces, flip the whole thing over and trim off the excess of denim that’s larger than your base fabric.

Now you can see the exact shape of your new seat cover, you can add pockets or other décor. I have a detailed article about how you can cut out and sew on jeans pockets here >>>.
Make the rest of panels
Now prepare the second panel for the other side of your chair cushion. It is made exactly as the first one. If it’s a bottom side, you don’t need to try too hard and make it fancy… Unless, both sides can be made nice and different and you could turn them over any time 😉
So you need two panels like this for each cushion that you are planning to refurbish. And then you’ll need one long side panel for each cushion.
Side panel
The vertical side panel which goes all the way around the seat contains a zipper, so you can easily remove and wash the seat cushion covers. It is also made from denim scraps but it does not need an extra layer for the base.
Measure all the way around your cushion for the side panel. Don’t need to be exact here, you will see soon why. And for the height simply place the ruler across this side. As I have mentioned earlier about measuring, don’t count too much here if you don’t want it slack.
This super long and narrow side panel consists of two parts – the zipper panel (here we will need one long stretch of jeans leg) and the rest (for this more denim scraps will do).
Zipper panel
The zipper has to be longer than one side, especially if the cushion is made of hard foam. If the zipper opening is too small, it will be a nightmare to slide cover on and off. That means that we need to get the measuring tape out again. Lay it along the side of your seat where you are planning for the zipper opening to be. It is best to have it at the back of the seat of coarse 🙂
To make this zipped part of the side panel, we need one stretch of jeans leg. Exactly as long as the zipper, which you have just measured. And wide enough for the width of the two pieces along the zipper. Due to a variety of zippers and the different ways they can be sewn in, I can’t tell you exactly how to calculate the width of those two panels along the zipper. You can also choose your own way of inserting a zipper here. I will show just the simplest way, for any beginner sewer to manage.

I simply take a piece of jeans leg the same length as my zipper. Then I cut that piece lengthwise the middle in a very straight line for the zipper to be sewn in. I don’t bother about any other sides to be straight now because I will mark and cut this whole panel later to it’s exact size.
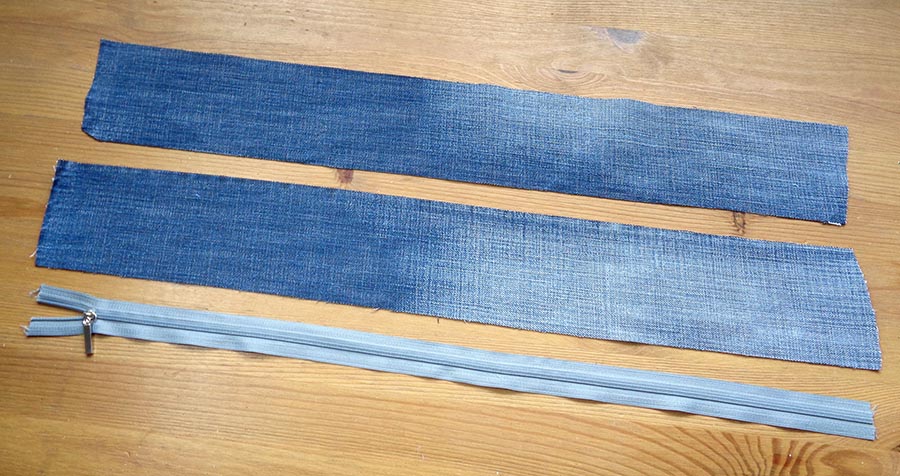
For instance, for my cushion this panel needs to be 60cm long and 6cm wide. Plus don’t forget seam allowances. But because it’s cut in half lengthwise, the seam allowances must be added again. So the leg piece I need here is minimum 62cm x 10cm (seam allowances included).
Depending on your method of inserting the zipper, it might add to width. So to keep it simple, just make sure that the jeans leg is wide enough. Insert the zipper first and cut the panel to size later.
Sewing in the zipper for our seat cushion covers
Any option for inserting zipper is good here, you can make a hidden zipper with or without a flap, it’s up to your preferences. The zipper is to be placed at the back of the cushion, so I am not trying too hard here 🙂
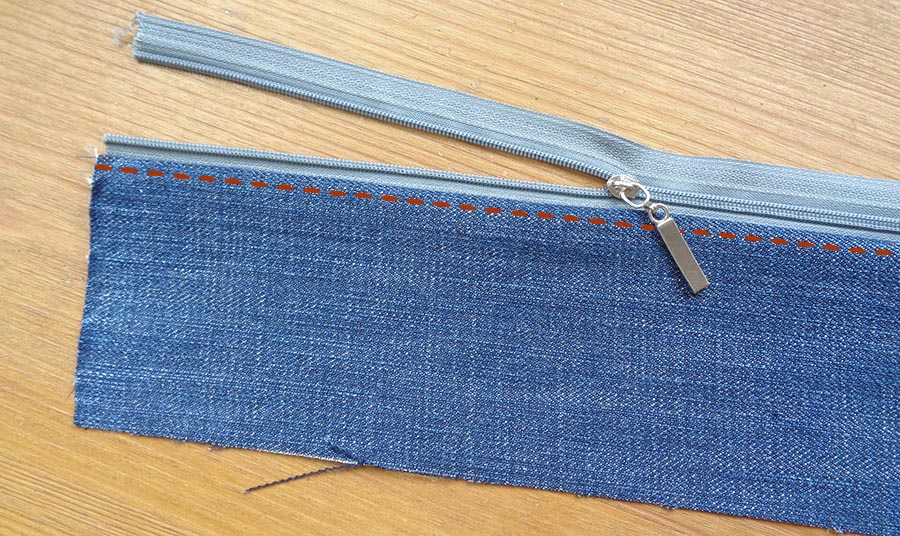
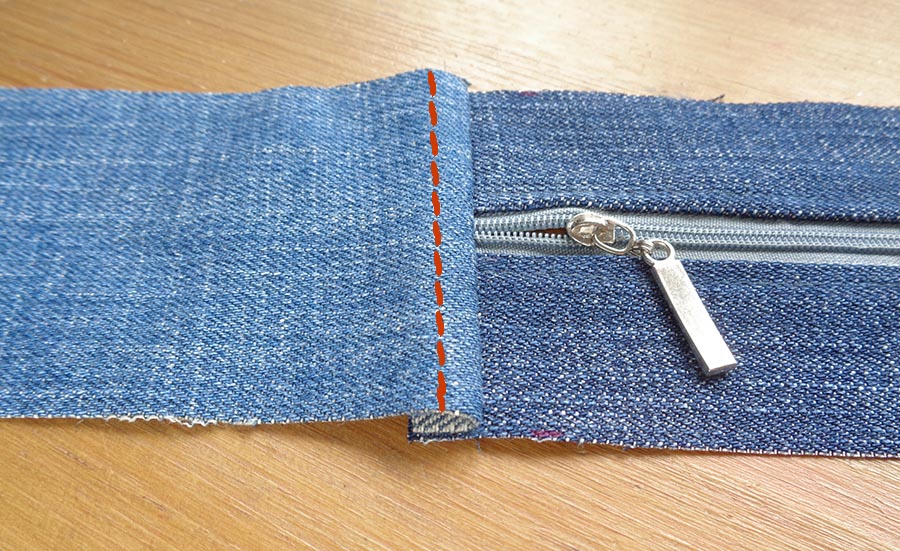
Lay the zipper along the straight edge, right sides together, and sew along all the way. Place your stitch line somewhere in the middle of the zipper fabric. Always sew with the zipper on top. This is to prevent fabric stretching and causing a wave in the zipper.
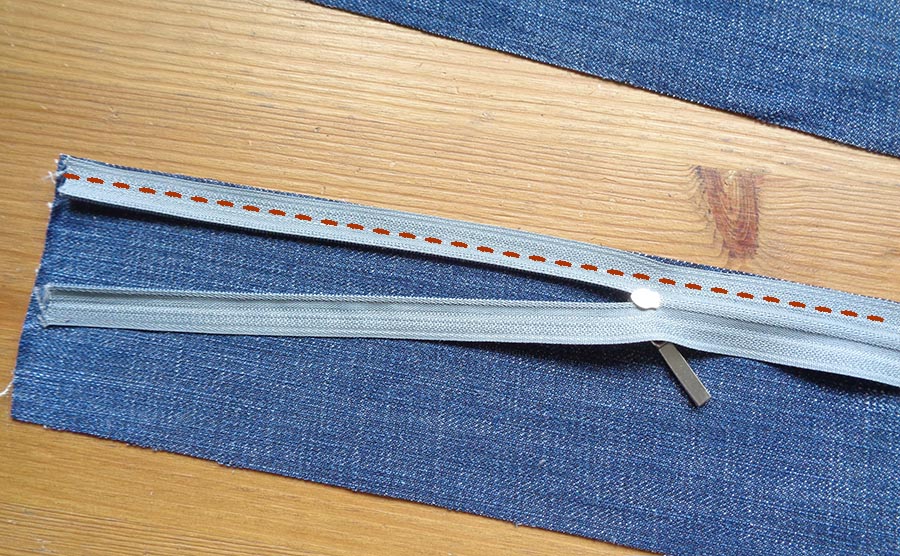
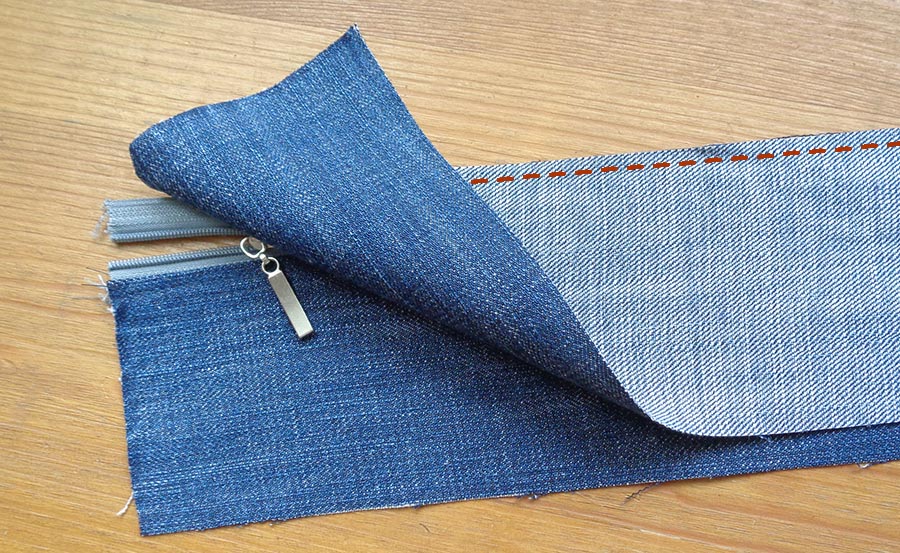
Refold the zipper to the right side, press flat and topstitch.
Repeat for the other half.
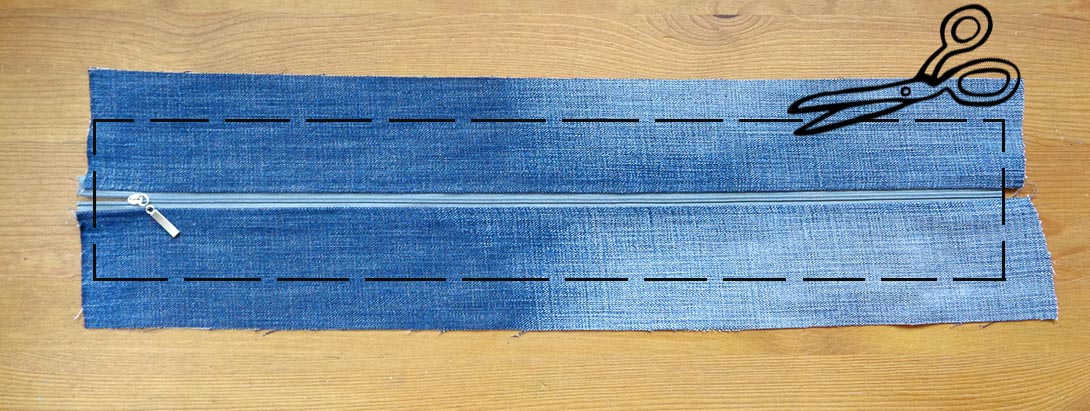
Now it’s time to cut this panel to it’s exact size. Measure, mark and trim to the size needed. In my case the height of the cushion side panel is 6cm plus seam allowances = 8cm. The easy way is to mark half at each side of the zipper all along and join the dots. So the zipper is your guide. For the length – length of the zipper (as measured earlier).
The rest of side panel
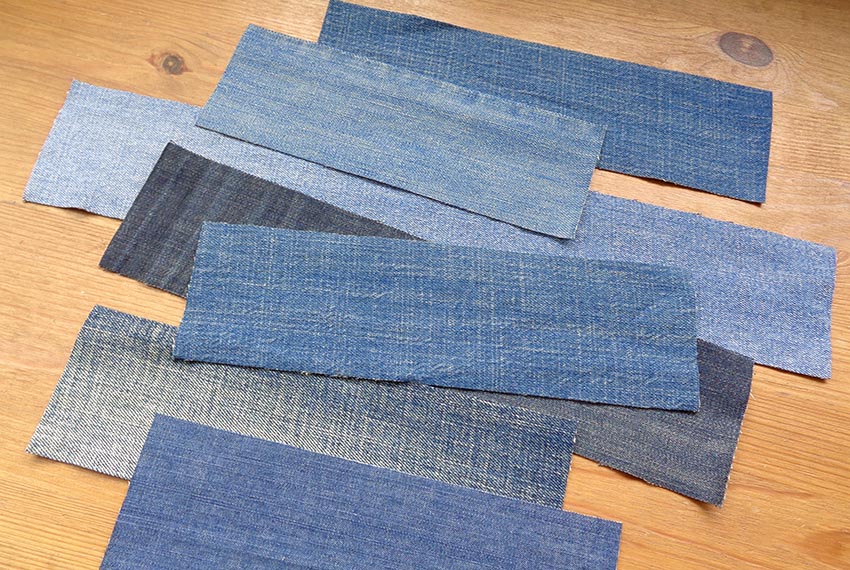
For the rest of the side panel to be added to the zipper panel we need to cut out loads of denim rectangles. The height has to be exactly the same for all of them as well as the zipper panel we’ve just made (in my case: 6cm + seam allowances for each side = 8cm). For the length of the rectangles – long or short – anything that you can get out of your denim scraps.
How many of those we need? Enough to build a long strip to go all the way around the sides of the cushion. But don’t forget that we already have the zipper panel and will be adding to it, so include it in your calculations.
Add as many as the length requires, don’t worry about being exact here. I have tried a couple of different ways of working out this length, but nothing worked. Denim stretches as you sew, corners are rounded, seam allowances are there… So I came up with a trick to make the perfect fit, follow me 😉
Sewing the side panel
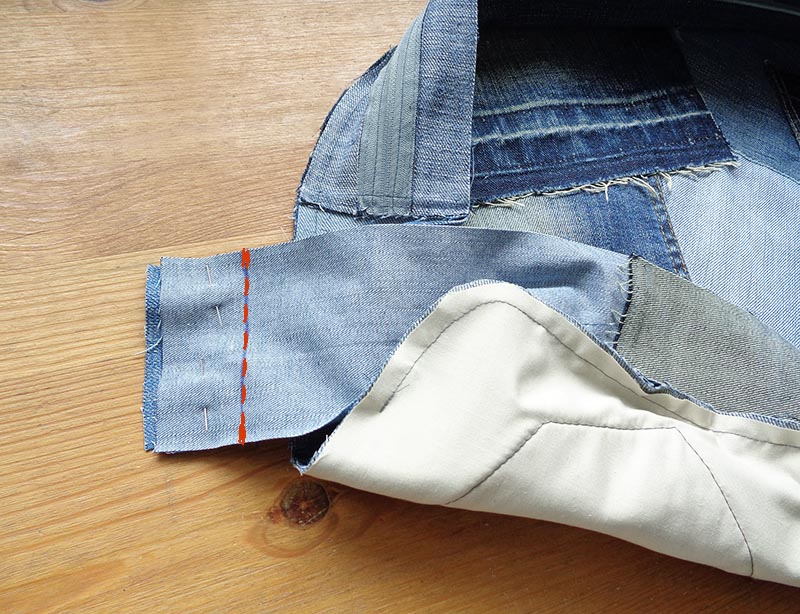
First of all sew a denim rectangle to one side of the zipper panel right sides together, secure thread at start and finish. Then fold out and onto one side and top stitch.
Now repeat with the other end of the zipper panel.
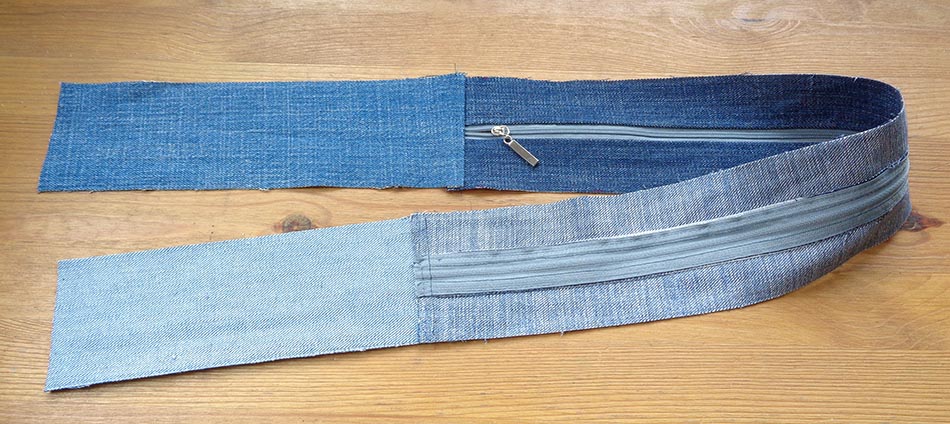
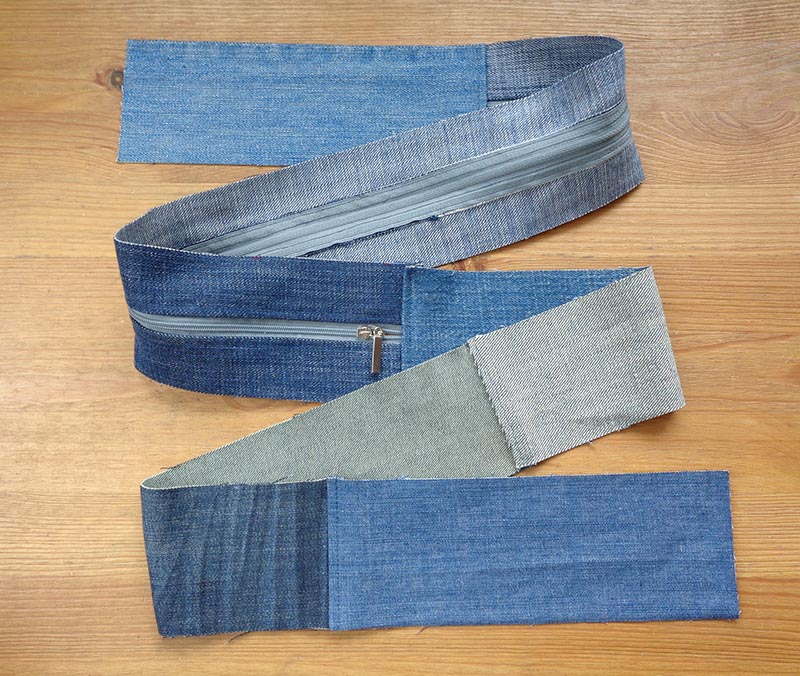
Start adding more rectangles in the same manner, but only to one side of this “snake”.
When you have enough length, don’t join the two ends, we need them loose.
Joining top and side panels
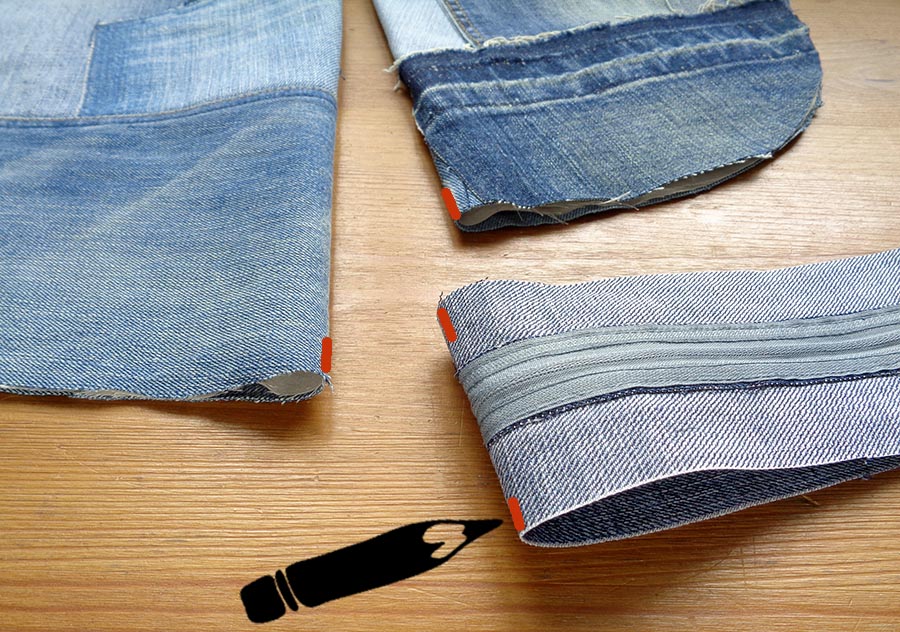
You probably already know which side of your top panel will be at the front and which side is for the back where zipper is about to go in. We need to mark the middle of the top and bottom panels at their zipper side. Fold in half the top and bottom panels, mark the middle at the zipper side. Fold in half the zipper panel also (not the whole side panel, just the zipper) and mark the middle too.
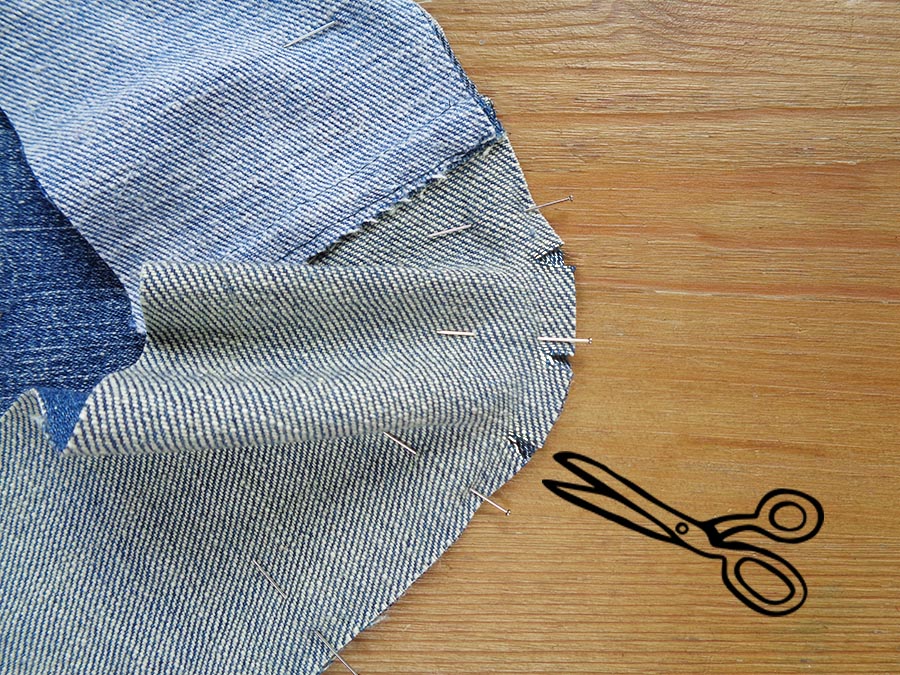
Lay the zipper panel onto the front piece right sides together joining the middle markings. Start pinning all the way around. Don’t be afraid to slightly stretch the side panel, especially on corners and curves. It will work out better 😉
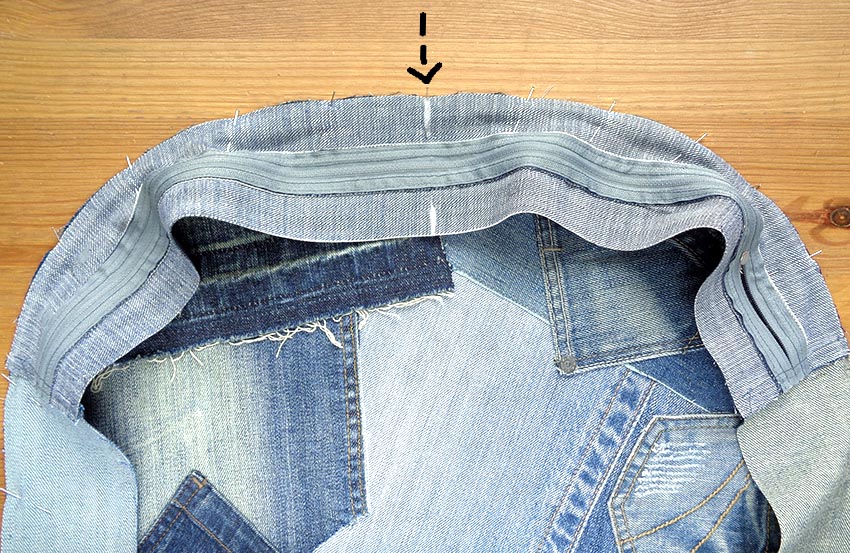
As you get to corners, it helps to make tiny slits, then continue pinning. The slits have to be smaller than the seam allowances. And try not to make too much gathering at the corners. When sewing through the corners, you may need to fiddle with the fabric, you can lift the presser foot, but keep your needle down!
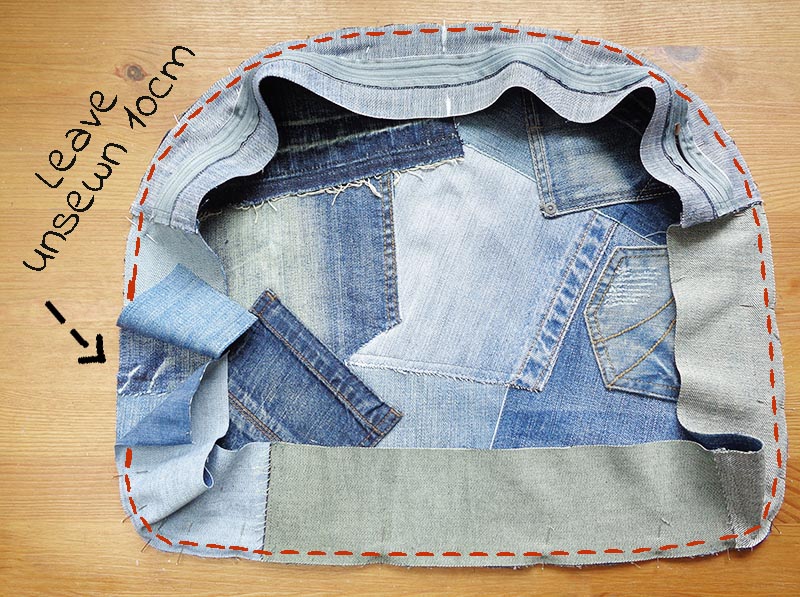
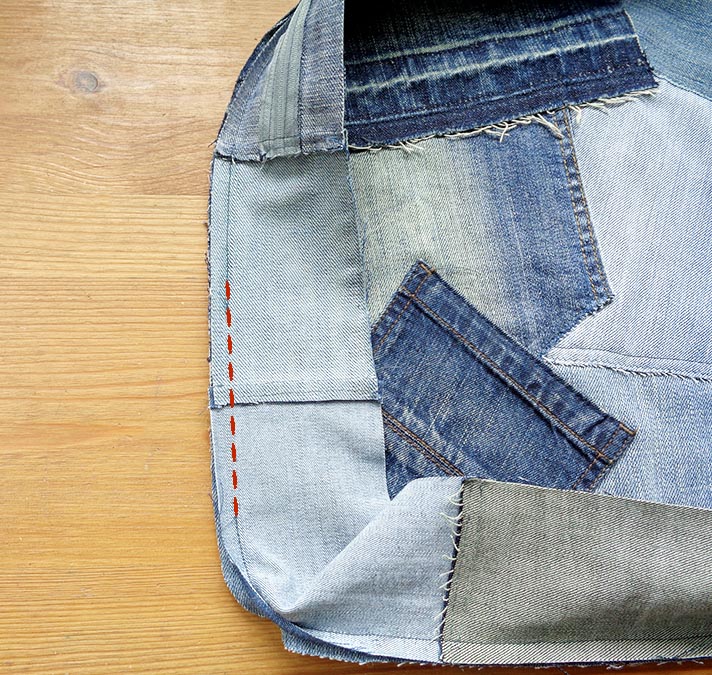
Now we are coming to the trick. Sew the pinned panels, removing pins as you go, all the way around, but leave unsewn about 5-7cm at each loose end. This gap has to be on a straight side, not on corner or a curve! Replace some pieces if it didn’t come to a straight edge.
Trouble shooting
If during sewing you encounter this problem – too much fabric in the upper panel, start removing pins before the presser foot and continue relaying the upper fabric keeping it straight all the way. Or you may wish to re-pin everything. This is ok, as I have mentioned earlier, you can never work out the exact length for this panel due to many factors. As long as the middle markings stay joined – you are safe to continue!
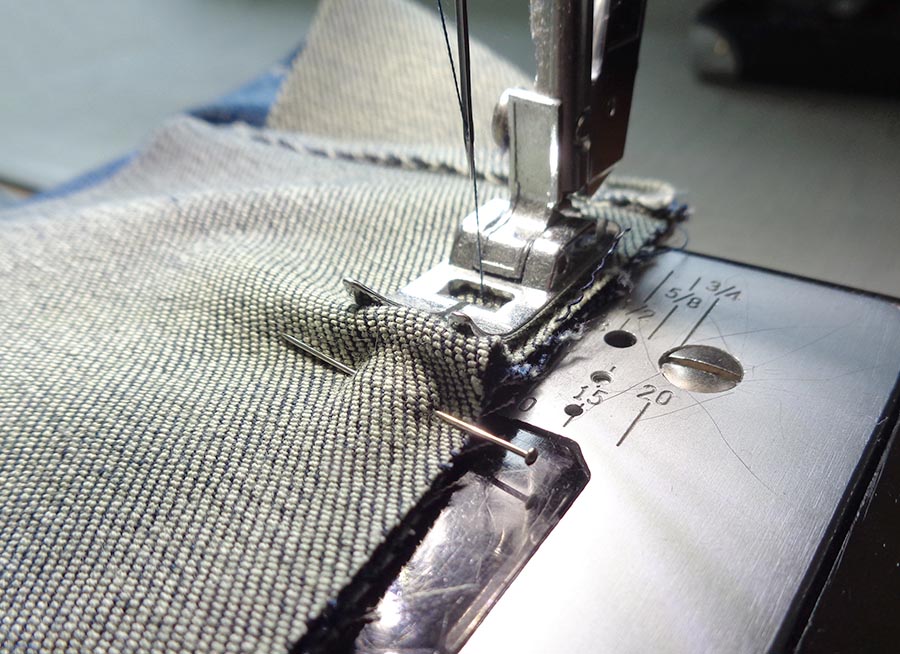
Back to our trick. Lay the unsewn ends flat and joined in such manner that you can sew them together conveniently. Mark the line to sew, pin the loose ends.

Pull the loose ends out to a side be able to put them under sewing foot and stitch. Then cut off the excess and top-stitch if you wish, just as the other pieces of this side panel.
Lay the stitched up panel back to where it should be and finish off sewing the side. As you can see now, the trick worked and the side panel fits exactly, no excess of fabric, no funny folds and nips. And also, it will now fit to the bottom panel pretty much exact!
Unzip the zipper slightly to be able to get in later 😉
Lay the other panel in front of you, add the panels we’ve just sewn on top of it right sides together. Align and pin the middle markings. Then pin all the way around, just as we’ve done earlier. Except that now no tricks and gaps needed, it all will fit!
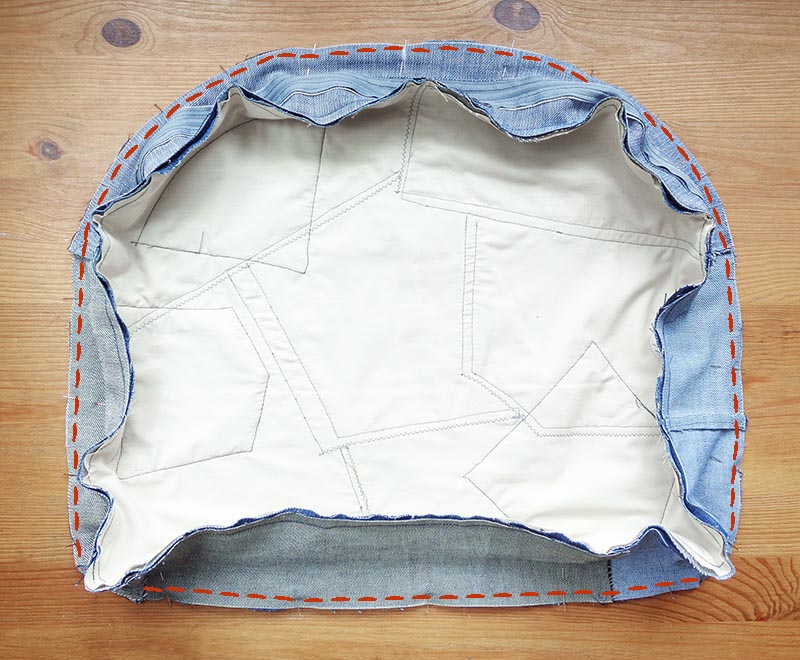
Stitch all the way around and you are done!
I recommend stitch twice all the way around so that the seat cushion covers are strong.
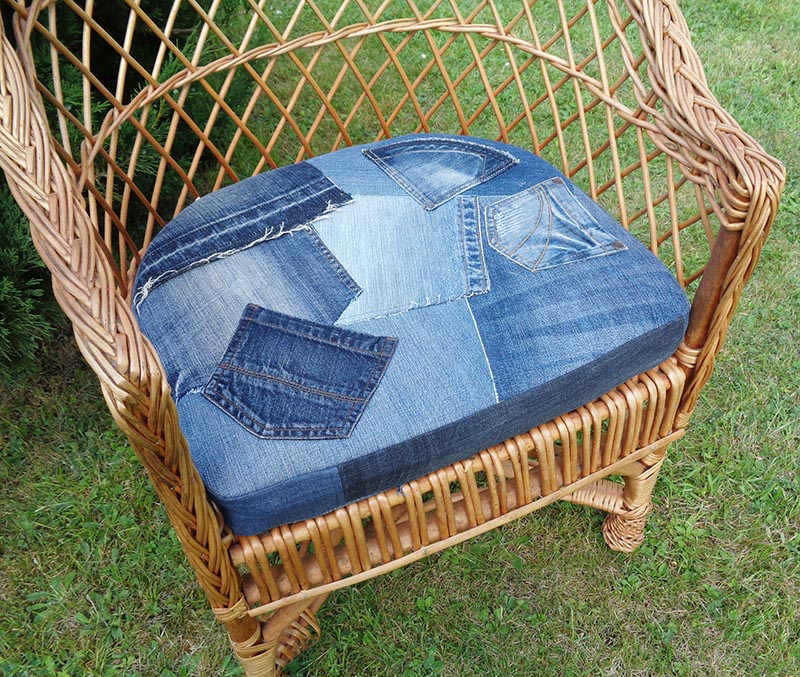
Admire you own seat cushion covers in denim! They look so cool and trendy with the denim scraps and just imagine how much you’ve just helped our Planet!
For more eco-friendly denim sewing projects go here >>>