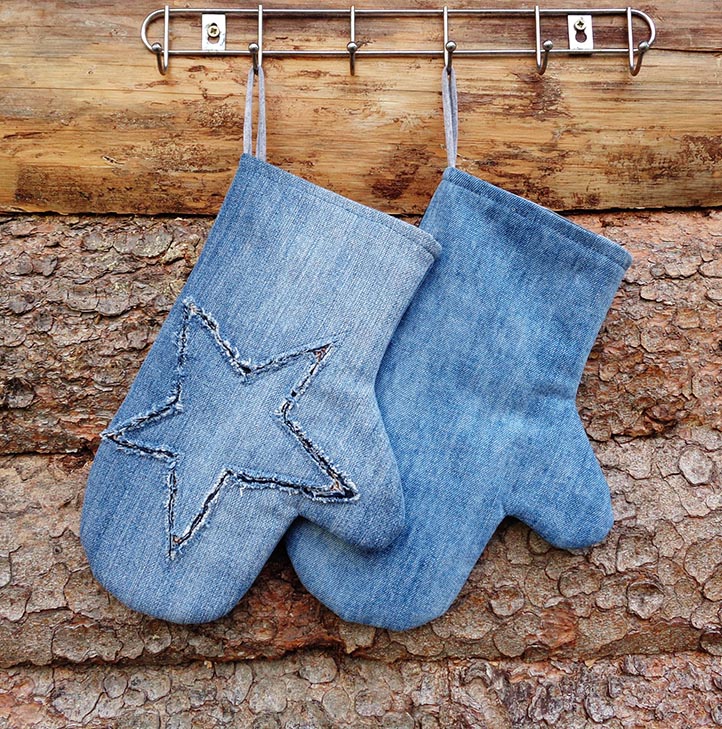
Pot holder or oven mitt can be just the right gift idea to make. A pair of denim oven gloves is an easy sewing project and great eco-friendly item to own. I hope you will like this free sewing tutorial for denim oven glove DIY.
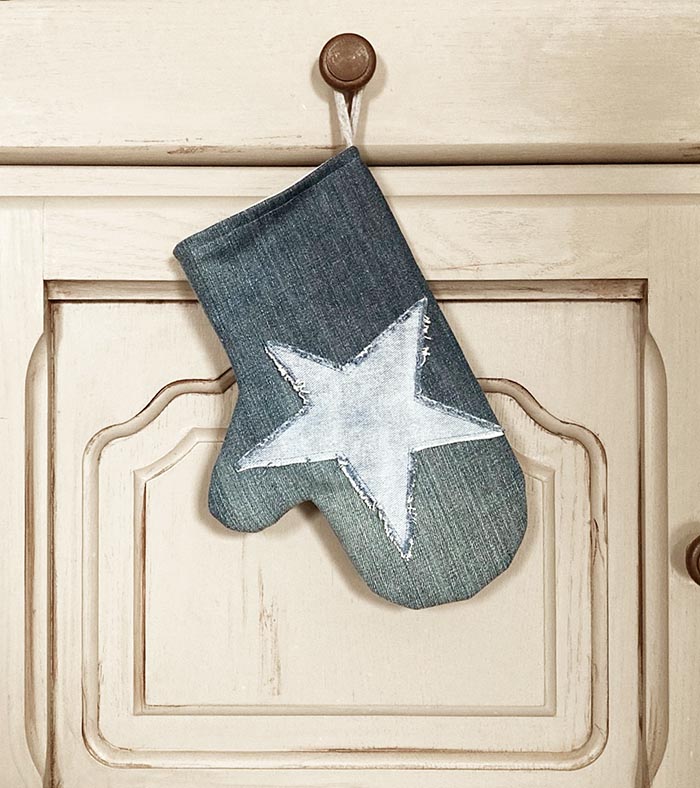
Of course, you can make a pair of oven mitts from almost any fabric, but isn’t it cool to make them from old jeans? Denim craft is always on trend! I would recommend to use medium thickness jeans.
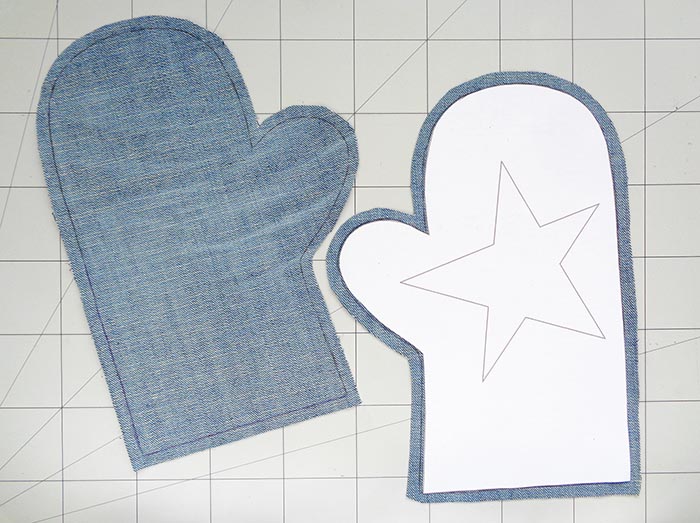
Print the pattern
I haven’t added seam allowances to this printable pattern for Denim oven gloves DIY, because it won’t fit into a standard printing paper 🙂 So don’t forget to add them when cutting.
Download and print this free printout oven glove pattern.
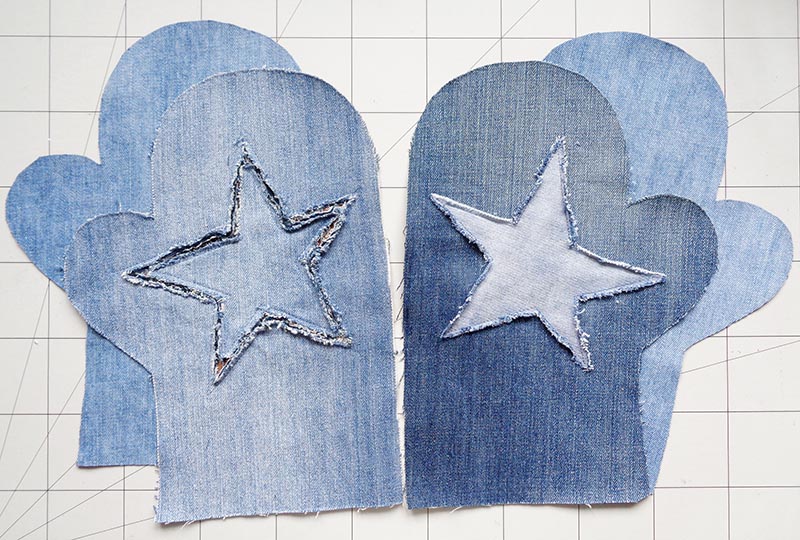
Cutting out all parts
For one glove you will need two pieces of denim, two pieces of lining and two pieces of fleece of medium thickness or other textile to keep the heat away – each pair must be cut as a mirror image.
For the outer trace and cut the mitt shape adding seam allowances.
Don’t forget that if you are making a matching pair of mitts, you will need the fronts of them mirror cut too.
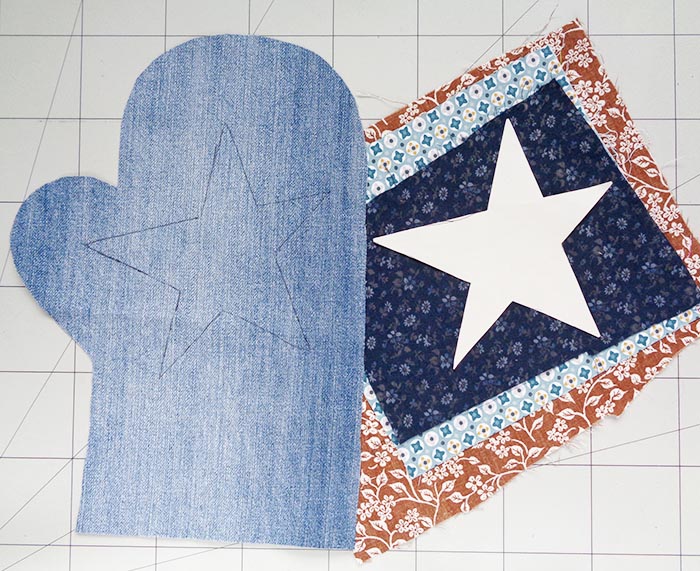
Decorating your Denim oven gloves DIY
For decorating your oven gloves I’ve included a star shape, but you may wish to try other shapes like those here >>>. In the end of that key chain tutorial you will find another free printout for a heart, snowman, cat shape. Another crafty idea – may be you wish to stencil or draw something on.
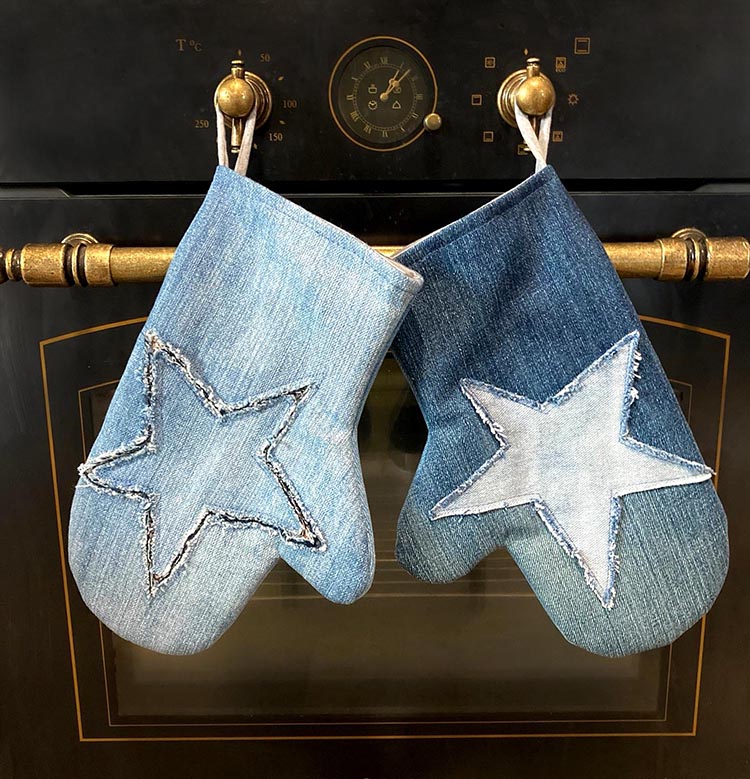
A simple applique is a good and fast idea, especially with denim, where you can fray the edges. Another way which I will describe here is a chenille star – do this only if you are patient and have plenty of time 😉
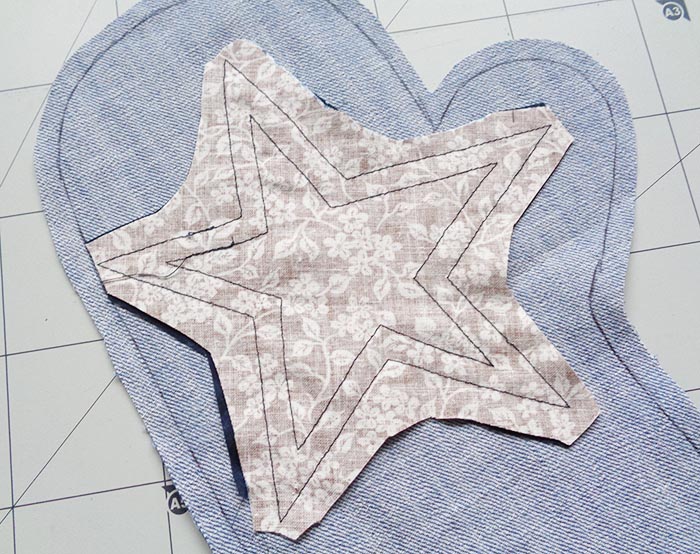
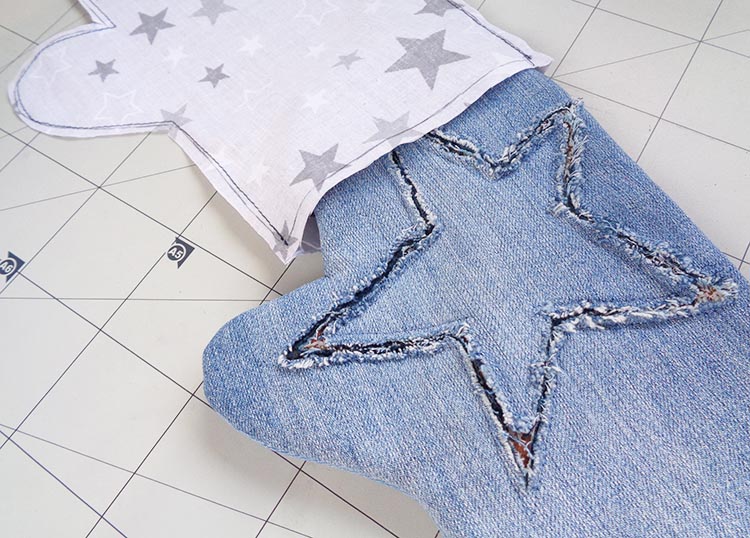
So, for simple applique, cut out the star shape out of contrasting piece of denim, sew it onto the position by simply following the edge line. Fray the edges. To do this the best advise I can give – is to wet the whole thing and rub with your hands, let dry and iron. Or take a wet cloth and rub against all edges, helping with nails sometimes, to achieve the desired look. Cut off excess of thread if needed.
Chenille star
I’d say making this type of textile décor is quite time consuming and if you have never tried it before, better practice on something more simple. I have a free tutorial here >>>
To make a chenille star, draw around the star shape onto the glove. Find 3-4 pieces of thin cotton larger than the star. It will show just a bit of colour once we cut through it. The larger the pieces – the easier it will be to place it underneath to ensure the star shape on top is fully lined underneath. Check thoughtfully, then pin through all layers.
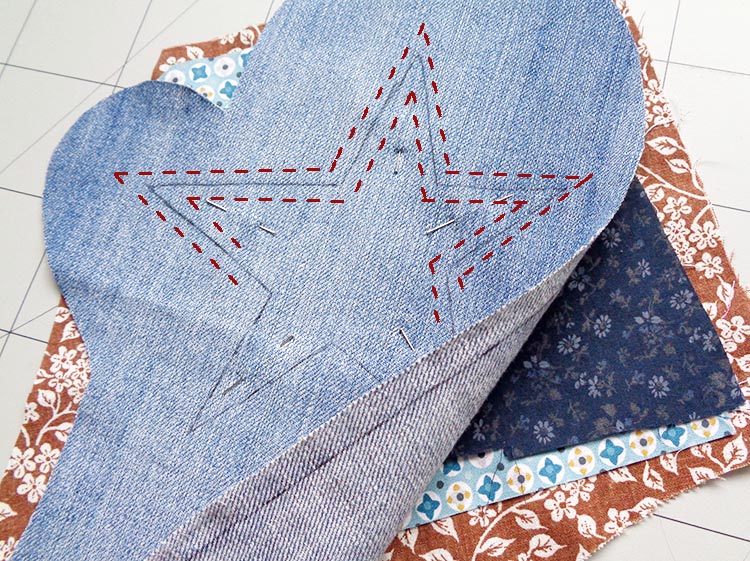
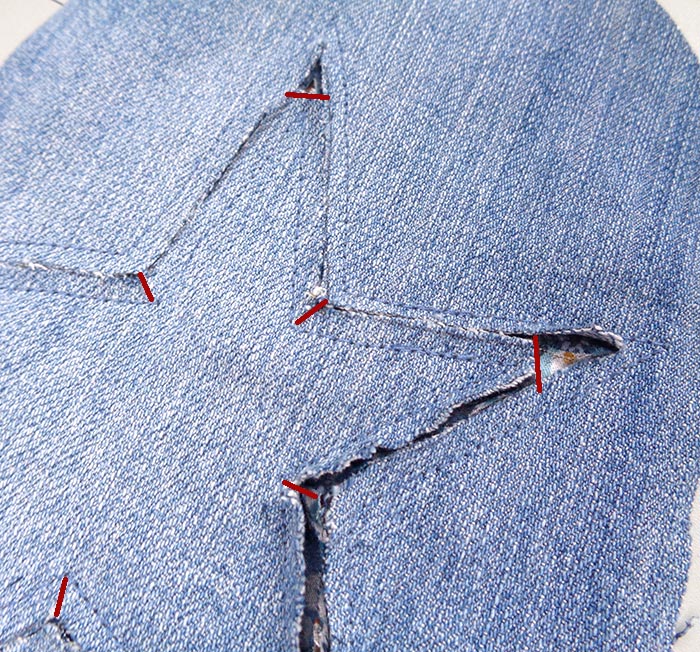
Stitch at both sides of your drawn line at about 10mm apart, which is 5mm from drawn line at both sides. Cut off excess at the wrong side.
With manicure scissors cut through the denim layer first. Then find the other layers and cut through them except for the lowest one! While cutting along the lines be very careful, feel by your fingers the lowest layer. You can cut altogether or layer by layer. Cut along the drawn line the whole star.
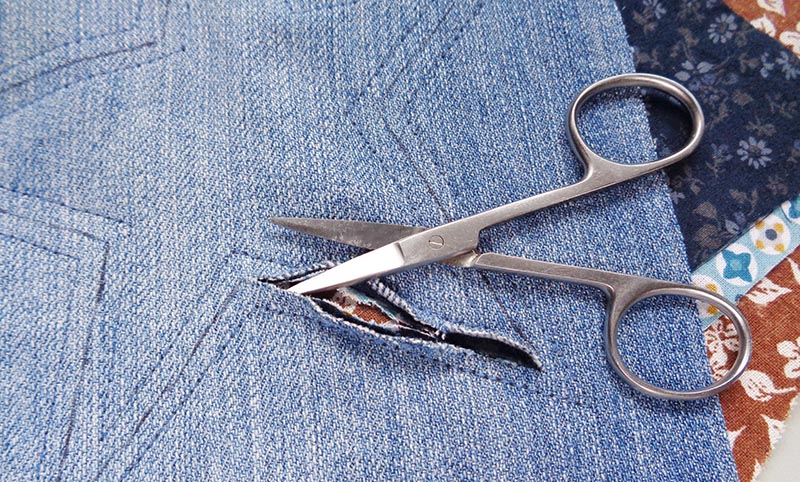
Also cut the star outer corners off and make small cuts within the inner corners. This will help to open up the fabric.
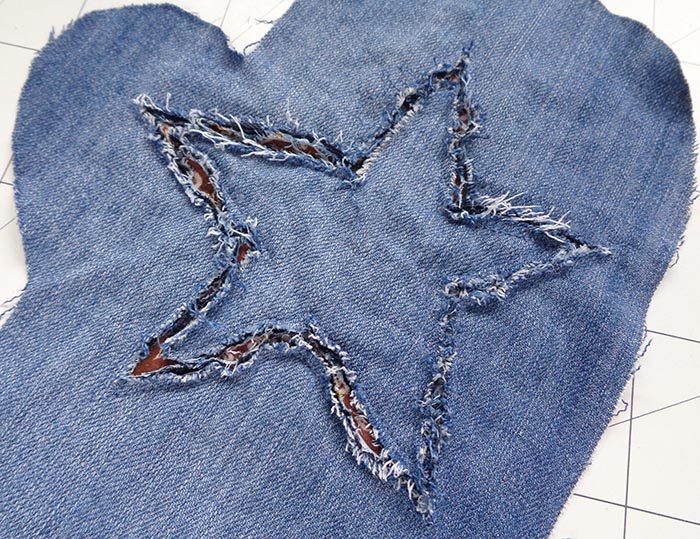
Fraying the edges is quite a piece of work too. For me wetting the whole thing was better than working on it when dry. Try to open up the cut to reveal all the levels, rub against the cut edges. You can even cut off some denim along the edges to expose more of the inner fabric. Cut off threads when necessary. Keep rubbing and opening the edges until you achieve the desired look. Let dry, iron and rub a bit more 🙂
Sewing the outer od the denim oven glove DIY
To make this denim oven gloves DIY I’ve used fleece for the inner layer because it’s soft and thick. I am not sure what thickness I have here, this is some leftovers from making neck warmers. My oven gloves was tested and this is perfectly enough to keep the heat away. You may use something else to thicken up the mitt, use your own judgement and remember there is a layer of denim and lining too.
Cut out two shapes of fleece matching the denim mitts.

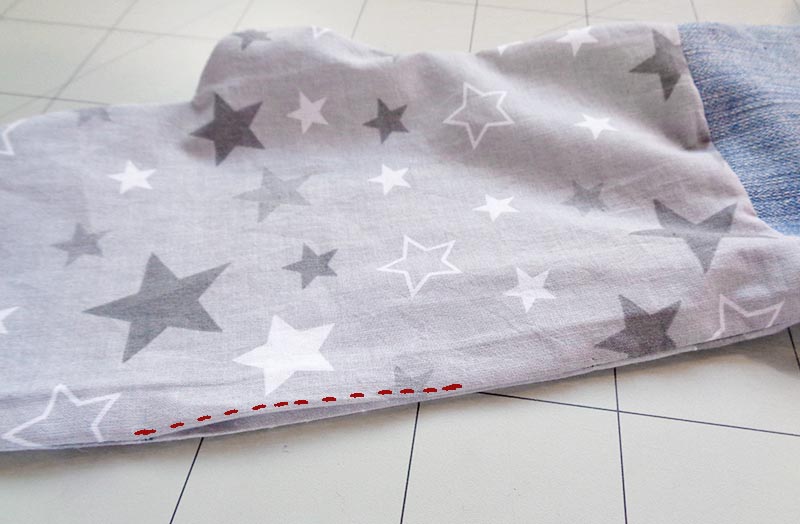
At the bottom of the gloves, as you can see, the fleece is shorter by 1″ (2,5cm). Doing this lets us to topstitch the opening later on. If we leave the fleece full size, it will create too much thickness and become very difficult to topstitch. The glove then will be usable but will look a bit unfinished.
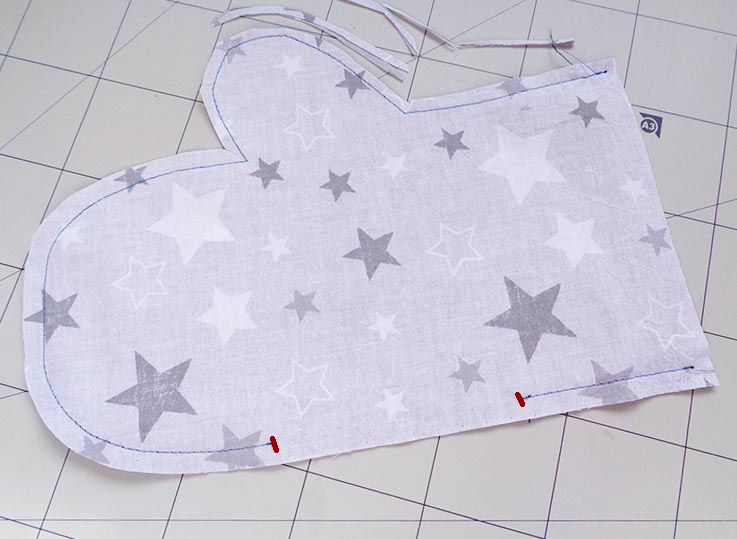
Lay a sandwich: fleece + two denims right sides together + fleece. Clip together and stitch around except for the opening.
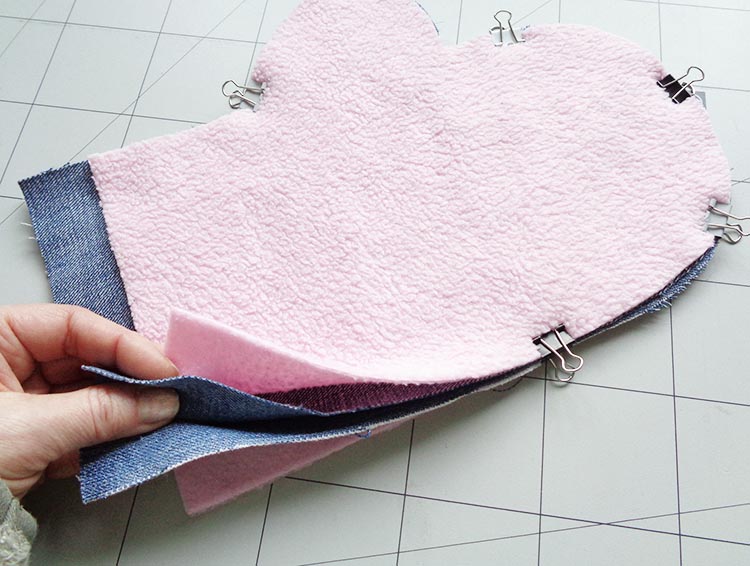
Stitch all way around, except for the opening.
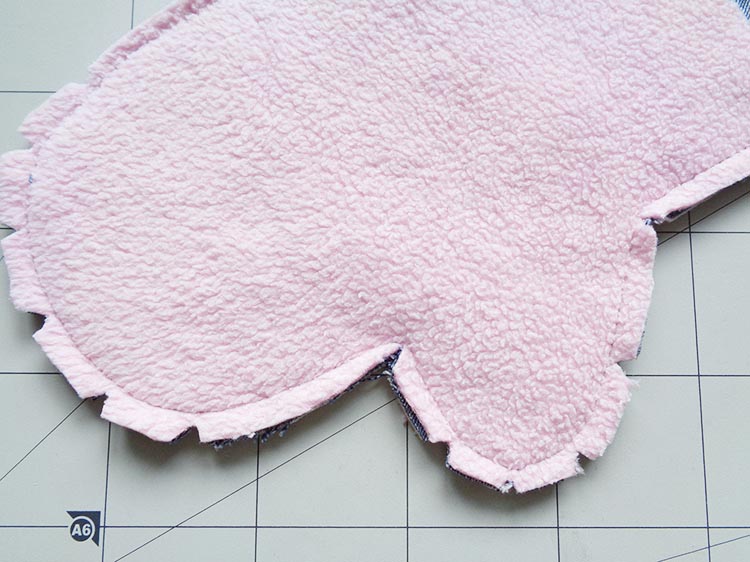
Cut small snips at the inner corners of the thumb cut V-s along all curved edges.
Adding lining
Cut out two mirror pieces of lining adding seam allowances. Pin right sides together and stitch along, leaving an opening at a side of about 4″ (10cm).
Cut off a bit of fabric al all sides (except bottom) to reduce bulk inside of a finished mitt.
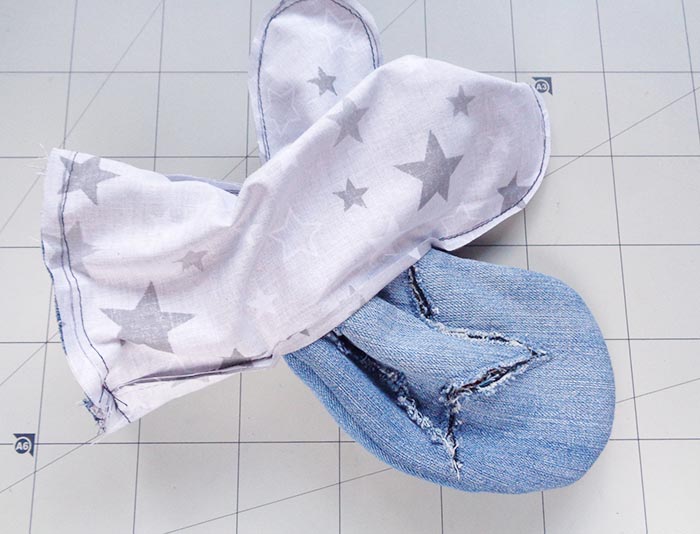
Turn the outer of the DIY oven glove right side out, straighten along the seams. Push the outer mitt all the way into the lining mitt right sides together.
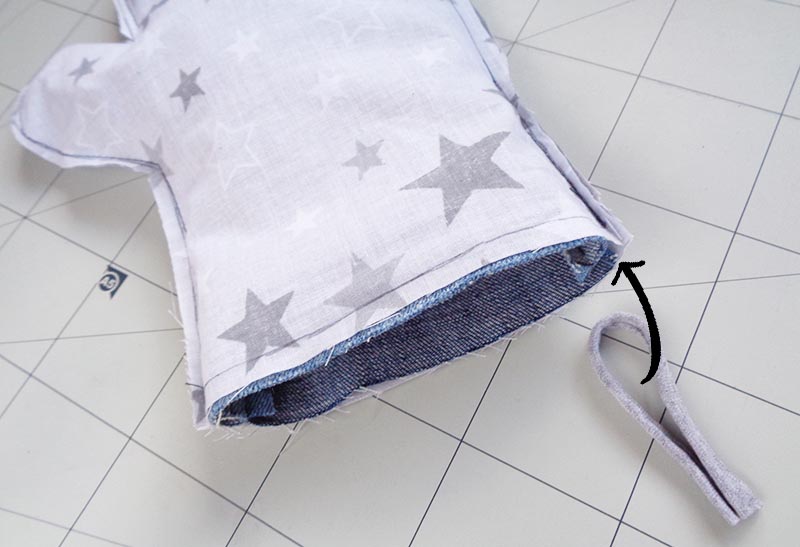
If you want to add a little hook, then insert it now into the corner (opposite from thumb) between body and the lining. Pin along the bottom edge and stitch it.
Through the opening in the lining get the outer out.
Stitch up the opening in the lining by pressing flat and straight the seam allowances and stitching along the very edge.
Place the lining inside of the outer. When pushing the lining in, make sure it goes between the two fleecy parts. Just saying because I accidentally pushed it in to a “wrong hole” 😀
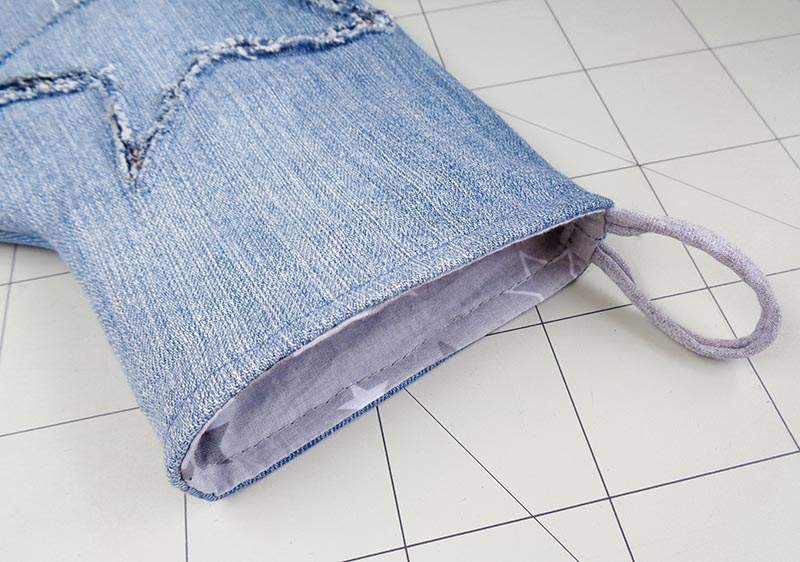
Topstitch the edge and you are done!!!
I hope you liked making denim oven glove! What are other ideas do you have to decorate a pair of oven mitts?
Take a look at some other easy gift ideas that you can make from a old jeans >>>

It is so generous of you to share this and so many other wonderful tutorials and inspirations. I’m currently busy sewing a bag with a tutorial of you It contains so many good hints, makes fun and is really worth the money! Kind regards – Sabine
Thank you, Sabine, for such hearty comment! It’s so nice to know that my effort worth it!
I’m a straight up noob here, and my brain is not processing pulling the denim through the unstitched side in the lining, then getting the lining inside the denim. Do you have any video clips showing this process?
Hi, Georgia! I don’t have a video, it’s easy. I think once you reach this point when sewing, you’ll understand. Have you left a gap unstitched in the lining? Maybe the gap is too small and confusing? Pull everything out through this gap to reveal the outer side of both denim and lining. Then stitch up the gap. And then place the lining into the glove. It’s easy to understand while doing. Hope this helps! Happy sewing! Kat
We have crummy weather headed this way for the weekend, and I planned to try this project at that time. I need to source some fleece stuffing still also. I’ll report back 👍🏼
Sounds like a good plan! If you can’t find fleece, some other soft stuff can be used. Good luck!
I have just tried some old towling and it worked beautifully .
Excellent idea! Thank you for sharing!