Use up your denim scraps
Patchwork has always been a great technique to use up a lot of scraps of fabric which every sewer has. Reverse patchwork is pretty much the same as classic, but opposite. It works especially good with denim due to the exposed raggy edges, which are adorable in denim.
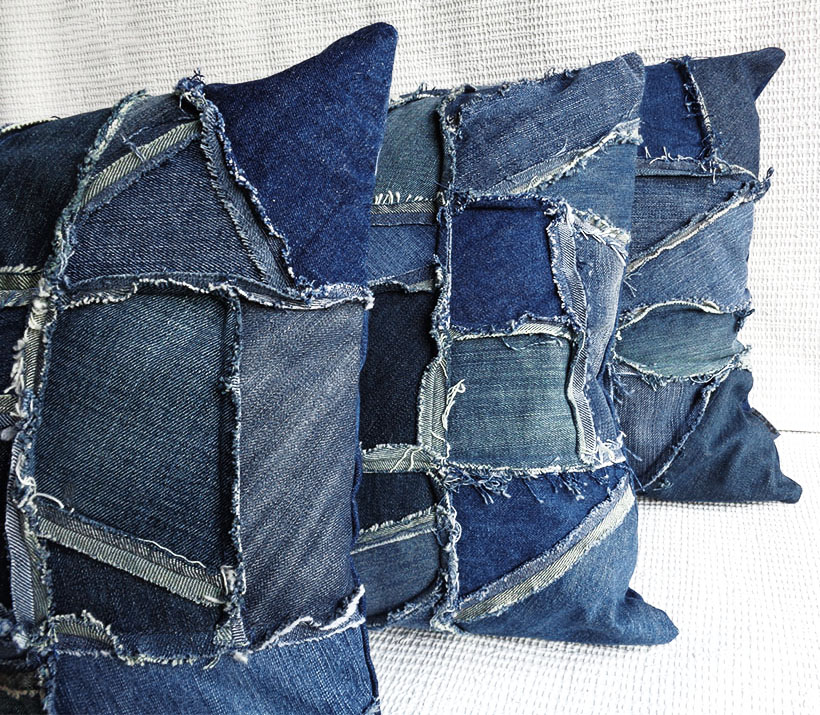
As well as with other piecing techniques (like the crazy patchwork or keeping original seams) this reverse patchwork is used to build a large piece (canvas) from small pieces to be then used with a pattern of almost any shape and size.

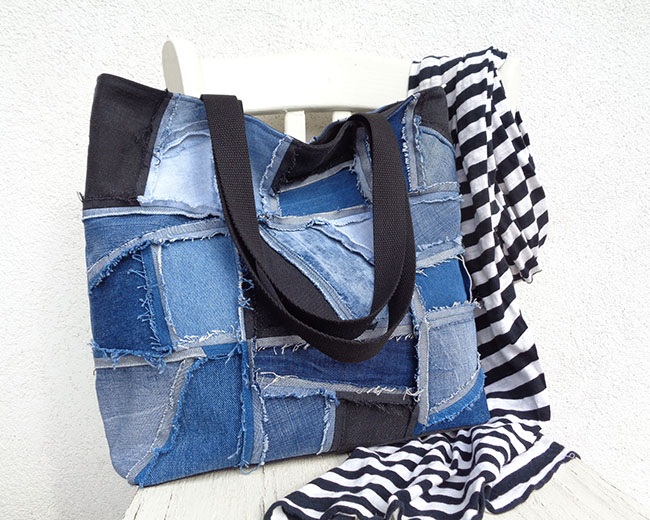
Bags and purses, pillows and puffs – many projects can be made using the reverse patchwork technique and it always looks great and unusual. And don’t forget, using up leftovers and sewing from old jeans in general is an awesome way to be eco-friendly! Read more about how important it is to reuse jeans in my 10 reasons WHY.

Big into small
To create this reverse patchwork first thing to do is to split the large pattern of whatever we are making into smaller and preferably equal pieces. For instance, here I am making a pillow which is 14×14″ (36x36cm). I can split it into 4 equal parts, each 7×7″ (18x18cm). Or I can split it into 9 equal parts, each 4 3/4″ x 4 3/4″ (12x12cm). If the shape you are making is not a square, your pieces could be rectangular or not equal. It’s just that with equal pieces the whole process goes faster and less confusing.

If you are making a footstool or a floor cushion, the top circle can be split into equal “pizza slice” shapes.
You don’t need to cut up the paper pattern you have, just calculate and make a small piece of paper to use with the next step. It will be our paper guide. And in some cases, there is even no large paper pattern (like for my cushion I am making here), I only know the size to aim for.
How large should the small parts be? It depends on how big are the scraps you are going to use and how you would like the item to look. You will need to fill each part with denim scraps, the smaller the scraps, the “raggier” the item looks, but it takes longer to make. Just as a recommendation, I split into parts of appx 5″-7″ and I find it easy to work with and I like how the items look with it.
Considering seam allowances
So, nothing complicated here. But just one thing to pay attention to – is the seam allowances. When you are splitting a large pattern into smaller parts, make sure you do the calculations measuring the original piece WITHOUT seam allowances. But once you’ve split and made the pieces to be sewn together – seam allowances always MUST BE ADDED at all times. This is to make sure that from small pieces you end up with a large piece of the original size.
Sewing up the small parts
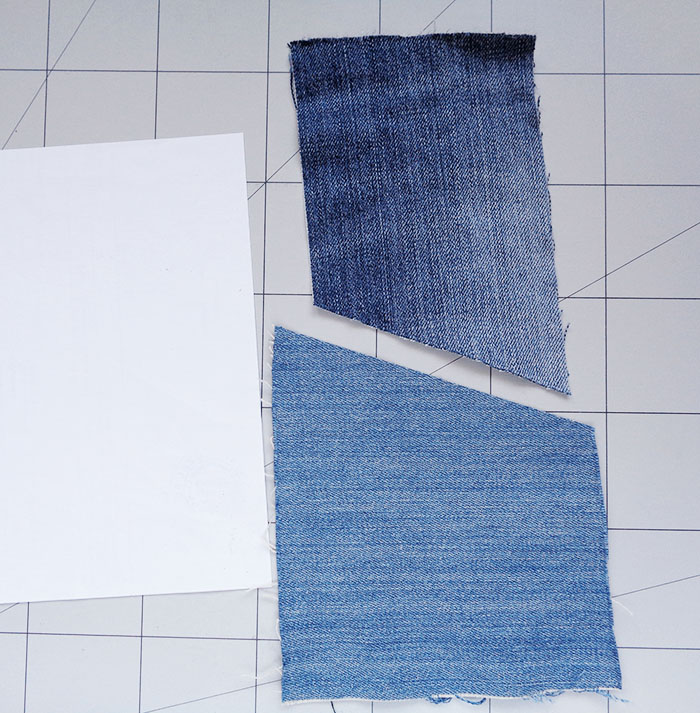
Having that one piece of paper (the small part, our guide) choose which scraps of denim might be good to fill it up. Iron all pieces. It does involve a lot of ironing with this piecing technique.

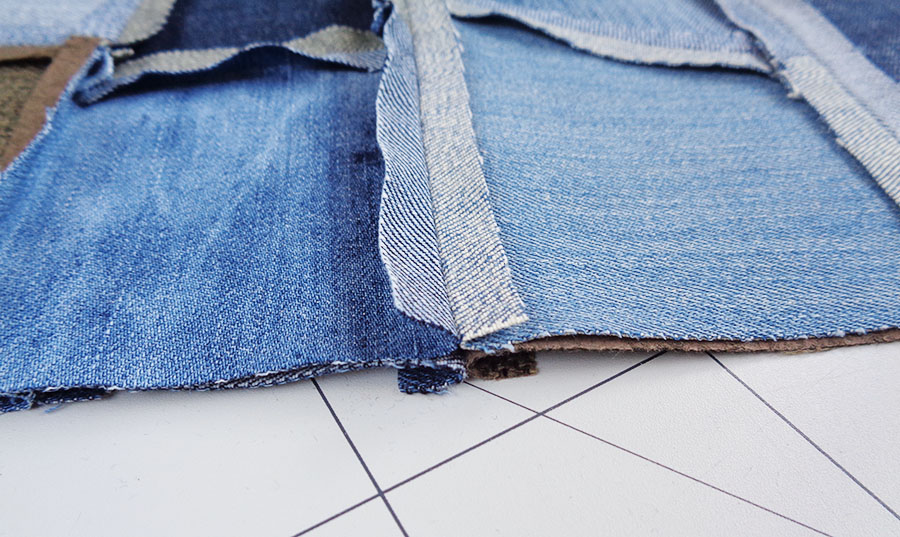
Start with your smaller pieces. Make sure they have two straight edges to be sewn together. Sew them WRONG SIDES FACING. I strongly recommend to sew twice at each seam to make your item stronger, especially if it’s a handbag or a footstool. Try your best to sew the second line exactly matching the first one to enable the seams to be flat open after.
Sew the two pieces, open and flatten your seam with fingers or iron it. Then plan for your next piece to be added. Again, trim your pieces to make sure you have two straight edges to be sewn together.
Trim one edge of the next piece and add it to the trimmed edge of the previous pieces. Wrong sides facing, sew and open flat just like before.

Iron this cute little creation. Lay the paper guide on top of it and cut around adding a seam allowance.

One small part is done. Repeat everything to make the rest of the small parts needed. For instance for this pillow case I need 4 parts.

Some notes
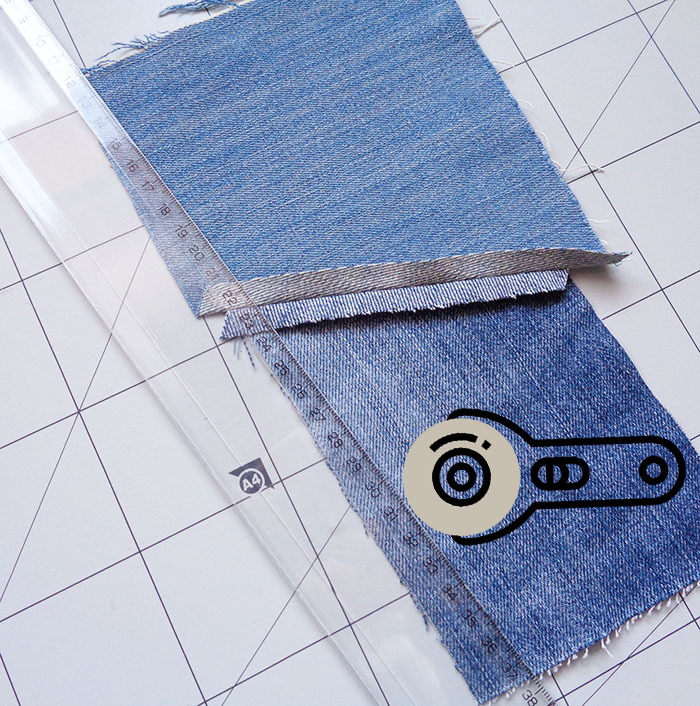
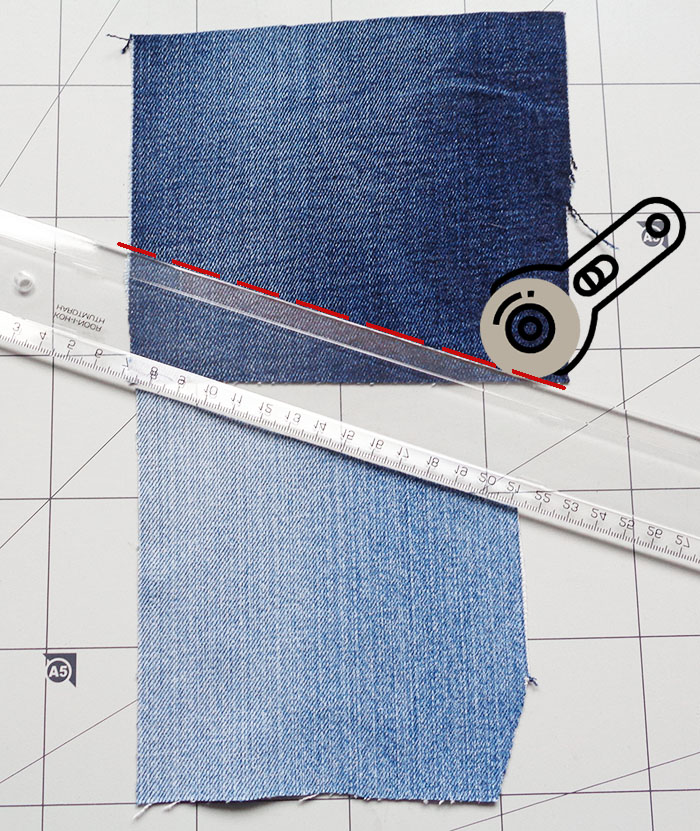
The small pieces can be straight here, but having them a bit messy makes it quite interesting, so I prefer my pieces to be cut slightly diagonal. Sewing diagonals however could be confusing at first.
Just an example how I plan and trim my diagonal seams. Cut one piece diagonally as you wish, lay in front of you. Lay the second piece above. Lay your ruler onto the upper piece level with the edge of the lower (pre-cut) piece. Now you can cut and sew up and you will end up with one joined piece.
For one small part I am usually using 2-4 pieces of fabric, showing the easiest and the basic layout to give you an idea of how it works. Once you understand it, you can go as crazy as you wish here.
At any point keep referring to the paper guide we’ve made to make sure it fits and there’s space for the seam allowances to be added.
It’s good also to add other fabrics for more fun:
Small into big
Play with all the parts to lay them in the order you like the most. Sew them together in pairs first. Then those pairs – into the larger shape, just like with classical patchwork but with wrong sides facing and the seams reversed.
To help yourself to handle larger shapes, level up and pin together the straight seams of the pairs first. And always pay attention to all of the seams – keep them open.
Iron the whole thing. Trim off sides if anything came a bit un-straight. And your canvas is ready to be sewn into whatever project you are making.

I have added a matching backing to my pillow (some ideas about pillow backing made from old jeans is here >>>). Pull off some threads that are easily coming off to save your washing machine filter 😉 Now it’s ready for a wash.

When sewing this canvas into a bag or a pillow it is possible to still have raw seams exposed at the sides. So, it’s up to you if you wish to make it with reverse seams all way around, but in some cases (like for instance a handbag with zipper and lining) it is not always possible. So just think ahead which is best for your project.
Finishing off the fray
Fraying denim can be quite a long job, really, it depends how much “ragginess” you wish it to have. With this reverse patchwork technique I think it’s enough just to doss it in a washing machine together with your usual washing. Yes, there will be some loose threads, but not a lot. Once you get it out of the washing machine, it might be good to rub the open seams against each other for a bit of more fray. It’s good to do while wet. Then dry the item. It will probably call for some ironing again. Iron with steam and don’t press too hard on the seams just to keep them un-tidy. Remove or cut any threads which you think are too much.
Another way to fray the edges without washing the whole thing is to wet it just a little and rub all the seams against each other. Like in this video:
After roughing it all up, you can iron the whole thing, trying to keep the seams open. Then you can lay onto it a pattern of whatever item you are making, cut around and continue sewing your project!

Have you enjoyed this tutorial? Was it useful for you? If you are thinking how to thank me, you can buy me a coffee. This is how I keep this website adds-free!

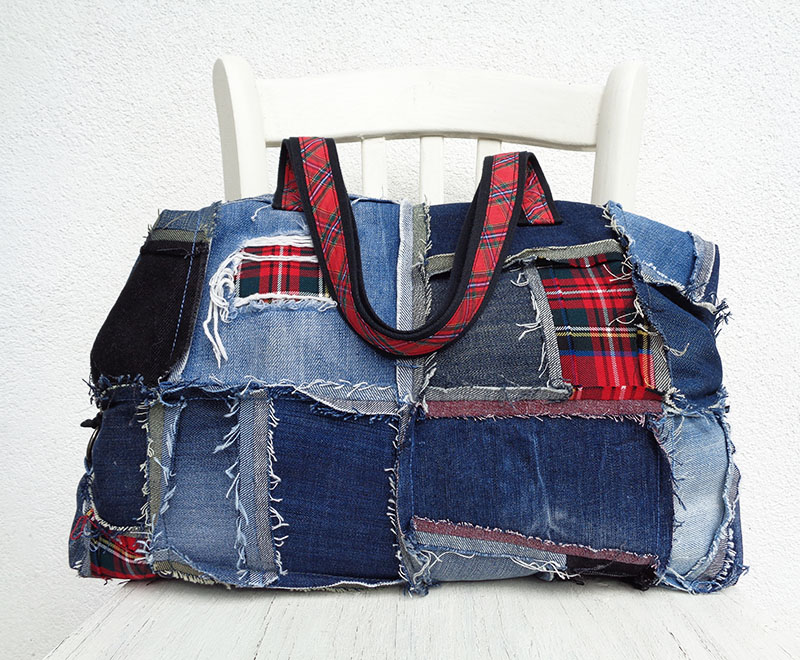
Using this reverse patchwork technique I have made a a duffle bag, a slouchy bag, a make up case, a footstool and lots of cushions.

Have you tried making something with this raggy reverse patchwork technique? Show it off on Instagram and tag me @makeitindenim so that I don’t miss it. I think this reverse patchwork technique is great to use up some scraps of denim left from other denim projects.

Love these ideas for scraps. The look is great. I have been wondering what to do with my scraps. Thank you.
I am so happy that you’ve found it useful! Have fun!
Thank you for sharing this technique! I love it.
I am glad it was helpful, Sally!