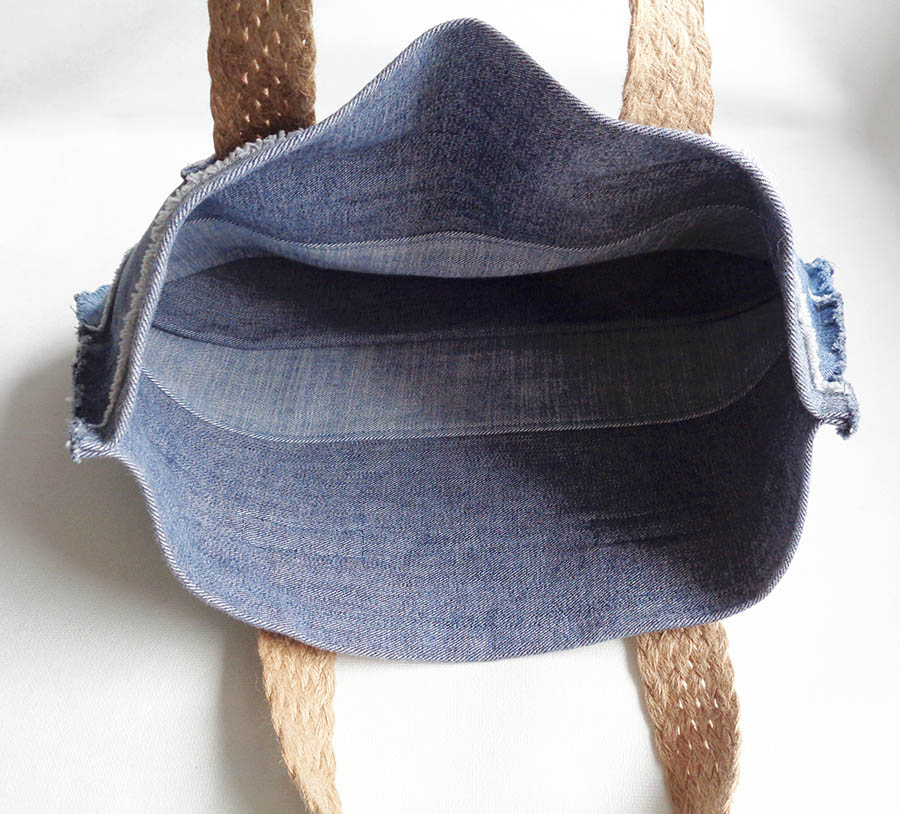
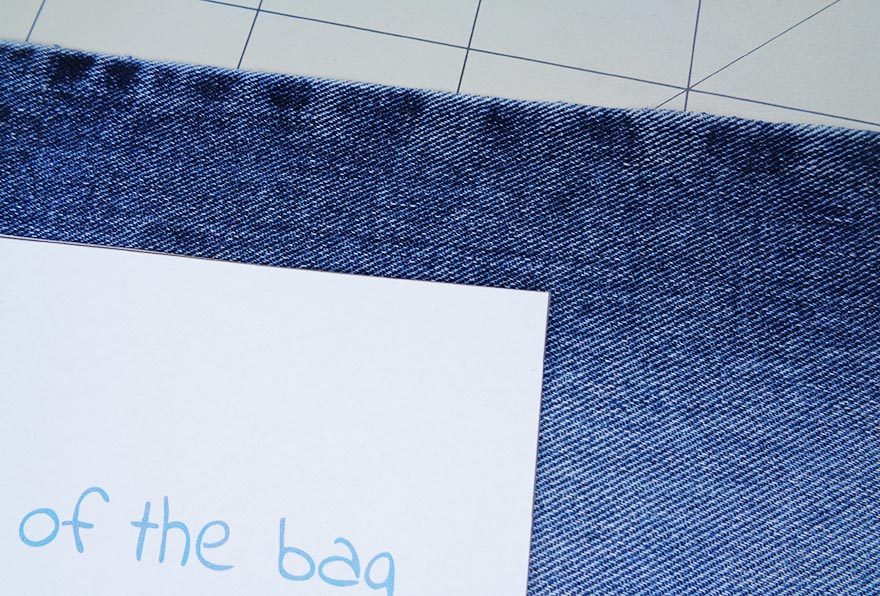
No lining needed
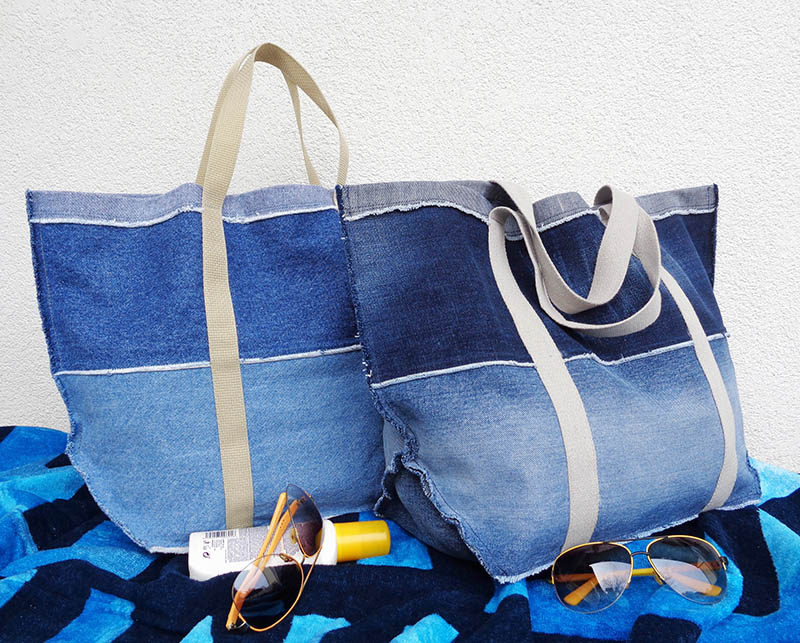
This denim tote bag is really fun to make! Denim fabric works best for this Reverse Seams Bag due to it’s great fraying possibilities.
And as you know denim is “all time favourite”, you will never go wrong with a denim tote bag!
Also recycling old jeans helps our Mother Nature in a very big way!
There is a bit of magic in this reverse seams bag: no lining needed because there is not a single raw seam on the inside! This makes it so easy to make for any beginner level!
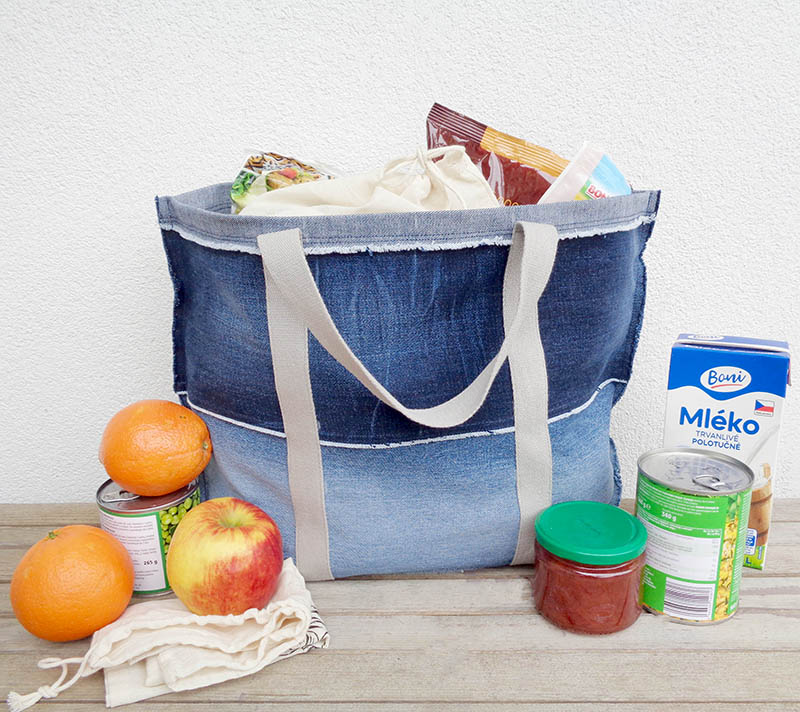
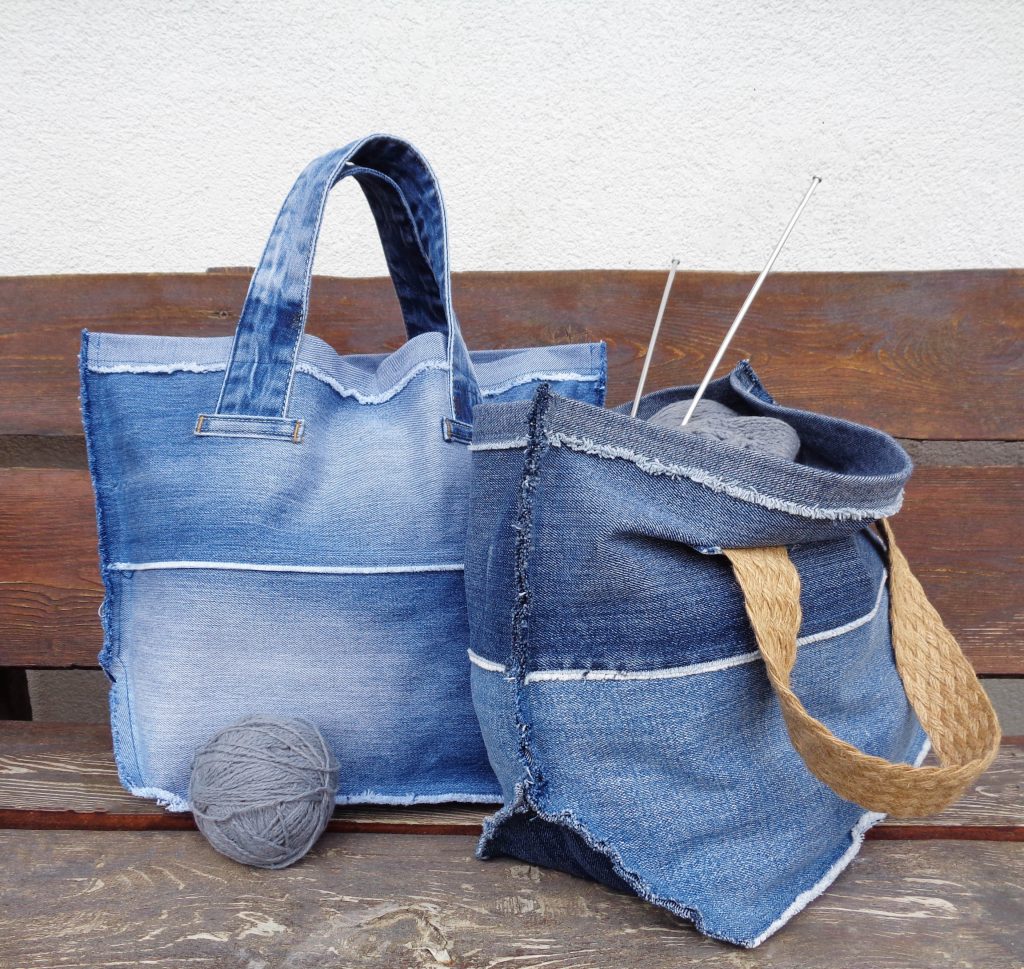
With this free tutorial you can sew your own large denim tote bag to use as a shopper or as a beach bag. There are other sizes and other handle options can be made using this tutorial. Pockets can be added too. For a full tutorial with many more details check the end of this page.
Preparing to make denim tote bag
For this large bag you’d need some large and wide jeans. I’d start with printing the pattern, it will be much easier to see if the pattern pieces fit into the jeans you have. But just as an idea your two largest pieces are 21x53cm (8″x21″).
Here is the free download:
Download the file and print it twice. Make sure the printer settings are on A4 and “Actual size” and all other boxes concerning resizing are not ticked.
Lay the pieces onto the jeans to see where it can fit. Remember there will be seam allowances added.
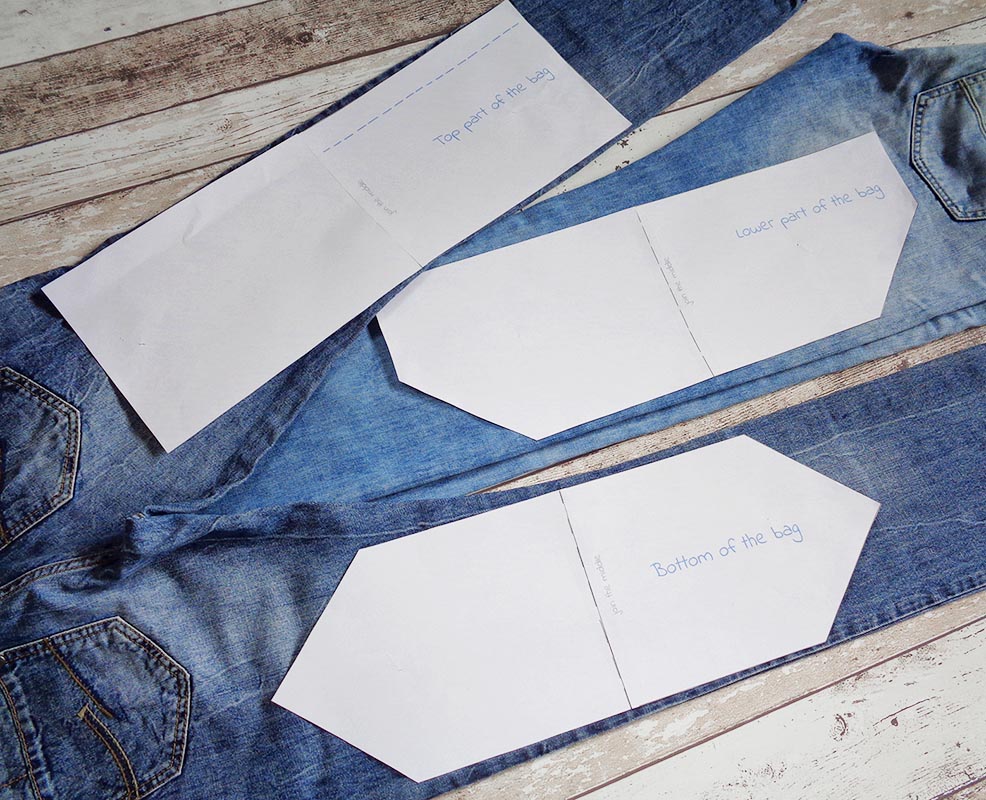
Plan it so that there is two strips for each side of the bag (4 strips total) plus one strip for the bottom.
Cut it right!
Cut the jeans along all the vertical seams and iron. Once you have decided which pattern piece goes where, pin them in place ready for cutting.
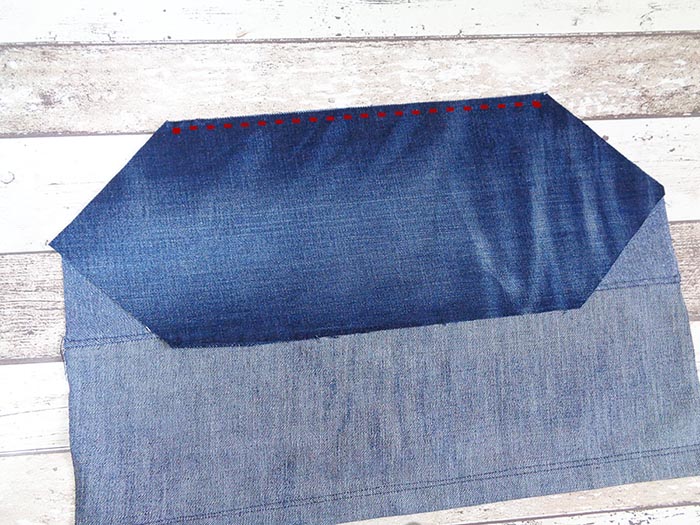
Attention!!! As this bag uses reverse seams as a décor element it is important to cut the denim in the right way. We are aiming here to get the pretty fray edges. The important matter is the grain lines of the fabric. The horizontal cut lines of our bag must be aligned with the grain of denim!
Cut out all the pieces with appx 1cm (~1/2”) seam allowance.

Sewing and fraying the top
Start working with the upper pieces. Fold the top over appx 2,5-3cm (~1”) and iron. Pin if needed and stitch along with two straight stitches, this is just for extra security, because this edge will be frayed. You can use a decorative stitch or a zigzag here.
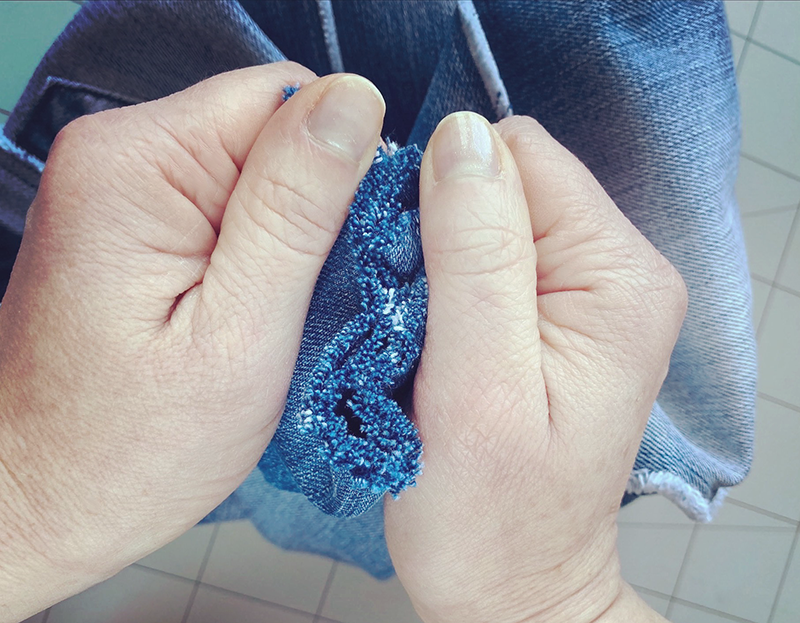
Pull out some threads. If the cutting was accurate, you will get a very nice straight line here. If the cutting was not so perfect, master the fray by pulling individual threads and stopping before they fully fall out. Our aim is to make the fray visually straight. Pull and stop when you see it’s enough. Cut the excess of threads. You should have a visually straight line.

Cut off the loose threads. Take a wet cloth and rub harshly forward and backwards along this fray edge and discover that it becomes prettier and the threads are “locking in” and won’t fall out much more. The fray becomes even better once the finished bag is washed in a washing machine.
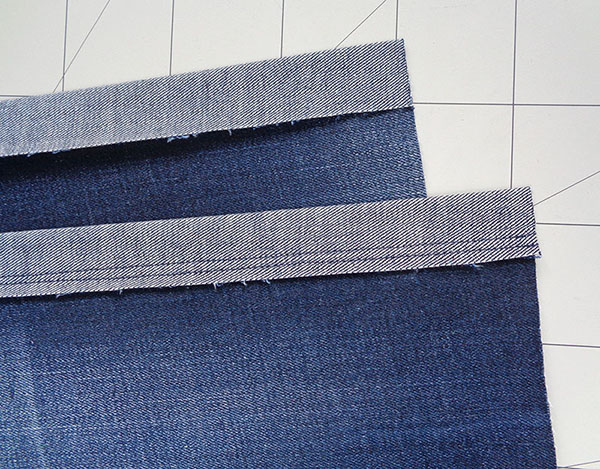
Sewing and fraying the other strips
To add the next strip align the edges to be sewn. The pieces must be wrong sides together!
Pin and stitch along. Unfold and iron in such manner that the flap is looking towards the bottom. Try to get the very flat body and a good flat seam in the middle to top-stitch it.
Topstitch this flap and fray the edge as described above.
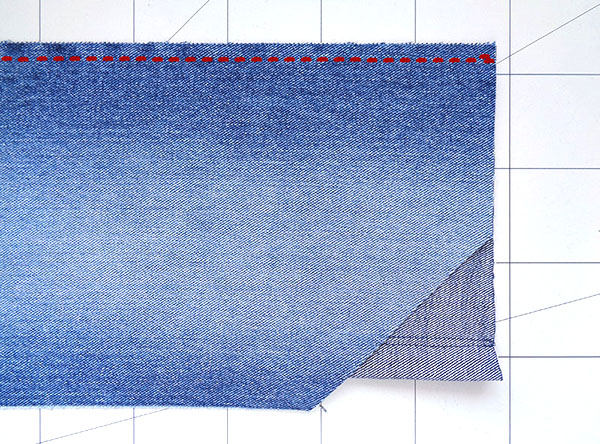
Add the bottom to your denim tote bag
Add the bottom piece. Also – wrong sides together!
Pin and stitch with a 1cm (~1/2”) seam allowance. At the start and finish of the stitching leave a gap of the same seam allowances. Sew twice for strength!
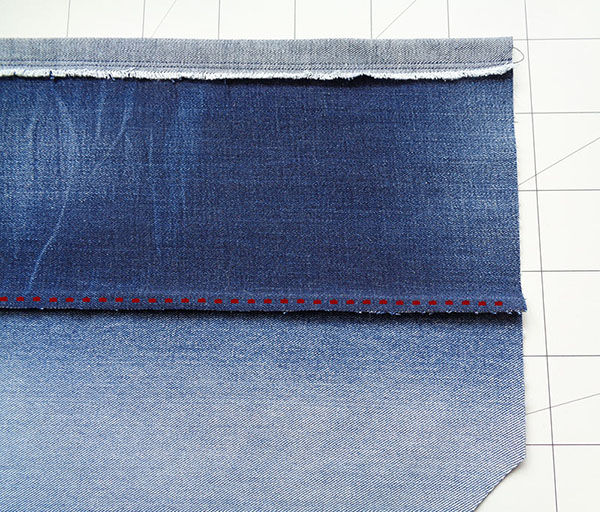
No need to topstitch here. Just fray. Sometimes it is faster and easier to make a proper roughed frayed edge by scrunching and rubbing it with your hands 😉
Repeat everything for the other half of the bag and add the bottom.
Adding the handle strap for our denim tote bag
For this large bag we will make a strap which goes all around the body. The weight will be distributed evenly and the handles will never rip the denim. This handles are so strong that they even hold a good few fire woods in the DIY log carrier>>>. You will need minimum 2,5m (2,75yds) of webbing, more if you wish for a handle drop to be larger than 13cm (5”).
This is how the handle strap will be laid:
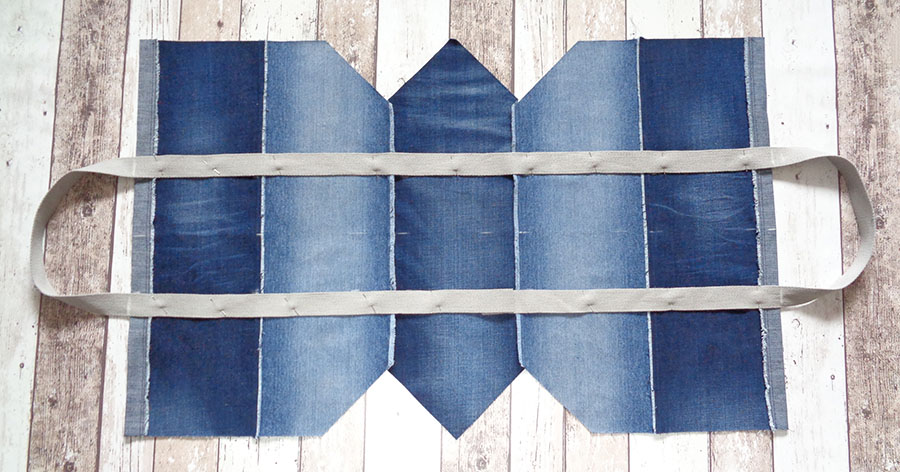
To make this handle strap, first fold the body in half lengthwise and place a few marks along the middle fold to mark the centre. Unfold. The distance between the straps should be appx 15cm (6”). Using a ruler, from the centre to the left and right mark half of the chosen distance.
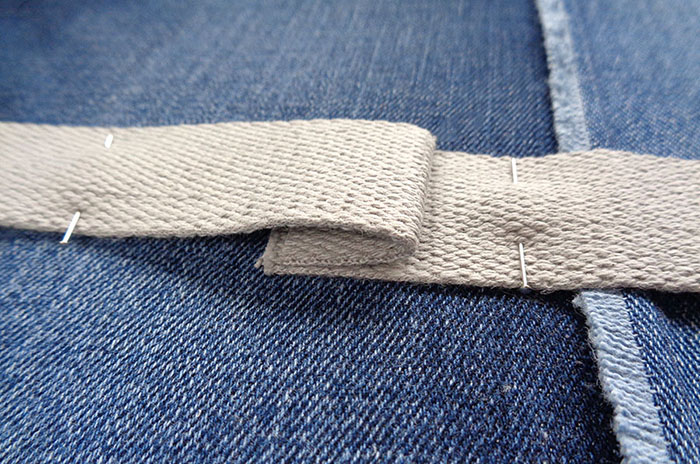
Don’t cut the webbing from a roll until you make the full ellipse. Start laying the strap on the outside of your marks. Pin the strap as you go.
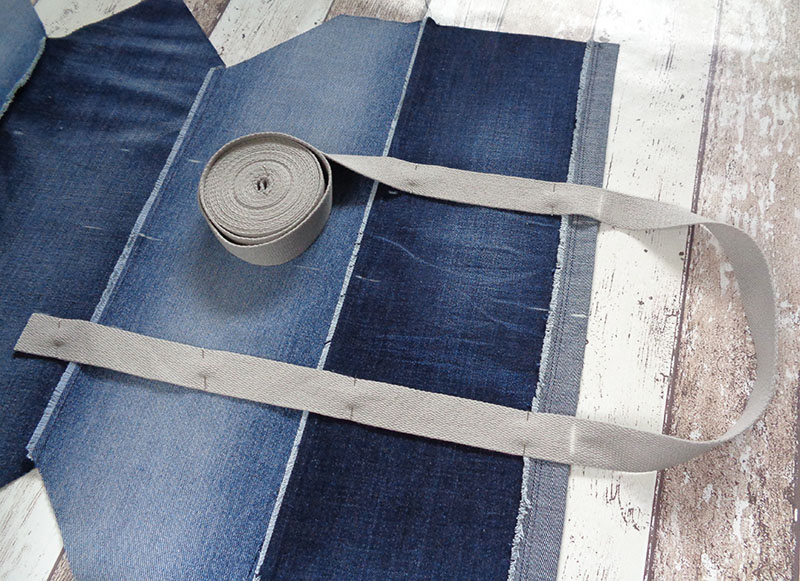
When you get to the handle at the top of the bag – decide how long you need it and measure before pinning. This measurement will be used to make the other handle exactly the same ;). As I am not using the bag over my shoulder, I make the handle quite short – 33-38cm (13″-15”).
Make the full ellipse, and when you get back to the start, cut the webbing off overlapping 5cm (2″). Fold over and secure it with clips. If you don’t have clips, and pins are no help here, pin just near the overfold, and try to master it just as it will be getting under the machine foot.
Sew the handle strap on
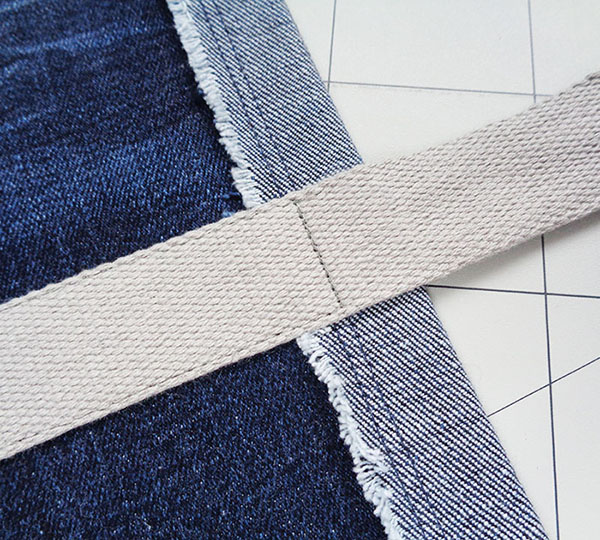
Sew all the way along the strap at it’s both edges. Start anywhere. I usually start somewhere in the middle. When you reach the fold, simply go over it. Once you have finished with the whole strap, you can add a line of stitching across the overfold too, to make it flatter and more secure.
While stitching one edge when you reach the start of a handle, simply go perpendicular to the webbing. For strength you can go back and forward at this spot. After that continue with the other edge of the strap.
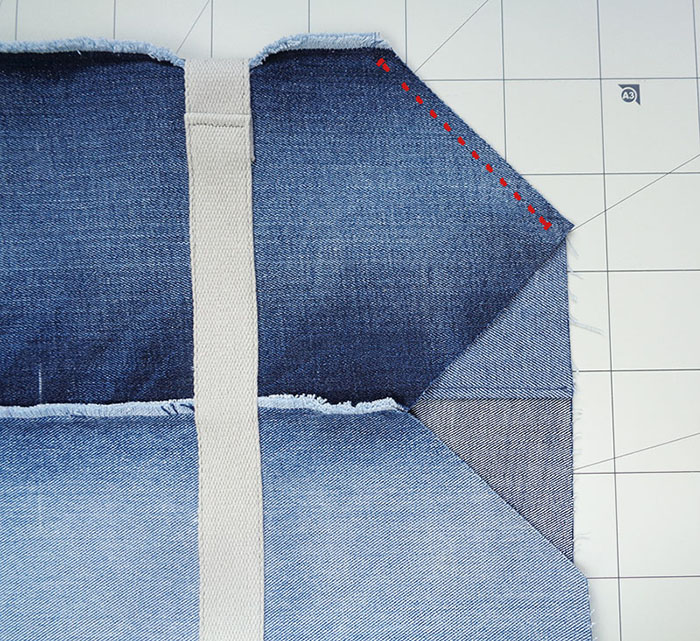
Sewing up the corners and the sides
Start with the corners of the bottom panel. Bring together one side of the bottom corner with related body panel wrong sides together, level it flat, pin and then sew twice with a seam allowance.
Start and finish that line without reaching the very edges! This will help to fold and sew the other half correctly.
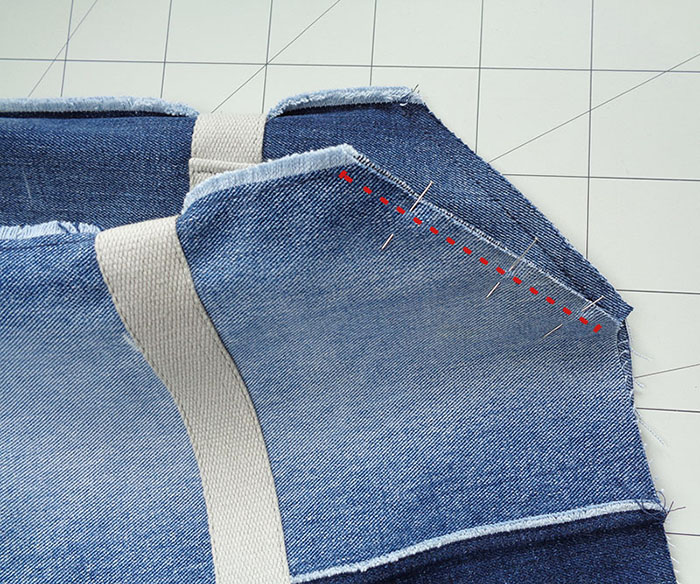
Then bring the other side of the bottom’s triangle to the other body panel and sew in the same manner, leaving some spaces at both ends.
To sew up the sides, align the two body panels together, wrong sides facing. Pin and stitch along.
Start right at the top, make sure to go back and forward to secure it. But at the very edge at the bottom leave a gap again, meet the previous stitch only.
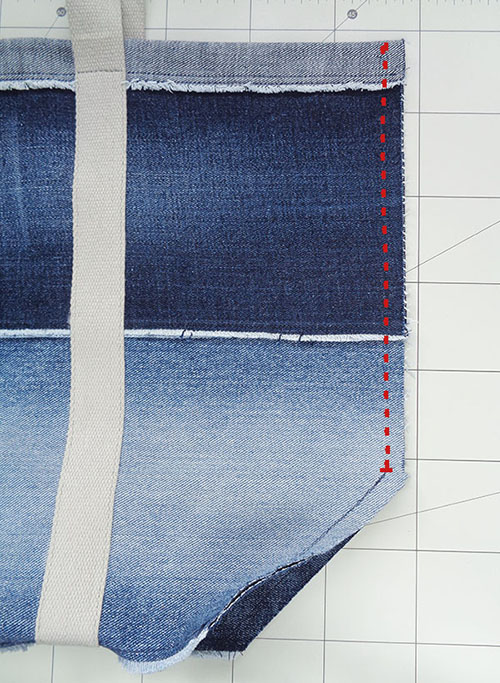
Stitch the side twice. And repeat everything for the other side.
So the denim tote bag is now ready as you can see 🙂 It just need’s some more rubbing and roughing up. Pulling the threads out at the side of the bag is different to what we have done previously. It doesn’t come so easy. Seam ripper helps a lot here! Pull out as much as you can. Then cut off the excess, then wet that edge and rub with your hands.
And when it comes to the diagonal corners of the bag — no problem at all! No need to pull any threads, just wet and rub! Iron and admire!
Let me know how you get on with this bag 🙂 Your work can be placed in the Student’s Gallery for the world to see!
To buy a full tutorial with three sizes:

This is a much more detailed tutorial to make denim tote bag. There are three sizes included: large Market bag, small Project bag and medium Casual bag. You will also learn how to resize the pattern, how to insert a pocket, how to get great results fraying denim and how to make other handles.


Some more fun to make eco-friendly denim projects can be found here >>>
I love this, about to have a go 🙂 thank you for sharing.
Thank you, Gabby! Have fun!