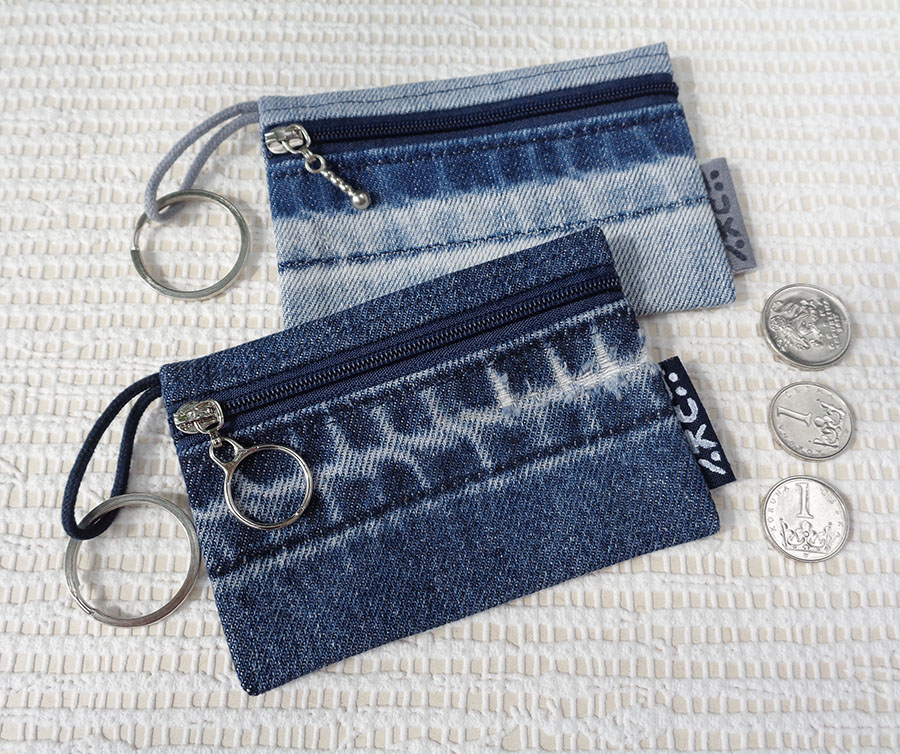
Handy zipper pouch for all sorts. As a change purse, key ring, cards wallet or a stash pouch

This DIY zipper pouch makes a cool little gift for men and women. Not only it is handy, but also eco-friendly, as you can use some old jeans for this, or other fabric scraps.

I use mine as a car key ring keeping my driving license, car docs and petrol card in it, so whenever i go by car – all it’s docs are with me – simply can’t forget it at home!
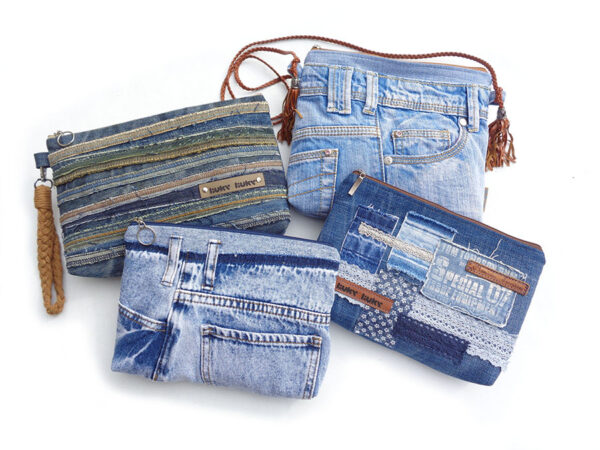
Or, in exactly the same manner, a make up bag can be sewn. It is simply a larger size and lining can be added. See at the end for more details.
So here we have an easy sewing project, suitable for beginners. Enjoy the free step by step tutorial how to make DIY zipper pouch.
What you’ll need for DIY zipper pouch
When choosing fabric for this project, look at the thickness — medium weight is the best. Thin fabric will make the pouch floppy and thick denim will make it rather bulky. Do not use stretchy denim – as this will cause stretched corners.
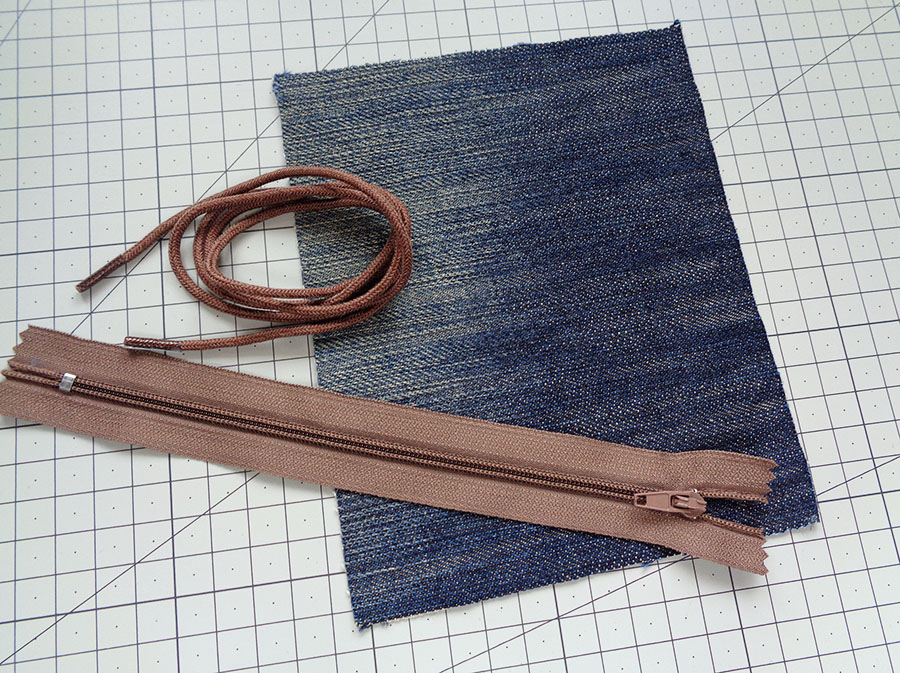
Cut a piece of denim 16x13cm (6 1/4″ x 5″) (the seam allowance is included). Make sure you follow the grain (texture) of the denim.
Find a zipper – minimum of 18cm. The longer – the better, especially if you are a beginner, longer zipper will give you more freedom while sewing.
A piece of string 12cm, it can be a shoelace 😉 You can skip the string and then you will have a coin purse or a stash pouch, but you will not be able to use it as a key ring.
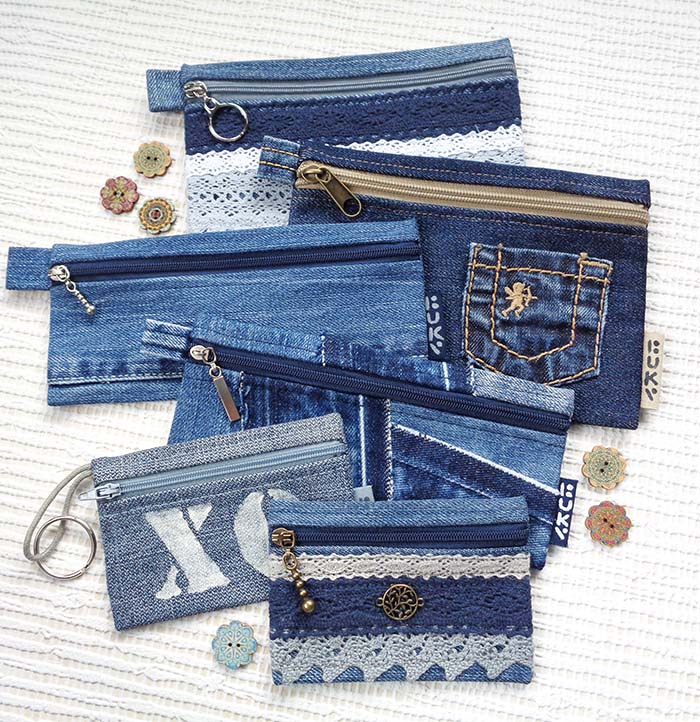
Add décor to your zipper pouch
If you are adding any design onto the pouch, sew the décor onto the pre-cut rectangle first and only then proceed with the pouch. The whole décor must fit no lower than 6cm down from top edge of the rectangle and don’t forget to keep the very top free too for the zipper to be sewn.

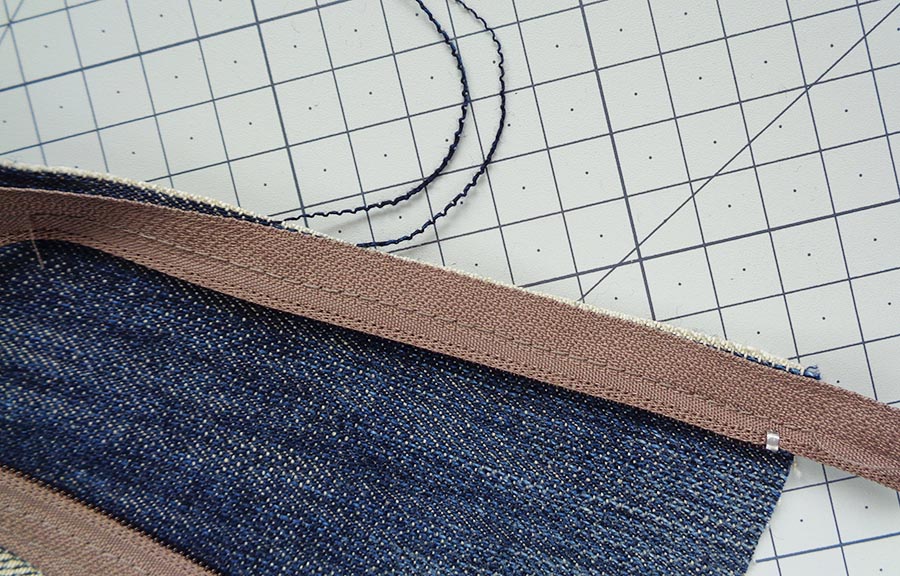
How to sew the zipper
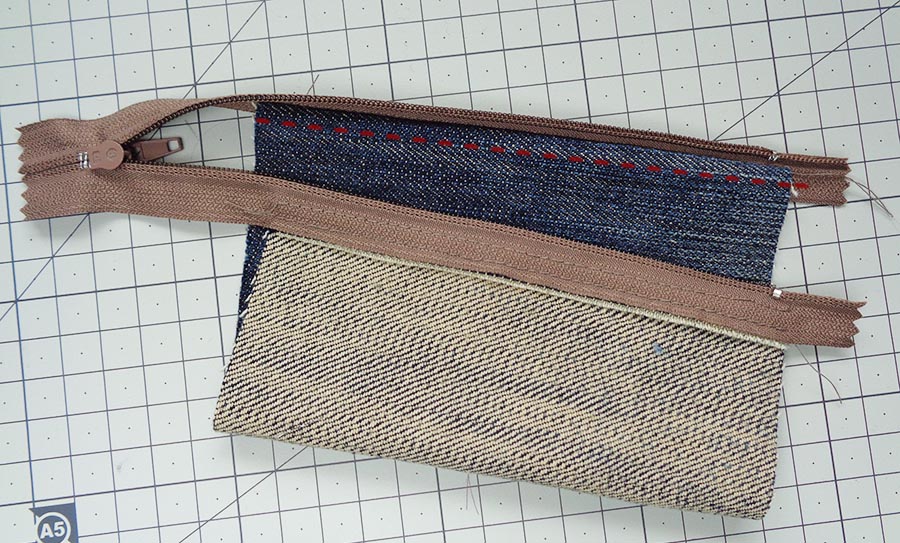
Place the zipper in the position as on the picture, faces together, align with the top (narrow) edge of the denim. Make sure you have some end hanging on your right, but if your zipper is longer than mine, you can have both ends hanging.
Stitch along.

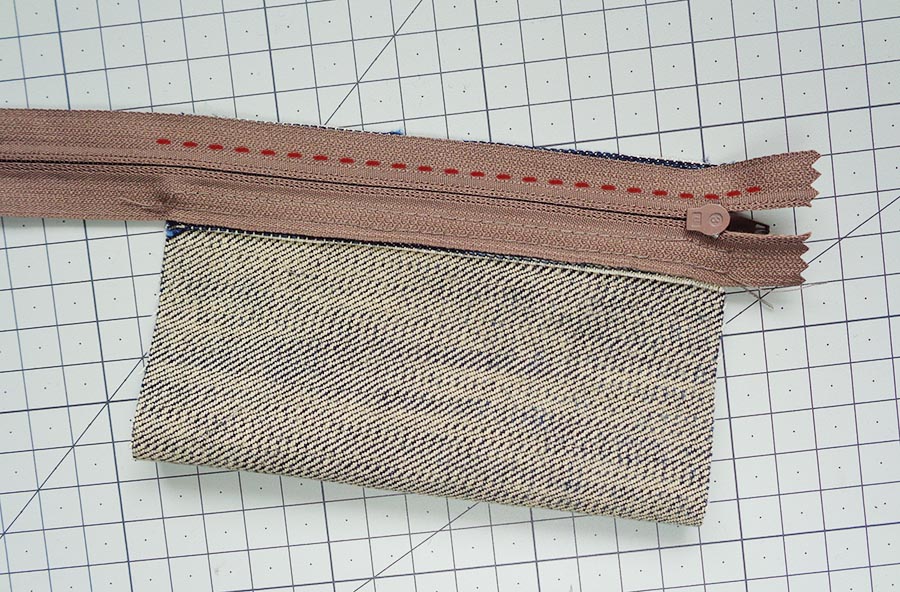
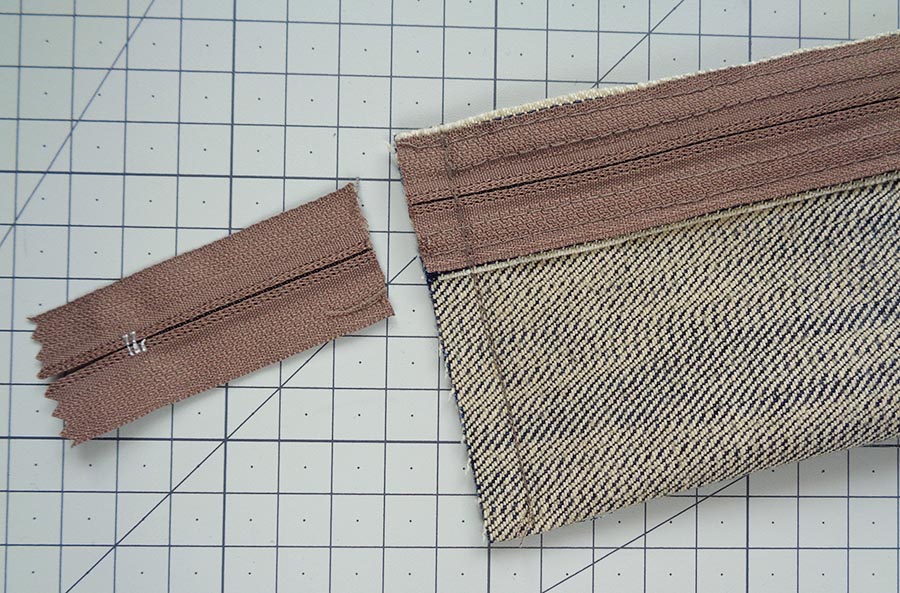
Once stitched, fold the zipper over to the right side, pull away from denim and press flat, creating a neat finish. Top stitch it in a nice straight line at some distance. This will secure the fabric and zipper in place.

Zip the zipper up, lay it in front of you and fold the bottom edge over the zipper. Align the sides.

Flip over to have the zipper in front of you and stitch the other half of the zipper in place. Make sure the sides of the pouch are level.
Repeat the top-stitching as for the first half of the zipper.
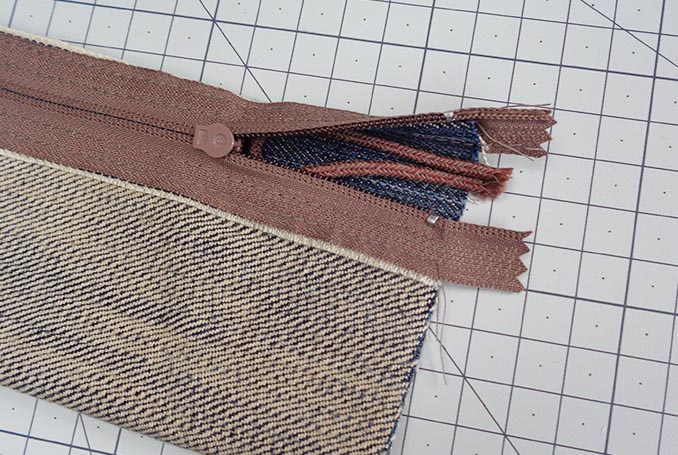
You should now have a tube like this.

How to sew up sides
Turn inside out. Flatten the tube positioning the zipper at the top, but about 2-3mm lower. This is important to avoid bulk. The zipper head should be on your right.

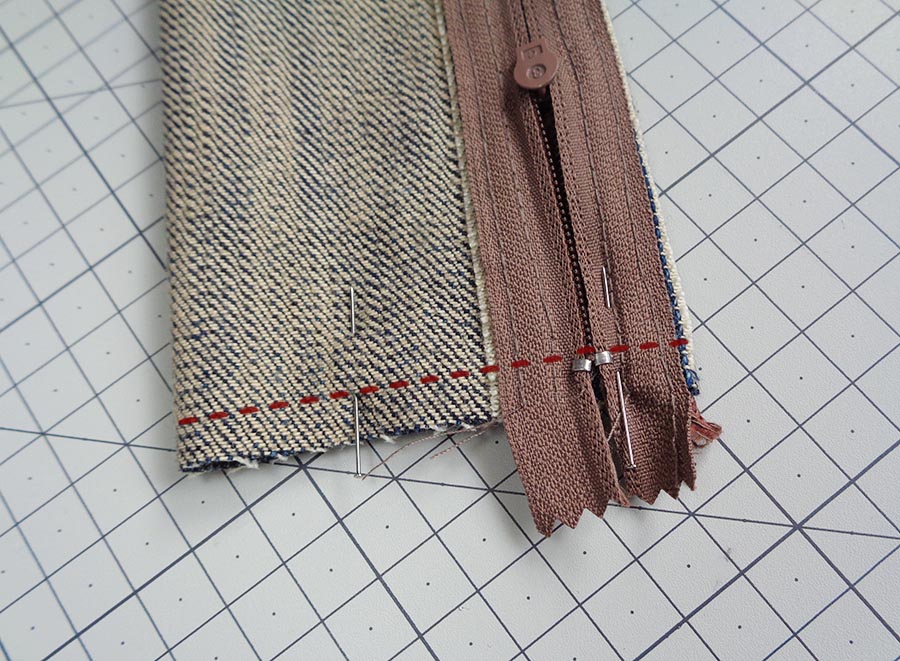
Stitch up the left side, leaving 1cm seam allowance. Cut the zipper excess off.
For the right side, unzip the zipper slightly. Fold the string in half.

Place the string into the pouch, aiming to have it right at the top of the fold.
Pin or hold in place and stitch the same as the other side.


Turn out to the right side. Poke the sides and the corners out carefully with a screwdriver or something like this.

You will notice that the pouch is not keeping it’s flat shape. All you need to do is to iron it! Place a thin cloth over the pouch to iron to avoid streaks and zipper melting.

Done! I hope that was easy enough and you are now excited to make many more, adding different designs 😉


Using the same method, you can make all sorts of flat pouches. Makeup bags, pencil cases, etc. Full tutorial with options for sizes, linings and décor can be purchased here >>>.
A pencil case can be made in the same way. The size of the rectangle is 21x17cm (8 1/4″ x 6 3/4″). Slight variation of this measurements is ok. The zipper must go to the longer side!

You can make a larger pouch for make up. The denim rectangle will be appx 19x25cm (7,5″x10″) and the zipper is attached to the shorter side:

Have you enjoyed this free sewing tutorial? Comment below or buy me a coffee to lift my spirits and post more free stuff for you all:
Have you tried to make a DIY zipper pouch? Share it with me and I will be happy to add it to the Student’s gallery here >>>
More recycling old jeans projects are here >>>
Da hast Du eine tolle Tasche genäht. Ich würde sie für die immer noch benötigten Masken verwenden. Mit Karabiner dran überall einsetzbar.
Vielen Dank für diese ausführliche Anleitung.
LG Ute
Thank you for the comment! I am glad it came useful!! Enjoy sewing!
This is brilliant! I’d never figured out how to put a zip in the side of a pouch. Thanks to your tutorial, I’ve finally done it! Thank you!
Thank you for the comment! I am very happy that you have found it useful 🙂 Happy sewing! Kat
Thank you for sharing. Great project for my students to do during their textiles craft lessons.
Easy instructions for them to follow
Hi! I am happy if this will be useful! Send me some pics when your class is done 🙂 I might put it into Student’s Gallery to show the world!
I’m anxious to try making some little bags and pencil bags. I like that the zipper is on the side, rather than the top. Your instructions are so easy to follow, I don’t think I’ll have any problem! Thank you for giving us so many ideas. So creative you are!! 😉
Thank you for your nice words! You’ve made my day! Happy sewing!
Love it, love it, love it
Thank you, thank you, thank you 🙂
My Dad passed away. He always had a seam sewn down the front of his Levi’s as a crease. I kept a pair and have been searching for the right project in order to give each of my siblings and the grandchildren something to remember him by. This is it! Thank you so much!
This is a lovely idea! He will stay in your hearts and your hands.
I absolutely love this idea. Repurposed jeans is always so special. Thank you for sharing.
I am happy that you find it useful! Thank you!
love these..thanks for sharing the instructions and pictures..Will give them a go soon.thank you.
Thank you for the comment! Would be nice to see them 🙂
una súper idea para hacer con mis alumnos en clases de costura. !Muchísimas gracias por las explicaciones paso a paso, facilita nuestro trabajo enormemente!!!
Happy sewing!
I finally understand how to make a zipper bag! Thank you for your very clear instructions. I can’t wait to use my stash of jeans for small and larger bags. 😊
And the stash of jeans becomes a treasure… :)) Have fun!
Hallo, auch ich finde die Idee toll. Ich habe schon einiges aus Jeans genäht. Dieses Täschchen finde ich sehr schön, praktisch und für viele Dinge nutzbar.
Dankeschön 😉, ich bleibe neugierig.
Thank you for you comment, Beate! I am glad you like it 🙂
جميل ومفيد ارجو زيادة المعرفة لمثل هذه الأشياء الجميله وشكرا لكم
Thank you! I am glad you like it!