Cute and easy DIY makeup bag tutorial
Zipper pouches are an absolute win-win when it comes to a handmade gift for a lady. Mother or grandma, sister or friend, very young and not very young – any female adores little zipped cases to stash her precious items, such as cosmetics, jewellery, memories and many more.

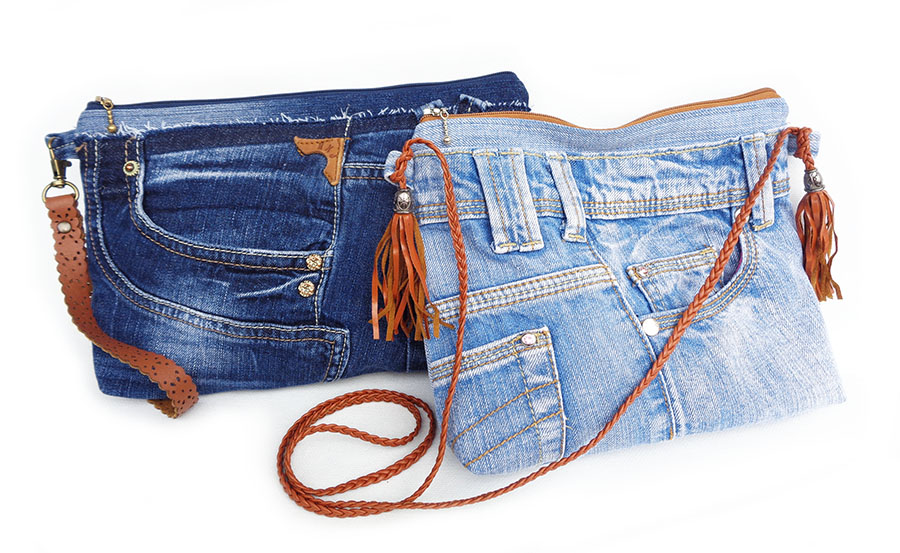
In this free DIY makeup bag tutorial I would love to show you how to make a lovely zipped pouch from old jeans. Using the free printable sewing pattern provided here you surely can make this makeup bag from any fabric and add any design, such as lace, stencil or patchwork. But I am including here step by step instructions of how to use the front pockets of some old jeans to achieve the awesome denim look.
You can also make a similar zipper pouch as a mini bag or a wristlet. A very detailed tutorial and printable pattern is here >>>
Print the pattern
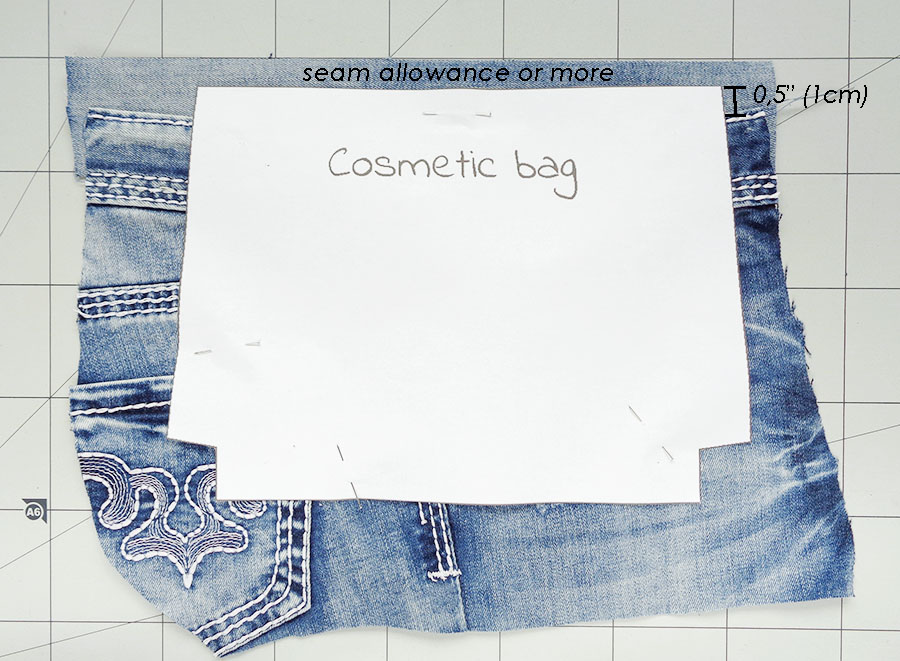
Best is to print and cut out the paper pattern before any further work. Having the pattern on hand will give you a good understanding of what size of jeans to choose and how to lay it on to get the best result. Free makeup bag pattern to print is here:
Print and cut out this pattern. It should be 9″ (23cm) across the top. If it differs slightly – no worries. If it differs a lot, try to change your printer setting to “Actual size” or 100%. However, this pattern can be resized to make a smaller or larger pouch.
Choosing the jeans
For this DIY makeup bag I recommend using smaller jeans where the waist band is not too wide and the front pockets are not too large. All the beauty of the jeans’ pockets must fit within the paper pattern.
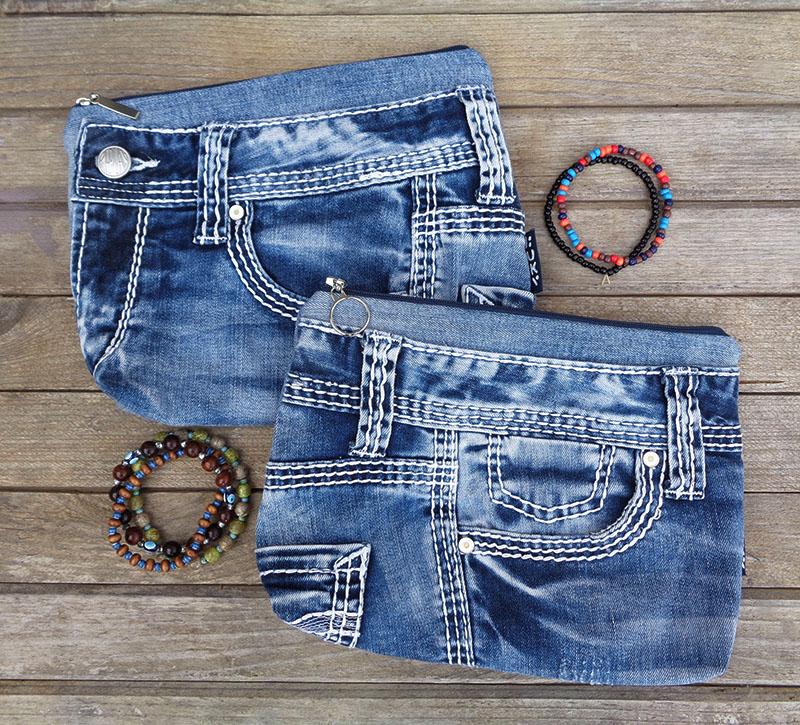
It is possible to make two pouches from one pair of jeans. I will show the layout for both.

One pouch will be made from the left side (as on the pic above) with the tiny pocket. It is very easy and simple to cut and sew. And another pouch will be made from the right side with larger pocket and the button hole. It is much more complicated and I will show how to make it later on.
By the way, if those tiny front pockets seem yellow even after you’ve washed the jeans, check out this info on how to wash the jeans properly >>>
Cutting the jeans
Don’t be surprised, but in this DIY makeup bag tutorial we start with cutting the back of the makeup bag. Lay the paper pattern onto the jeans’ leg and cut off roughly at both sides. If you are making two pouches, do this for both legs. If you are a beginner, I’d recommend to make the easy version for now and use the left leg (as per picture above). This is just because for now you don’t know what you will be making from the other half of the jeans, so better not cut it up for now 😉 I’ve wrote a whole article about the importance of NOT CUTTING UP your jeans before you know what you are making, don’t cut yourself short >>>

If the jeans have very wide legs, the paper pattern might fit between the seams and this is cool. If the jeans’ legs are very narrow (like mine here), cut along in such manner to have the pretty seam in the middle. Open and iron the leg piece.

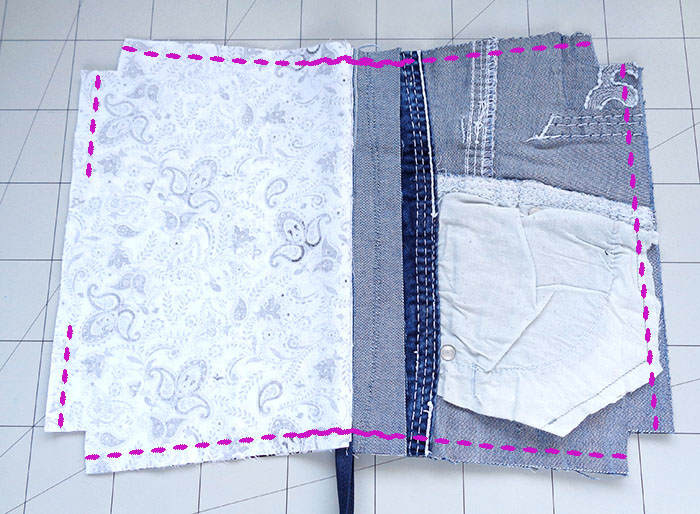
Pin the paper pattern onto the piece of denim. Try to align the top line of the pattern with grain lines of denim as much as possible. This will help with sewing and the makeup bag will look better when finished. Cut out adding seam allowances (those can be any, whatever is convenient for you, mine are 3/8″ (1cm)).
Cutting out the front

Cut along the inner seam (one of both) of the jeans’ front to be able to open flat the half you will work on.
Open it up, lay the pattern on to see how it could fit. Remember there will be a strip added at the top (to insert the zipper easily), so the pattern should be laid slightly higher than the waist band top.

Once you know the layout, cut further around in a rough manner just for easy handling. Remove the belt loops if they are too close to the sides-to-be and iron that rough piece. We are now working with the easier version only, the other option will be discussed later.
From the leftover jeans cut a piece of appx 11″x2,5″ (30x6cm) along the grain of the denim. Lay it under the top of the pre-cut front piece. Pin and sew along the top. If it gets tough (especially at the belt loops) go slow and turn the machine wheel by hand.

Now lay the paper pattern onto the prepared front piece. Align the piece into the final position. Think of all the original jeans elements you wish to be included. Check for the pockets and other thick bits, especially in the bottom corners. Try to avoid them or think of a possibility to remove as much bulk as possible, still aiming to keep the front nice and tidy.
Cut out the shape adding seam allowances. Below are some other samples of the front panel. As you can see there’s no bum pocket at all, this is due to the larger size of jeans.

On the inside tidy up the pocket and anything else that might seem too bulky or getting in the way.

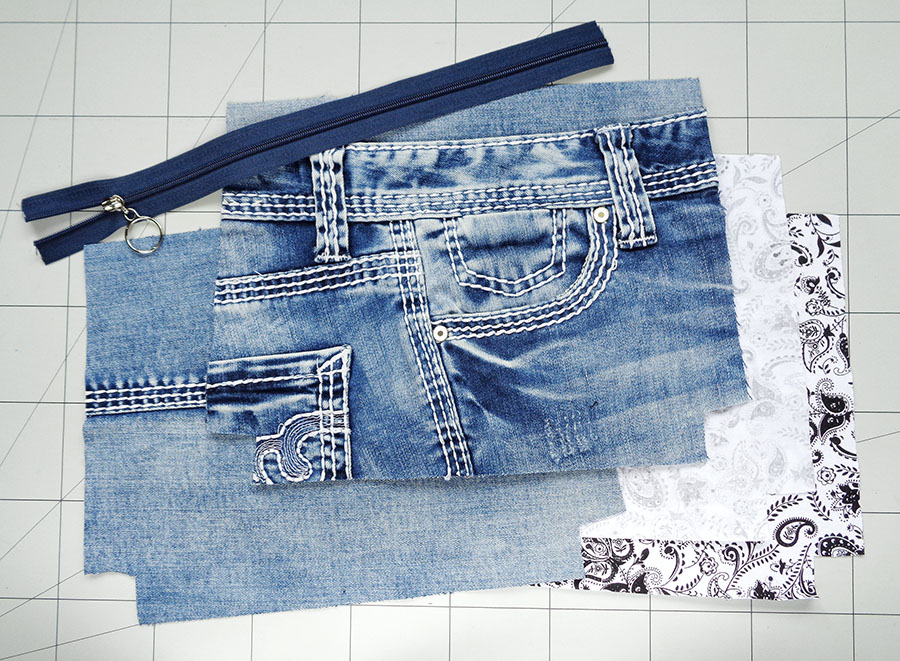
Cut out two pieces of lining adding seam allowances. Get a zipper ready (min 11″ (28cm) but better 12,5″(32cm)) and this is all we need to sew one DIY makeup bag.
Sewing the zipper
Align the zipper with the top of the bag right sides together and the open zipper head to the right. If the zipper is long enough, place it overhanging at both sides (not like on my photo).
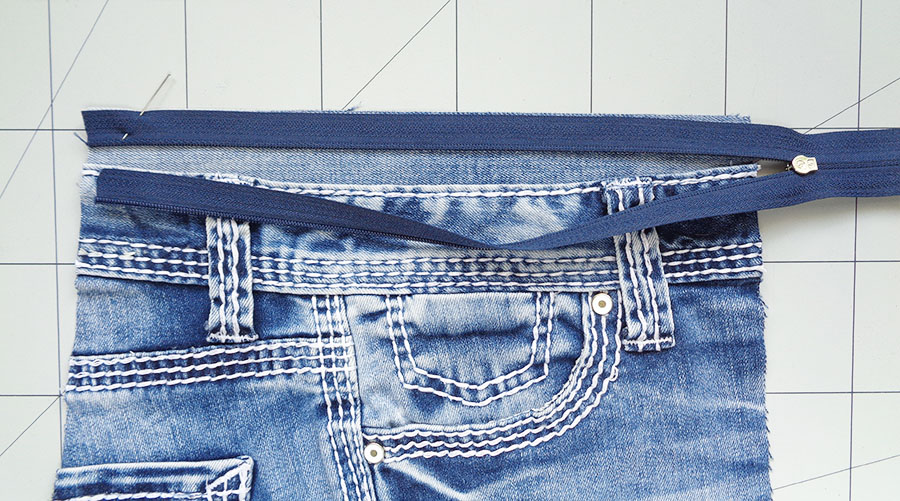
Place a piece of lining also aligned at the top and facing the denim right sides together. Pin. Stitch along the top of the “sandwich”, appx in the middle of the zipper’s half. If the zipper is small (3mm) like mine, then the distance from top edge to the stitching line will be appx 1/4″ (0,5cm).

If the zipper didn’t have overhangs, to pass by the zipper head – stop with the needle down, lift the presser foot, slide the zipper head past the needle then continue your sewing line.
Refold the fabric panels to expose the zipper. Using your fingers or an iron (be extra careful not to melt the zipper) press the top edge, pulling the zipper out at the same time. Then top-stitch the edge to avoid fabric getting caught by zipper later.

Sew the back panel and the other piece of lining in the same manner. When aligning the panels to the zipper, keep the zipper closed and align the sides of the pouch too.

Sew along, refold, press, top-stitch. You should have something like this now:

Sewing up the body of the DIY makeup bag
Unzip the zipper halfway, or you won’t get into the pouch after it’s sewn up 😉
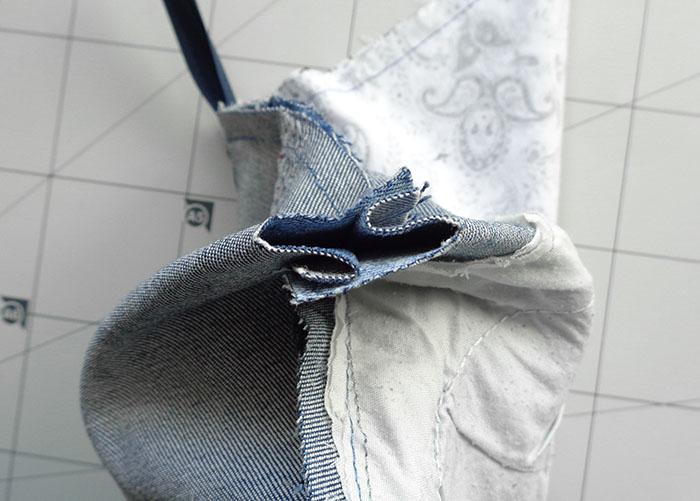
Refold the panels – denim to denim and lining to lining all facing each other. Keep the zipper teeth toward the lining. The area with the zipper is not going to work out completely flat due to the zipper’s thickness.

So on the side where zipper is open, join the zipper halves first, pin nearby, then pin the rest of that side. On the other side where zipper is closed, fold the zipper in half and pin nearby, then pin along that side. When sewing try to keep the zipper in this position – just for tidier result on the right side later.
Stitch along the sides first. Stitch 2-3 times nearer the zipper because this part will carry more pressure when we turn the pouch to the right side.
Then stitch along the bottom of the denim body and along the bottom of lining. In the lining leave a gap of appx 4″ (10cm).
Refold the corners to stitch them up perpendicular to the side seams. Feel with your fingers the seams and align them. Sew the corners in a short straight line.
The makeup bag would look like this now.

Repeat with the corners of the lining.
Cut off the excess zipper and turn it all to the right side through the opening. Push out the top corners where the zipper is. Stitch up the opening in the lining.

Place the lining inside of the pouch, press the sides and corners neat and you are done!
Bonus. DIY Makeup Bag with the other front pocket and a button.
Using the other side of the jean’s hip area comes especially handy when you are making a One Pair Of Jeans Bag With Pockets.

It is however more complicated because you’d have to deal with all the bulk of the fly and the zip. You’d need some patience and a very good seam ripper.
As with the first makeup bag tutorial above, lay the paper pattern onto the jeans and roughly cut around it to have a piece that is comfy to work with. Cut off the button.

With a seam ripper remove as much bulk as possible on the wrong side – the whole zipper and some thickness of the waist strap. Yes, it is tough so be extra careful!

You will unfortunately loose some decorative stitches on the front side too, but you can stitch over it to make it look better.

Feed a button through the button hole and stitch it in place by hand with a matching thread. You can even use a button from another pair of jeans as some are much nice than others ;).

Get a piece of leg from the same jeans large enough to lay underneath our existing piece. It has to have enough fabric at the top and the left side for the paper pattern and seam allowances to fit within it all.

Cut out adding seam allowances. Prepare the other pieces (back panel, lining) in the same manner as described for the first makeup bag tutorial.

Sew it all together also by following the instructions above.
Have you enjoyed this tutorial? Was it useful for you? If you are thinking how to thank me, you can buy me a coffee. This is how I keep this website adds-free!
Other designs for the same pattern
Now you know how to make an easy DIY makeup bag, think of all the possible designs and décor you could use on it! Make them as nice handmade gifts for your female friends and loved ones.

As on the picture above, if you wish to learn how to make crazy patchwork (top left pouch) visit here>>> and for working with jeans pockets visit here>>>
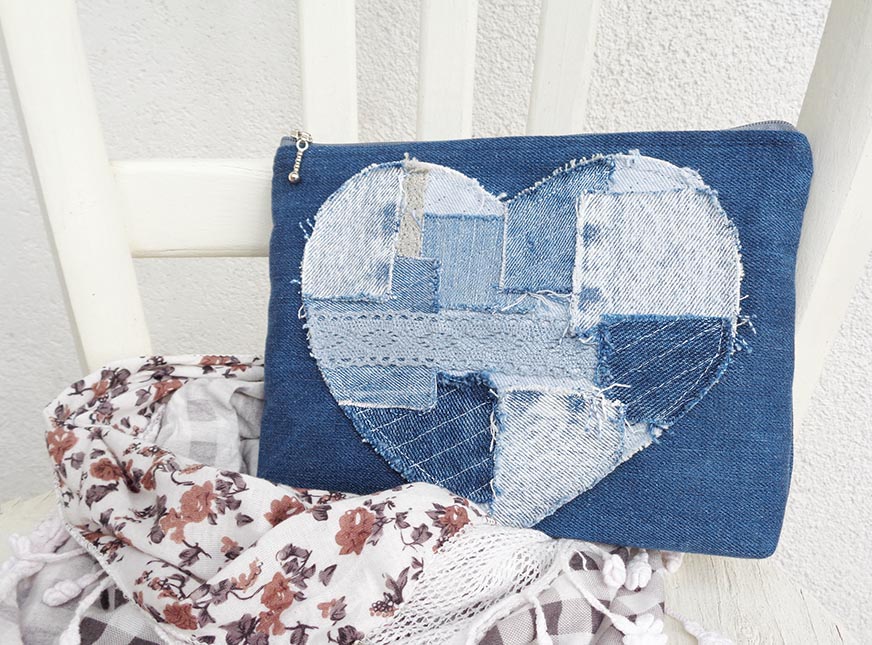
To learn how to make this Boro patchwork heart visit this free sewing lesson here >>>
Check out some more ideas for lovely gifts which you can make here >>>

Looks great. Instructions are well written and SHOULD be easy for me to follow. I am looking forward to making this makeup bag for myself and friends. I love giving handmade gifts. Thank you so much.
Thank you, Sylvia! Happy sewing and gifting!